Run Queries on Remote PostgreSQL from Snowflake

Glenn Gillen
VP of Product, GTM


You've got a bunch of data living in a PostgreSQL database, and you'd love to query that data from Snowflake. You don't want to replicate everything. You just want to be able to query that PostgreSQL data ad-hoc, but being able to access that database from Snowflake can be problematic. It's in a private subnet and it's blocked off from the rest of the internet for good reason.
How do you do it?
Today I'm going to show you having less than 15 minutes, you can set up a secure point-to-point connection that allows you to access your PostgreSQL database from your Snowflake warehouse. And I'm going to show you why Ockam is the most secure and best solution for doing that.
In just a few minutes. We will:
- Setup a PostgreSQL database in AWS
- Connect Snowflake to PostgreSQL with a private encrypted connection
- Run a query from Snowflake against the remote PostgreSQL database
Quick links
- Query Remote PostgreSQL Connector in the Snowflake Marketplace
- Ockam Node for Amazon RDS PostgreSQL in the AWS Marketplace
Amazon Relational Database Service (RDS) for PostgreSQL
We're going to provision an Amazon RDS PostgreSQL Database so we can see an end-to-end experience of data moving from Snowflake to PostgreSQL. If you have an existing PostgreSQL database you're able to use you can skip this step.
Create a PostgreSQL database
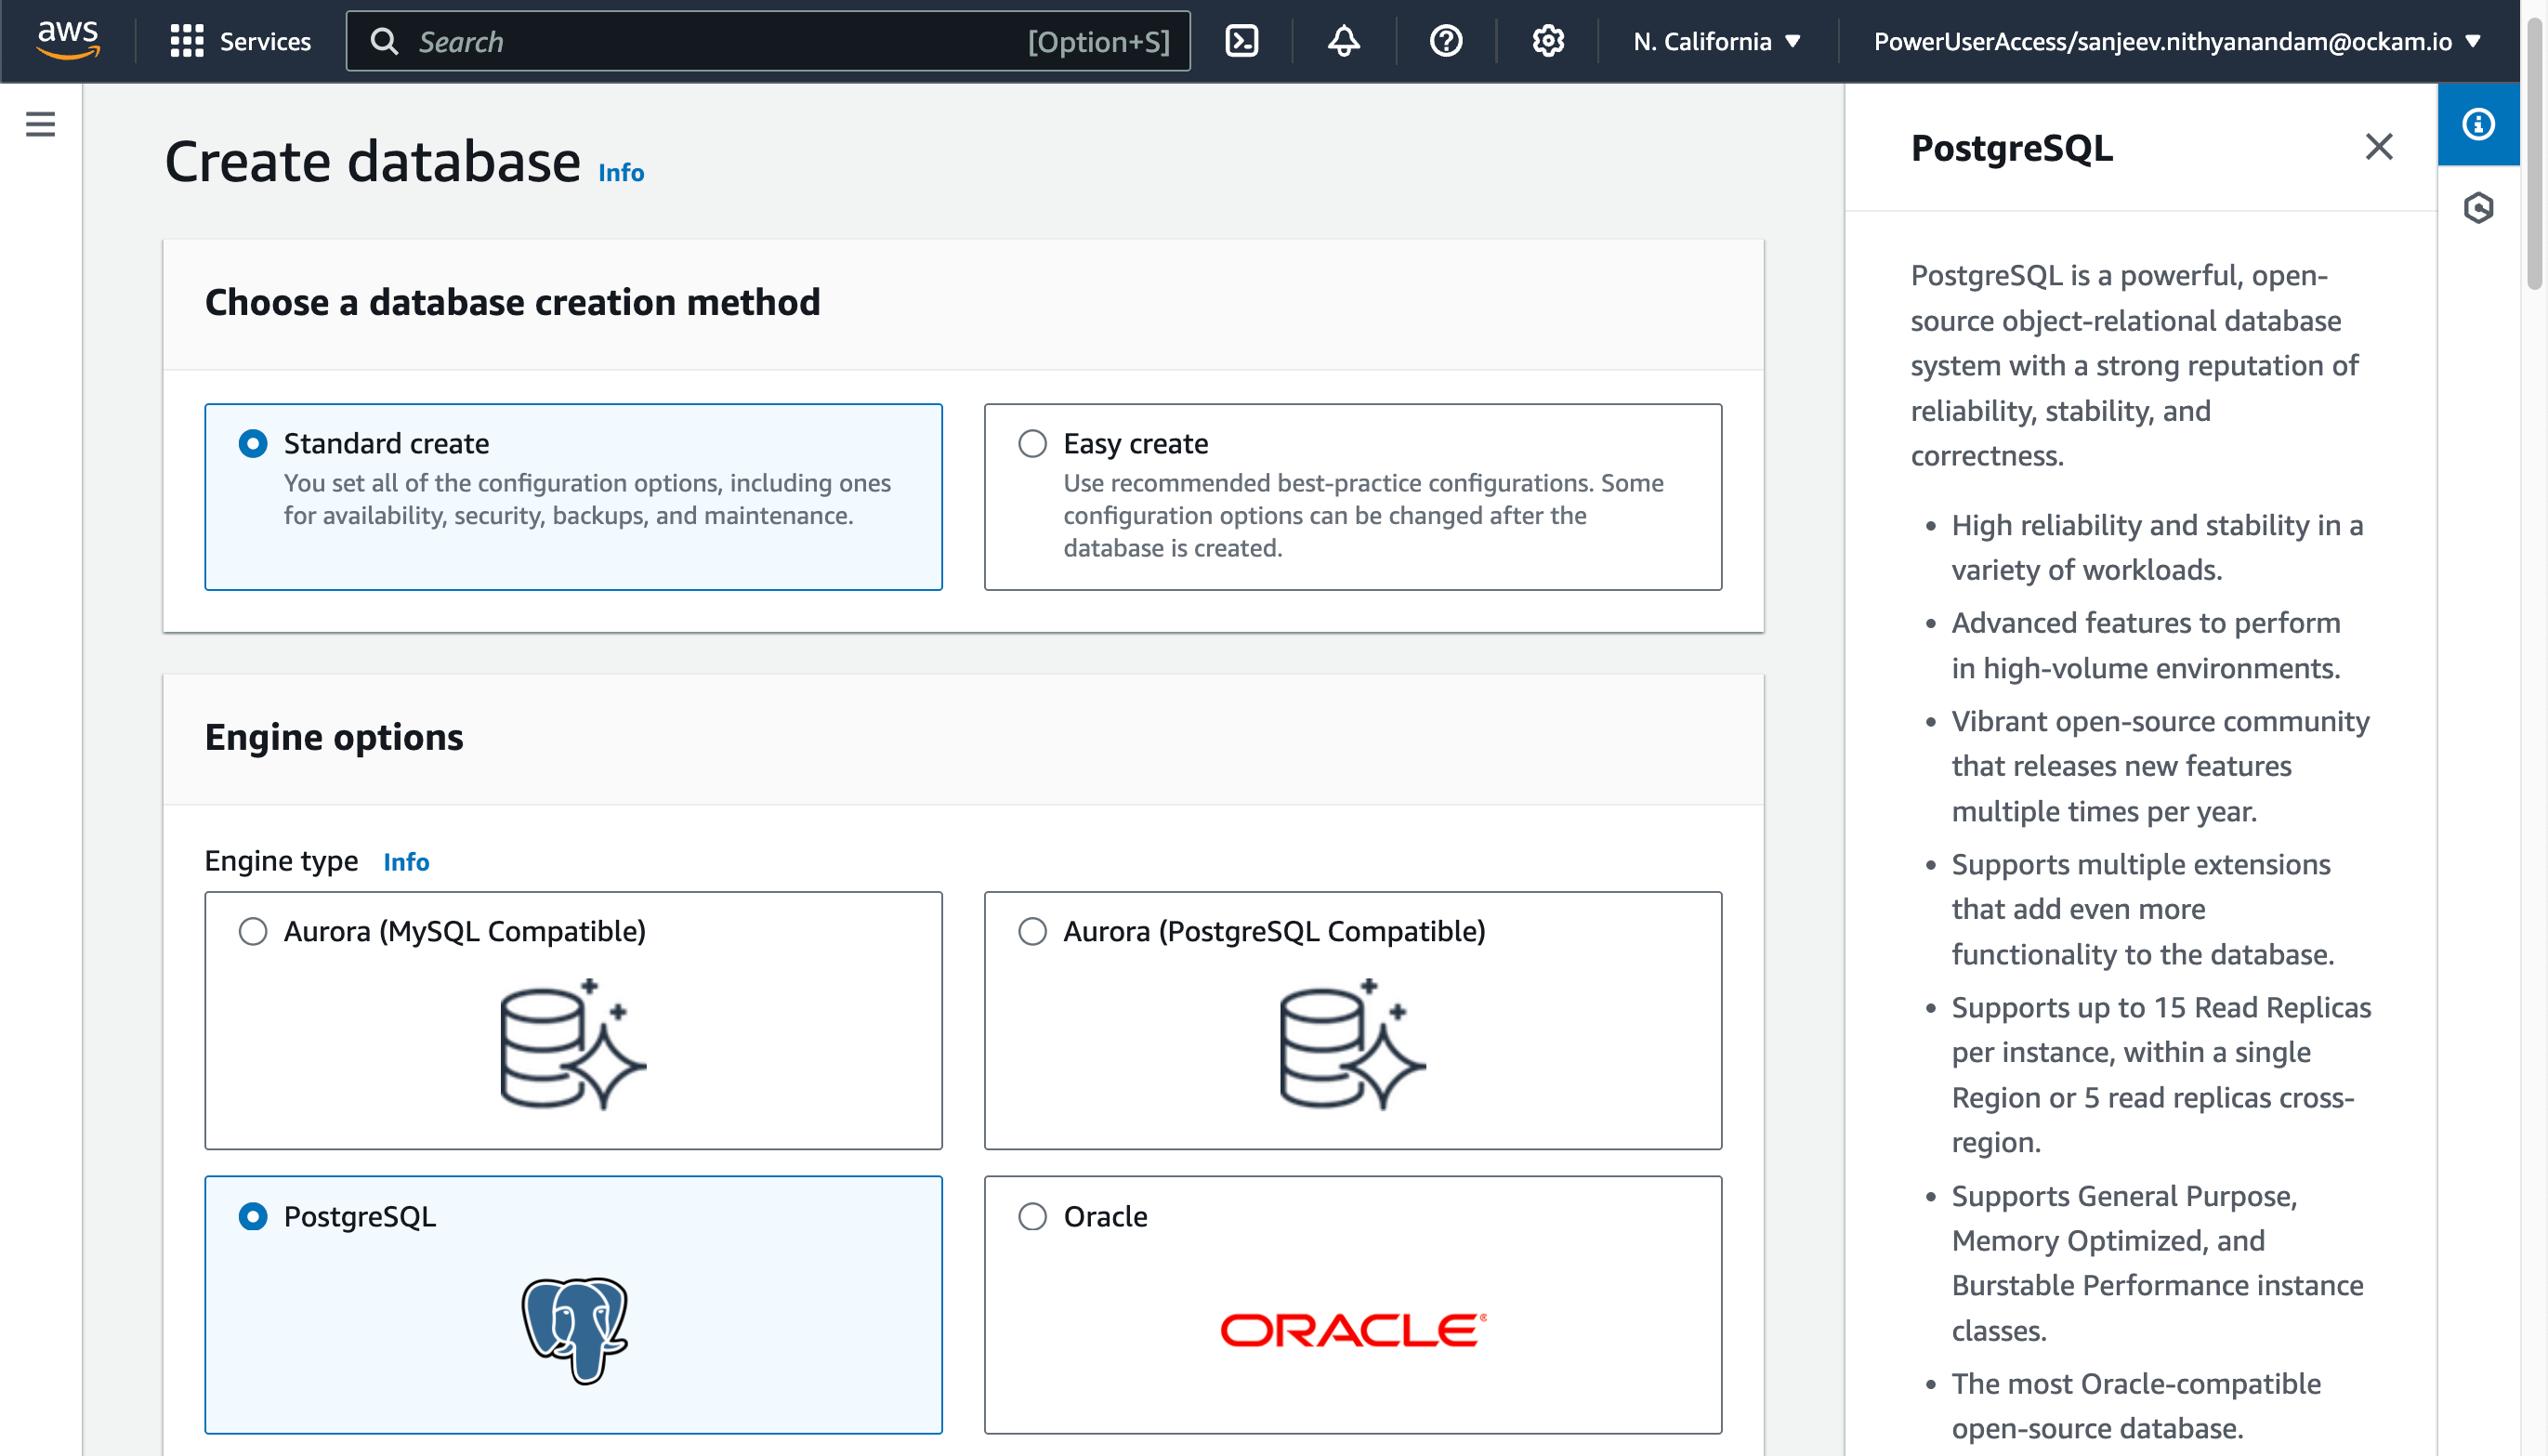
Within your AWS Console search for
RDS in the search field at the top and select the matching result. Visit the
Databases screen, and then click Create Database.
The Standard Create option provides a good set of defaults for creating a
RDS Database, so unless you've previous knowledge or experience to know you
might want something different I'd suggest choosing "PostgreSQL" and confirming the details and
then clicking Create database at the bottom of the screen.
Once you've started the database creation it may take about 15 minutes for provisioning to complete and for your database to be available.
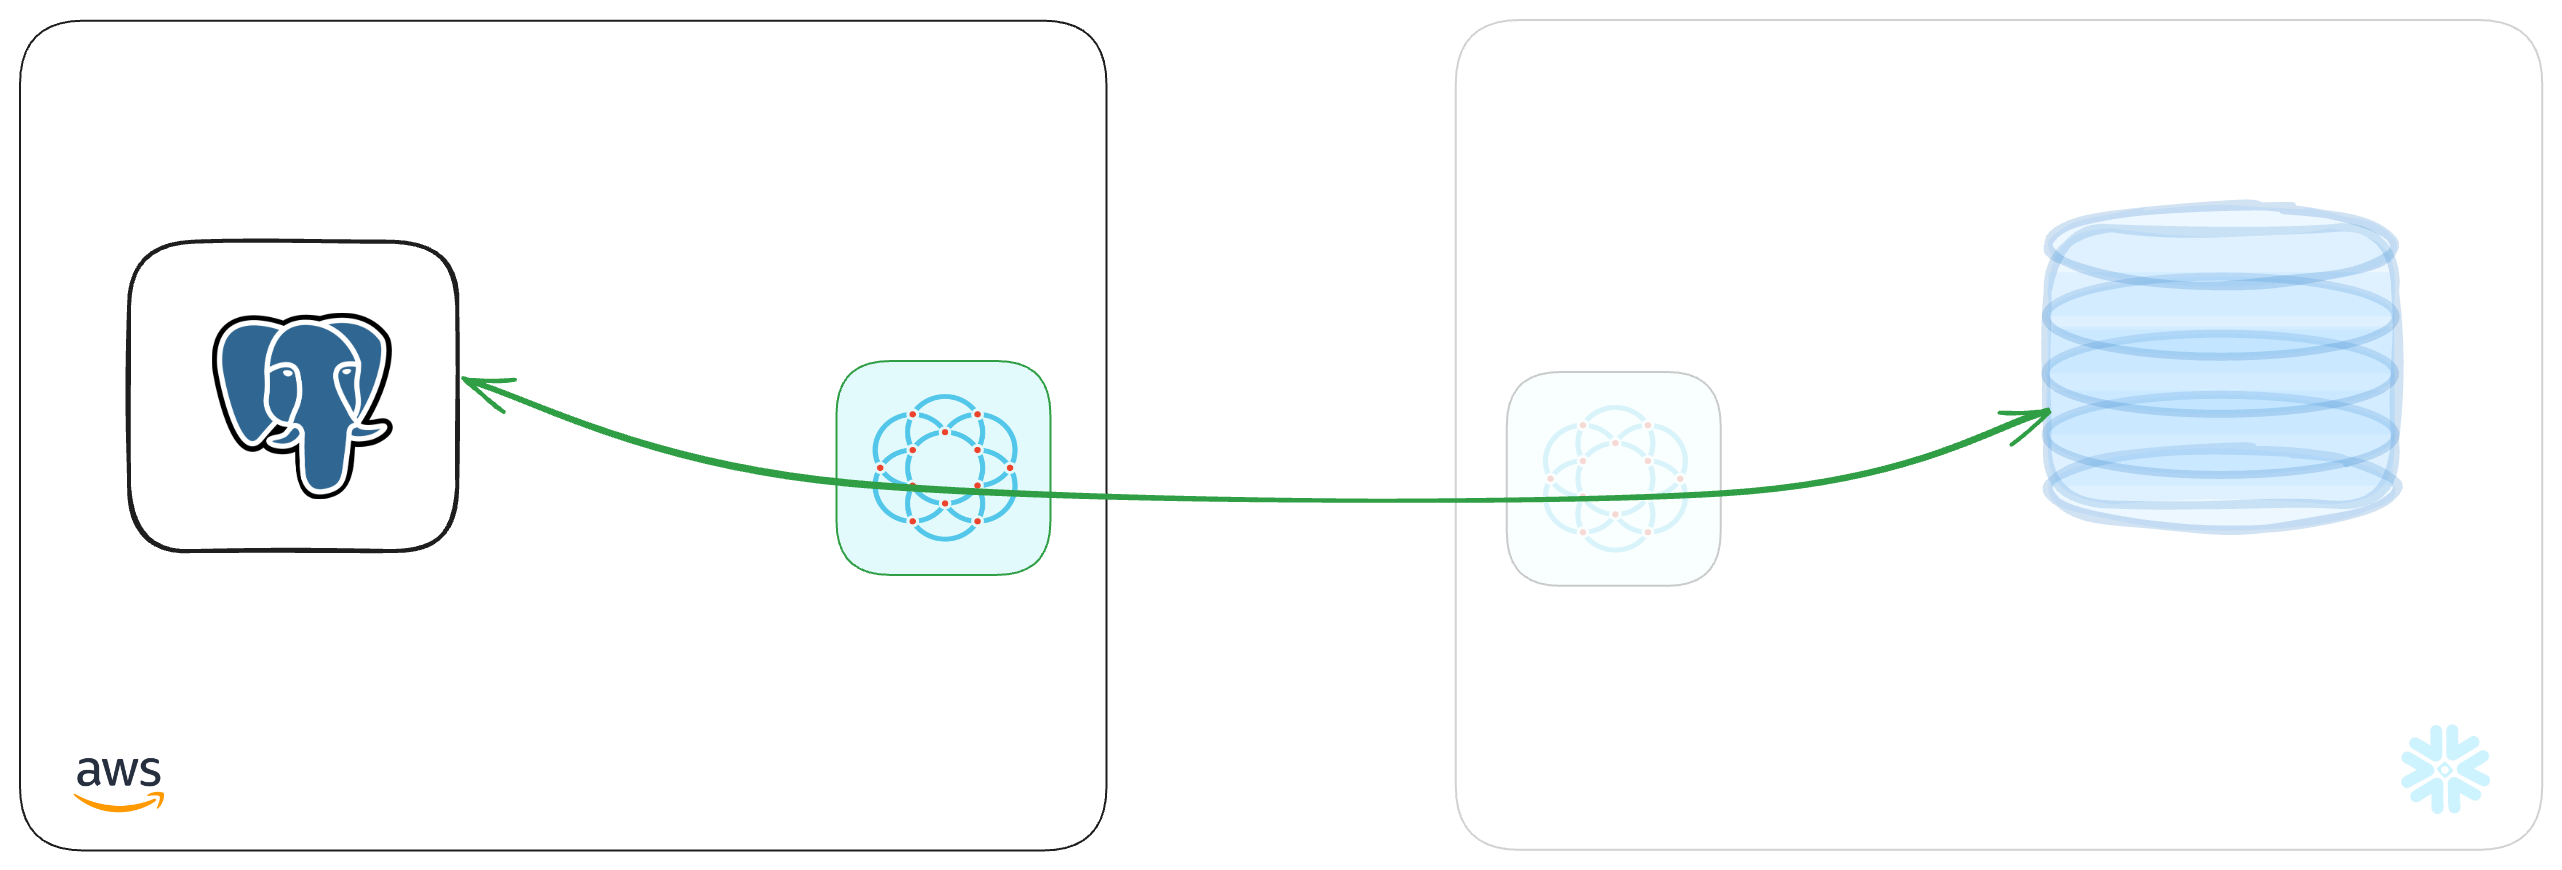
Connect Snowflake to PostgreSQL
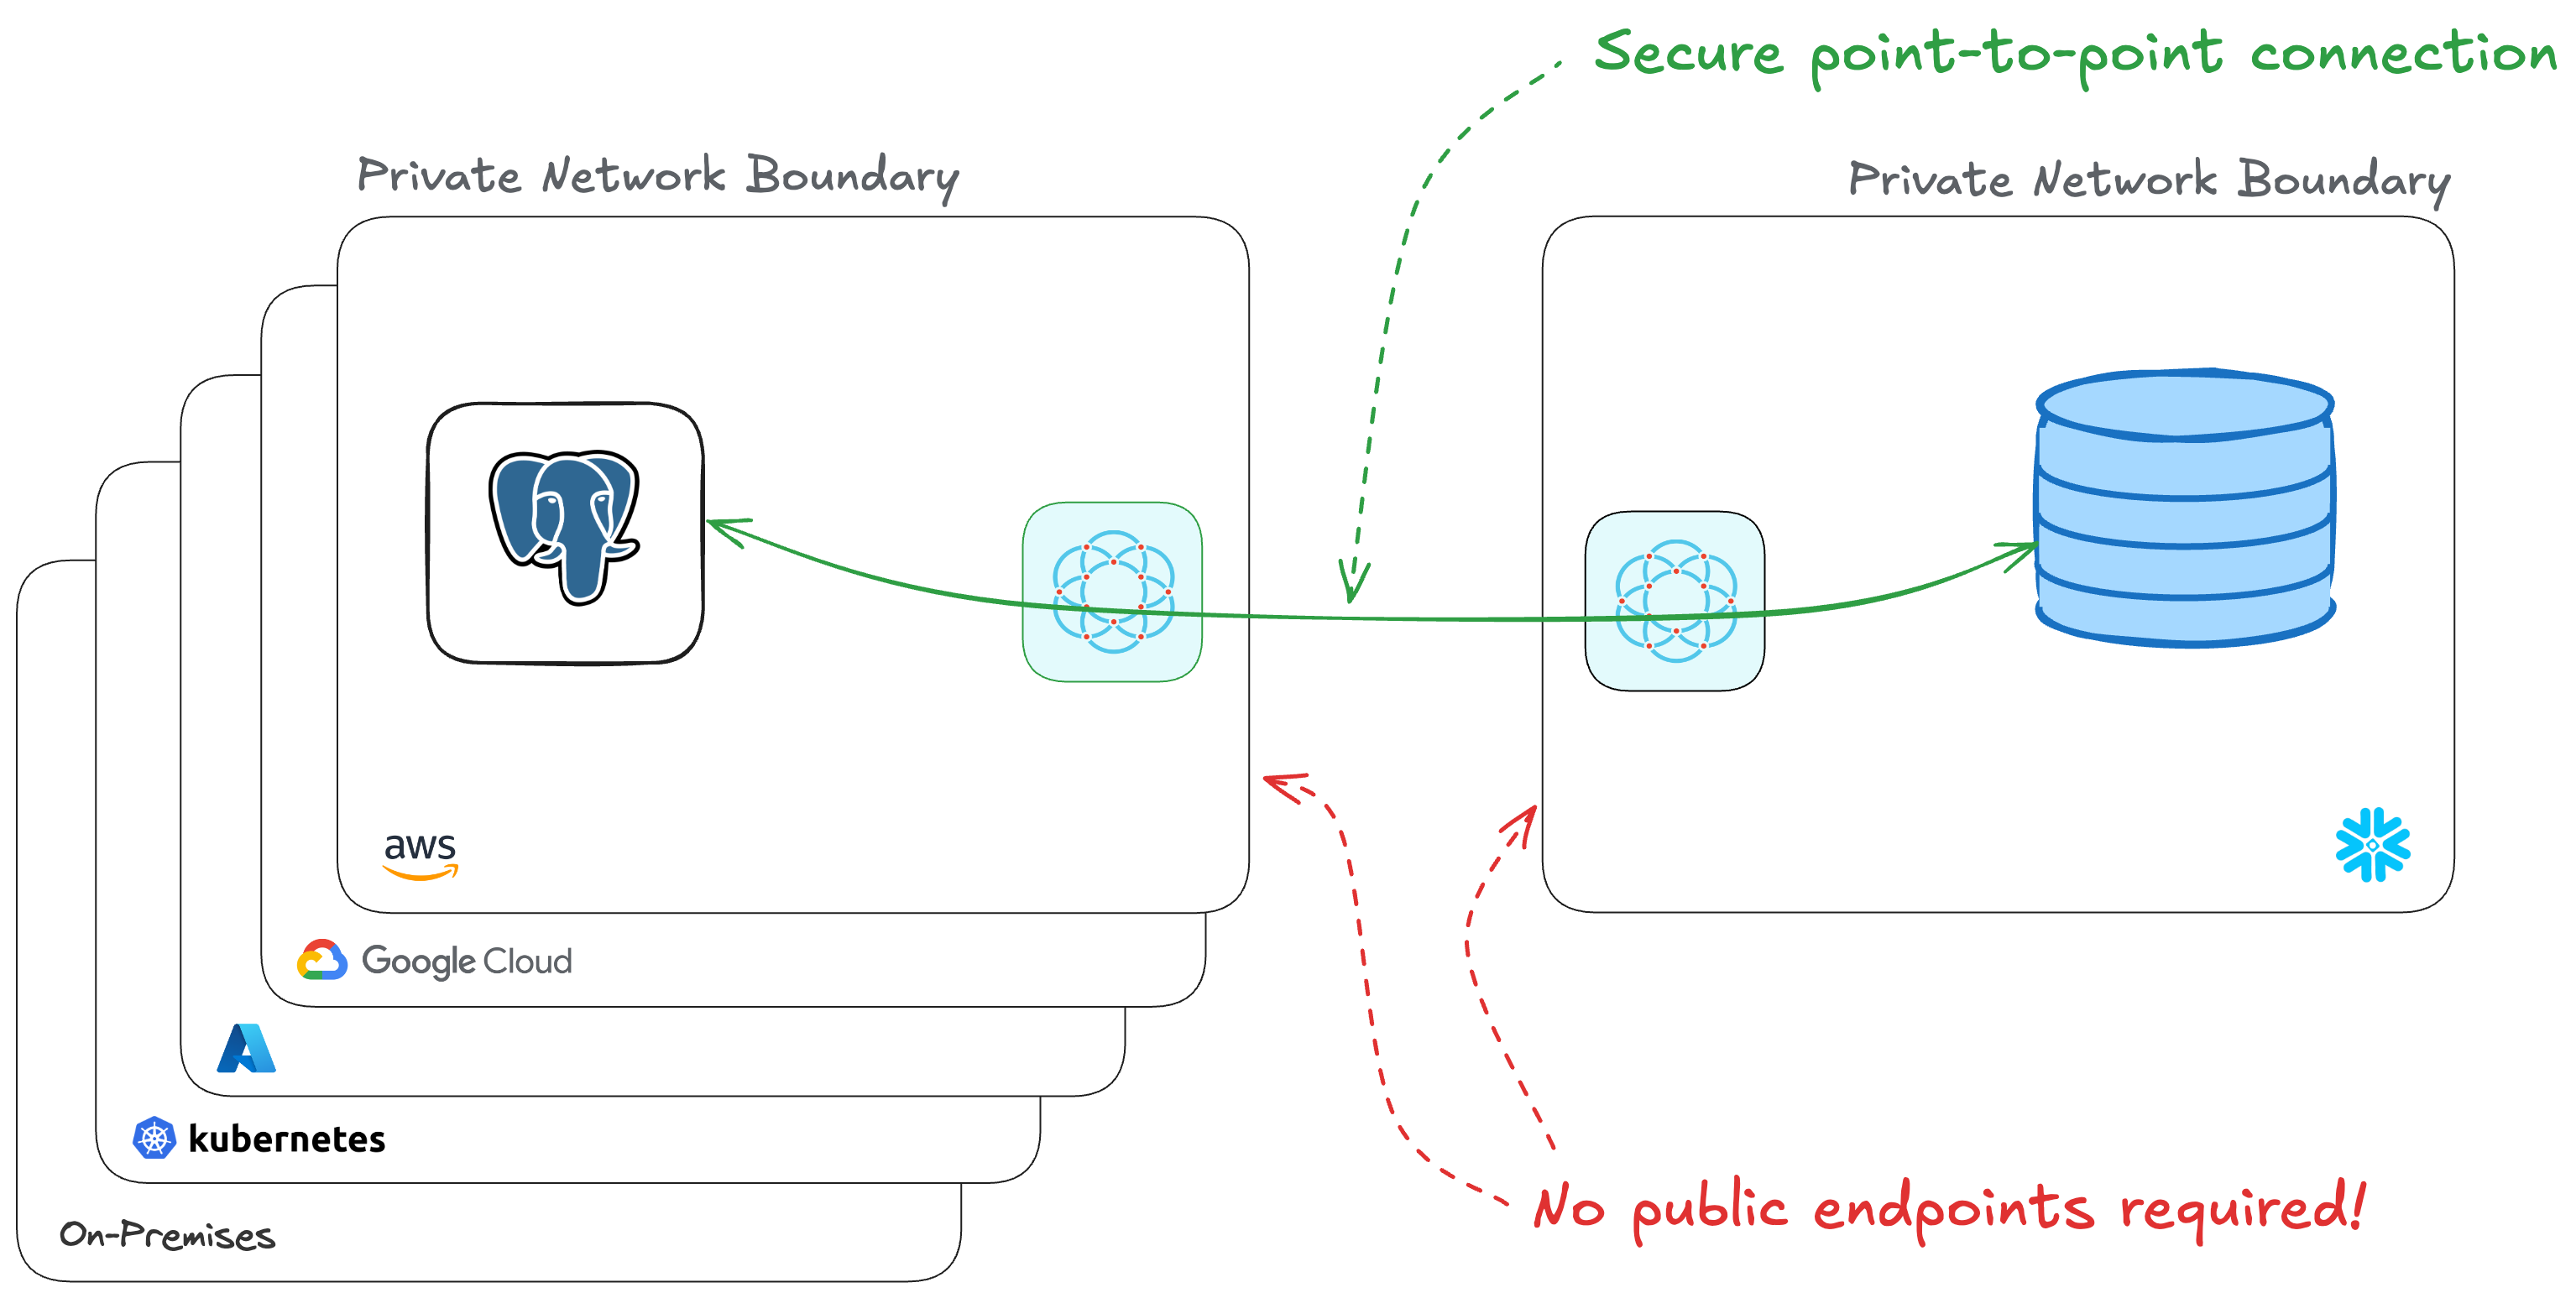
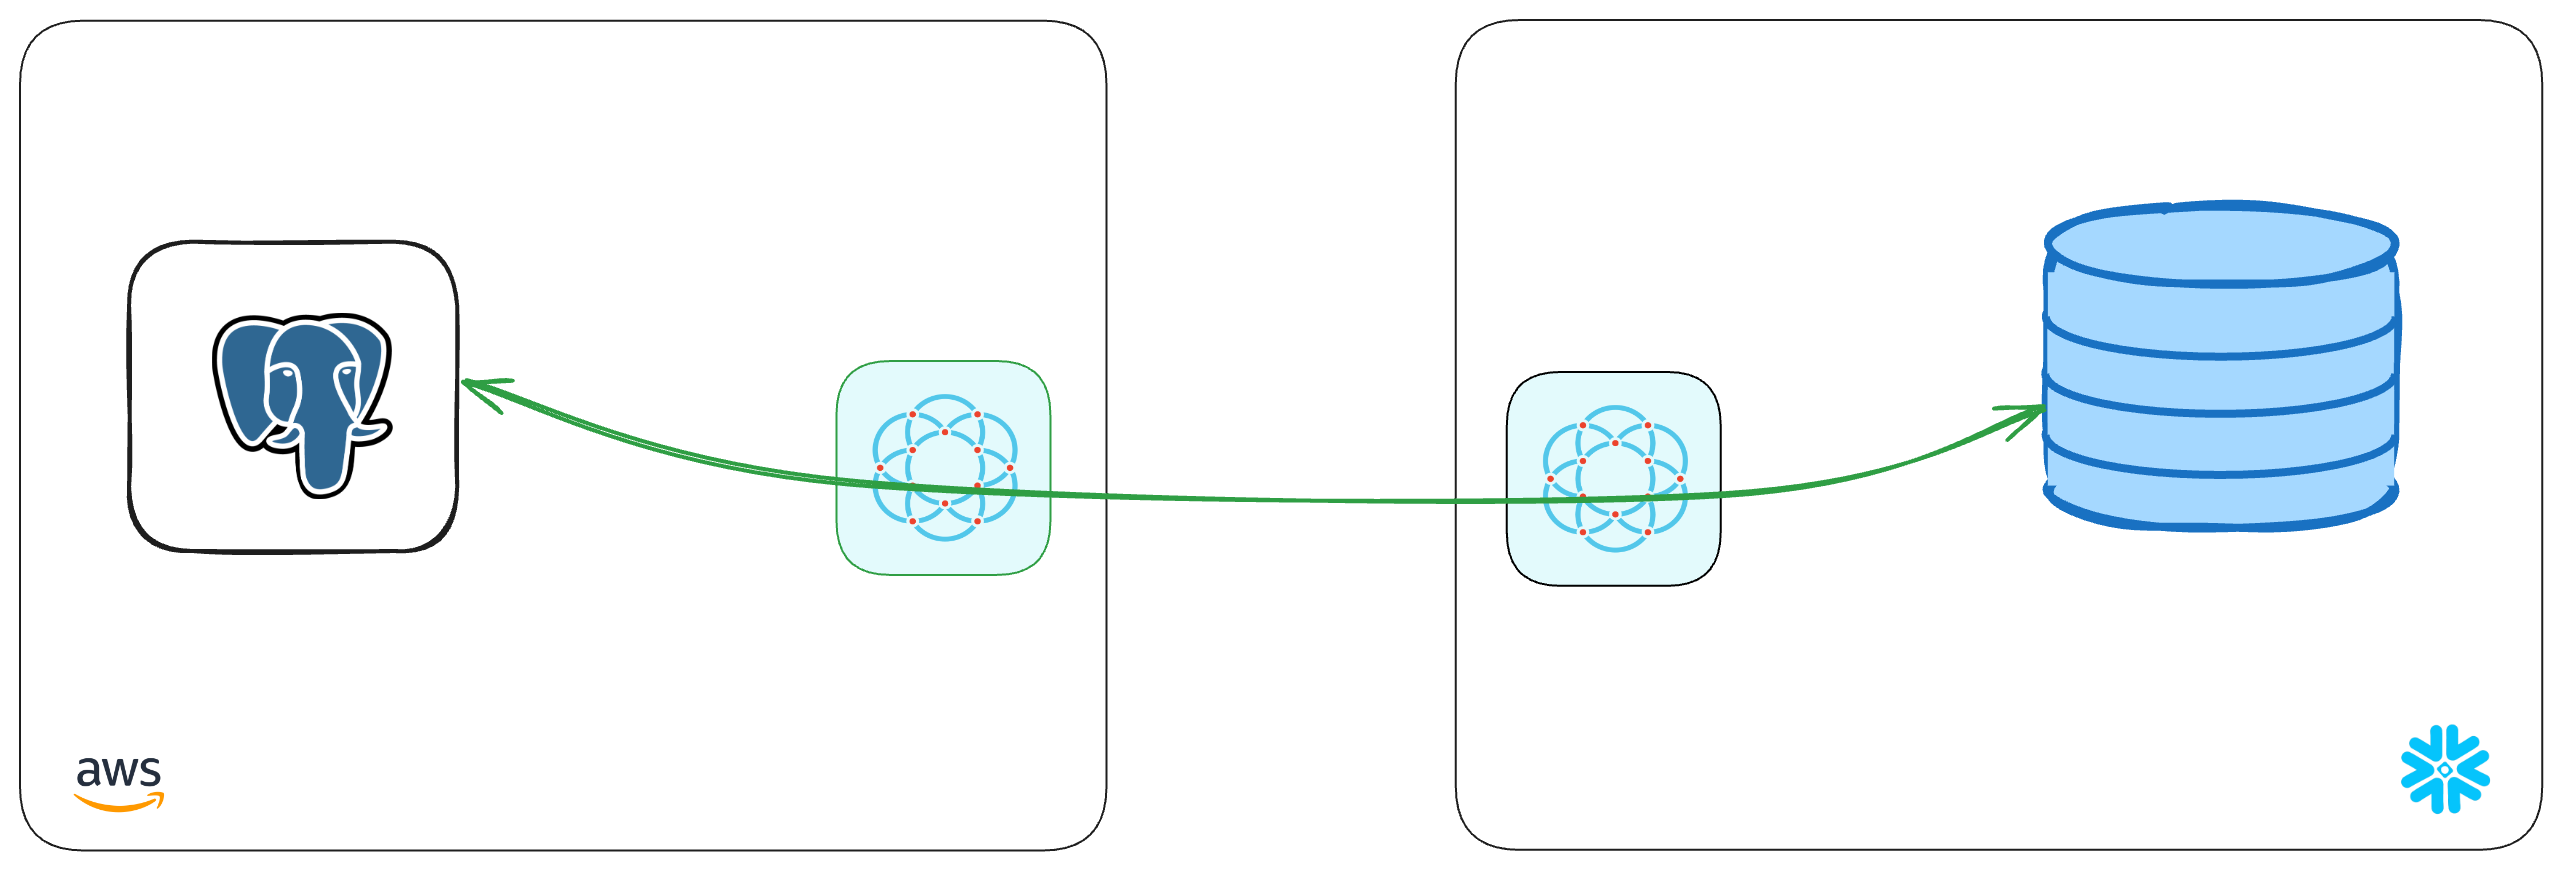
We've created a PostgreSQL database, now it's time to connect it to Snowflake! The next stage is going to complete the picture below, by creating a point-to-point connection between the two systems — without the need to expose any systems to the public internet!

Launch the Snowflake Native App
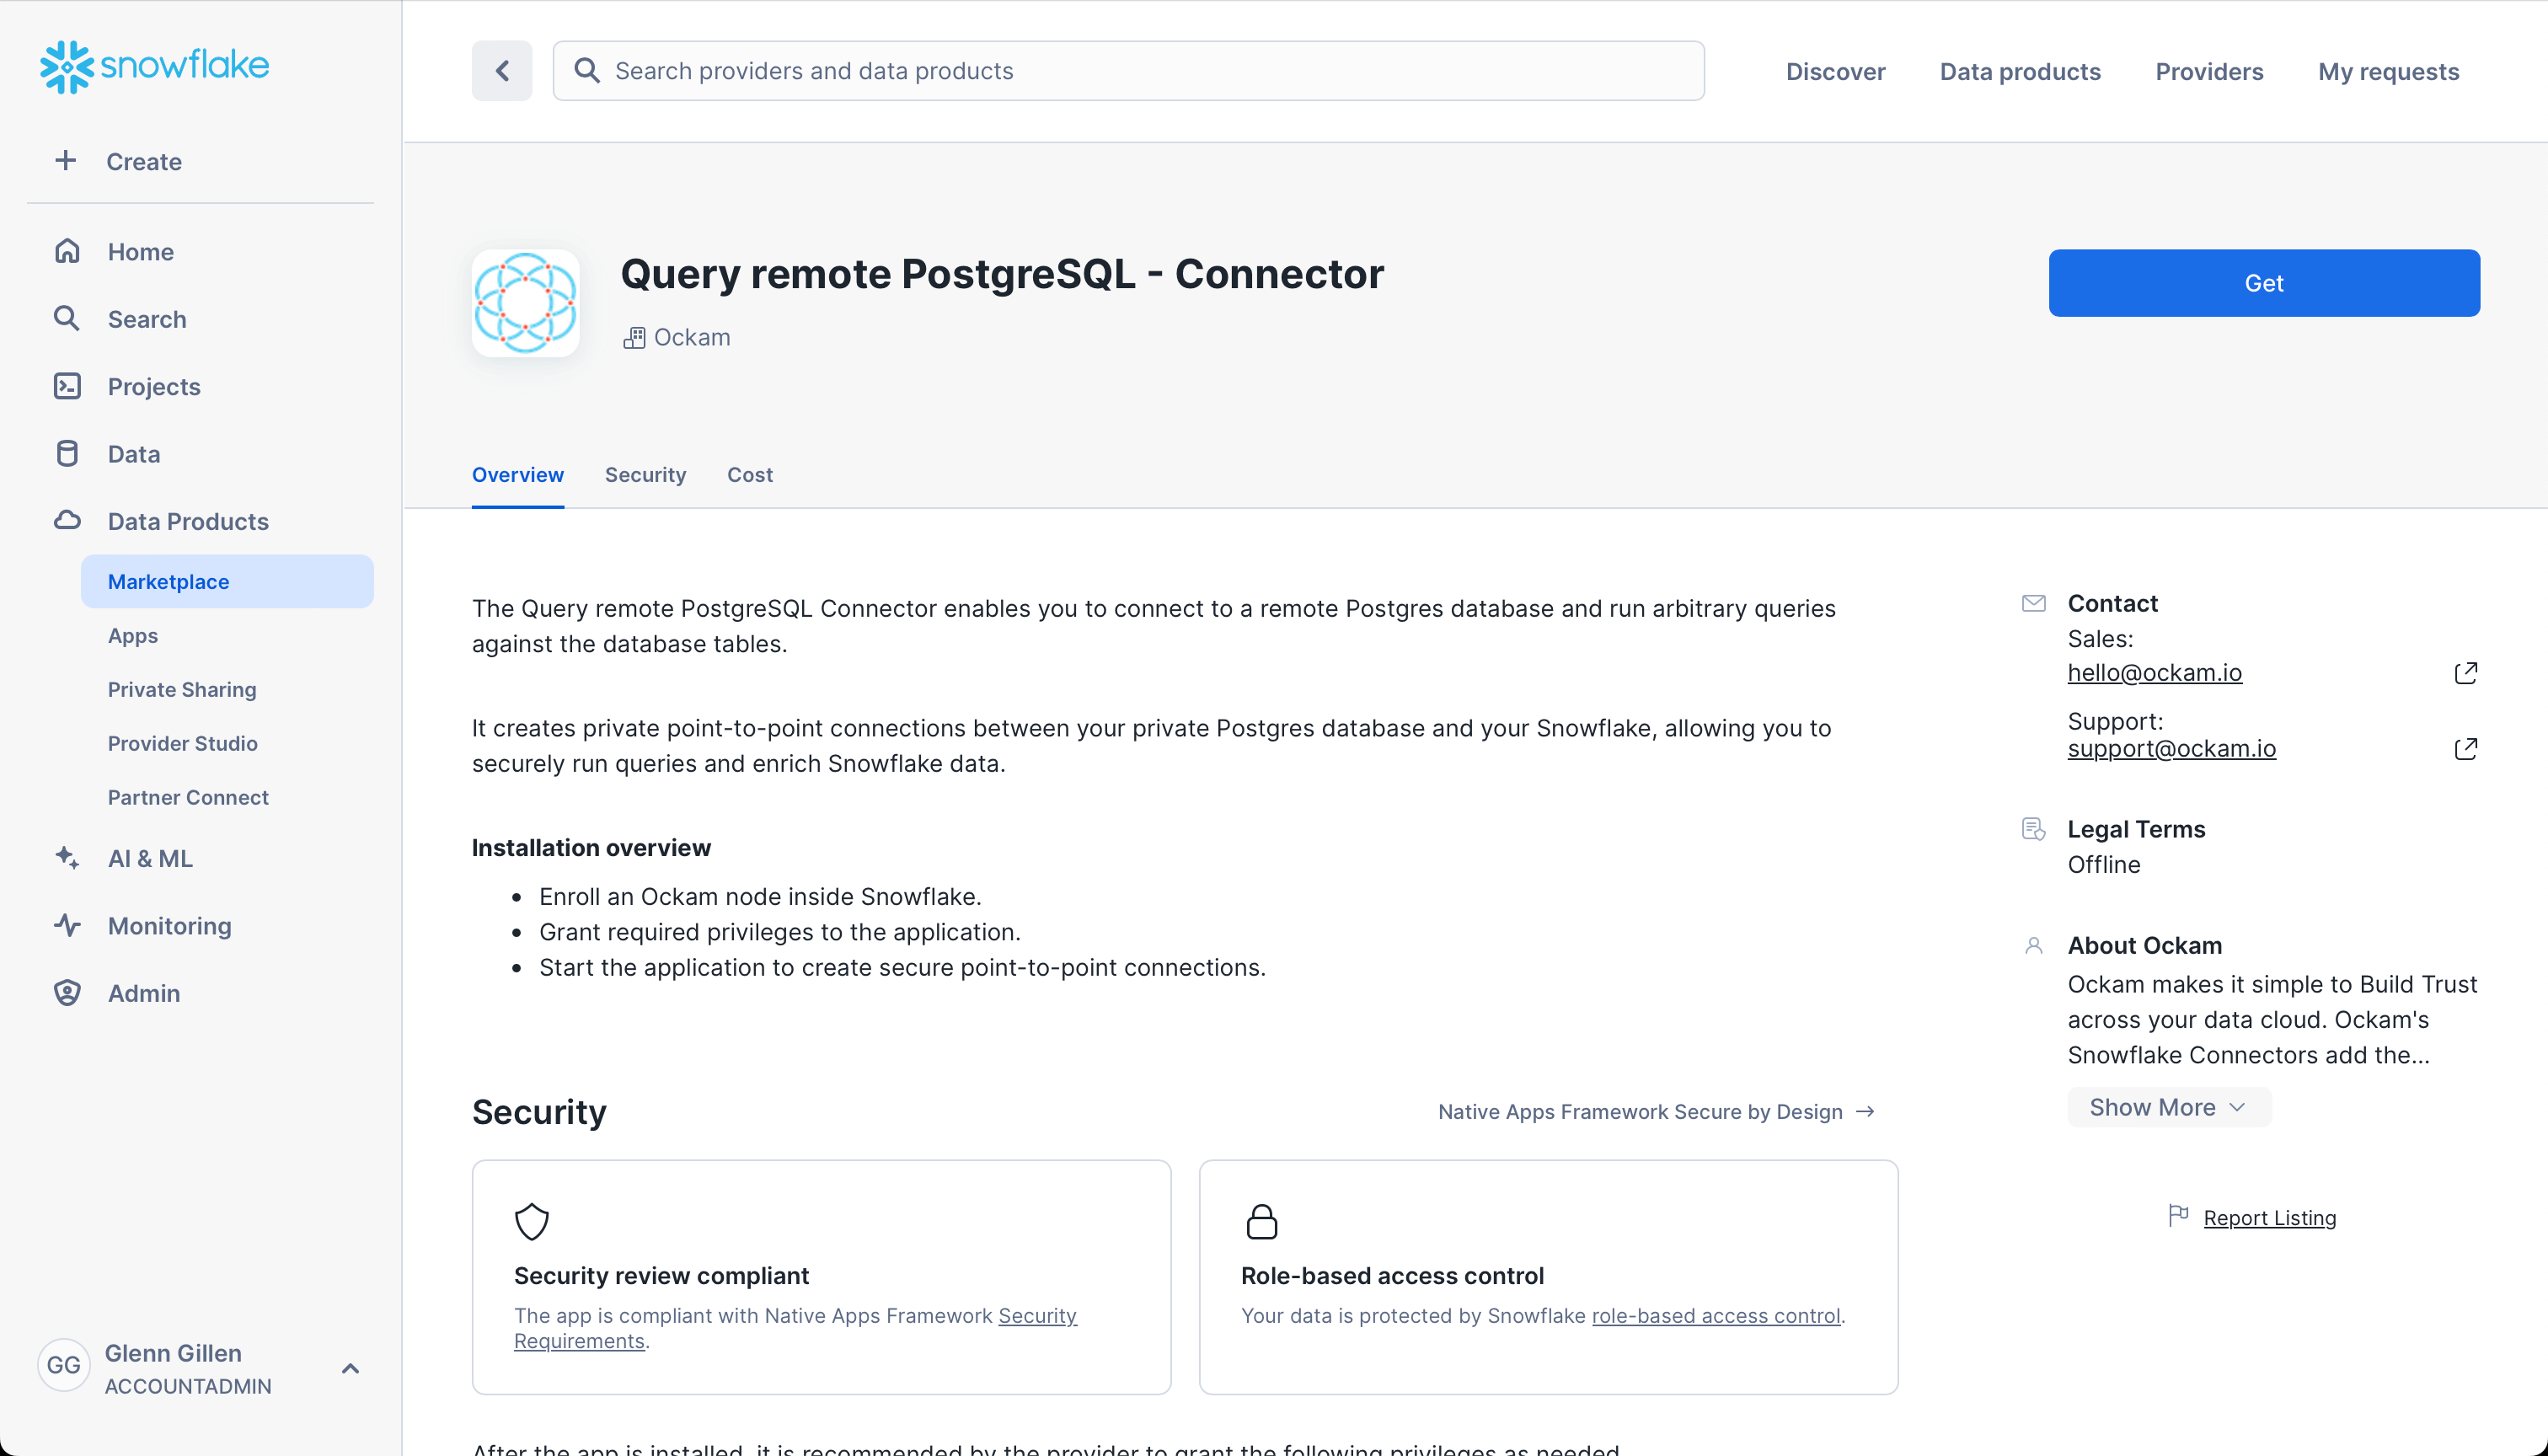
The Snowflake Query Remote PostgreSQL Connector by Ockam is available in the Snowflake Marketplace.
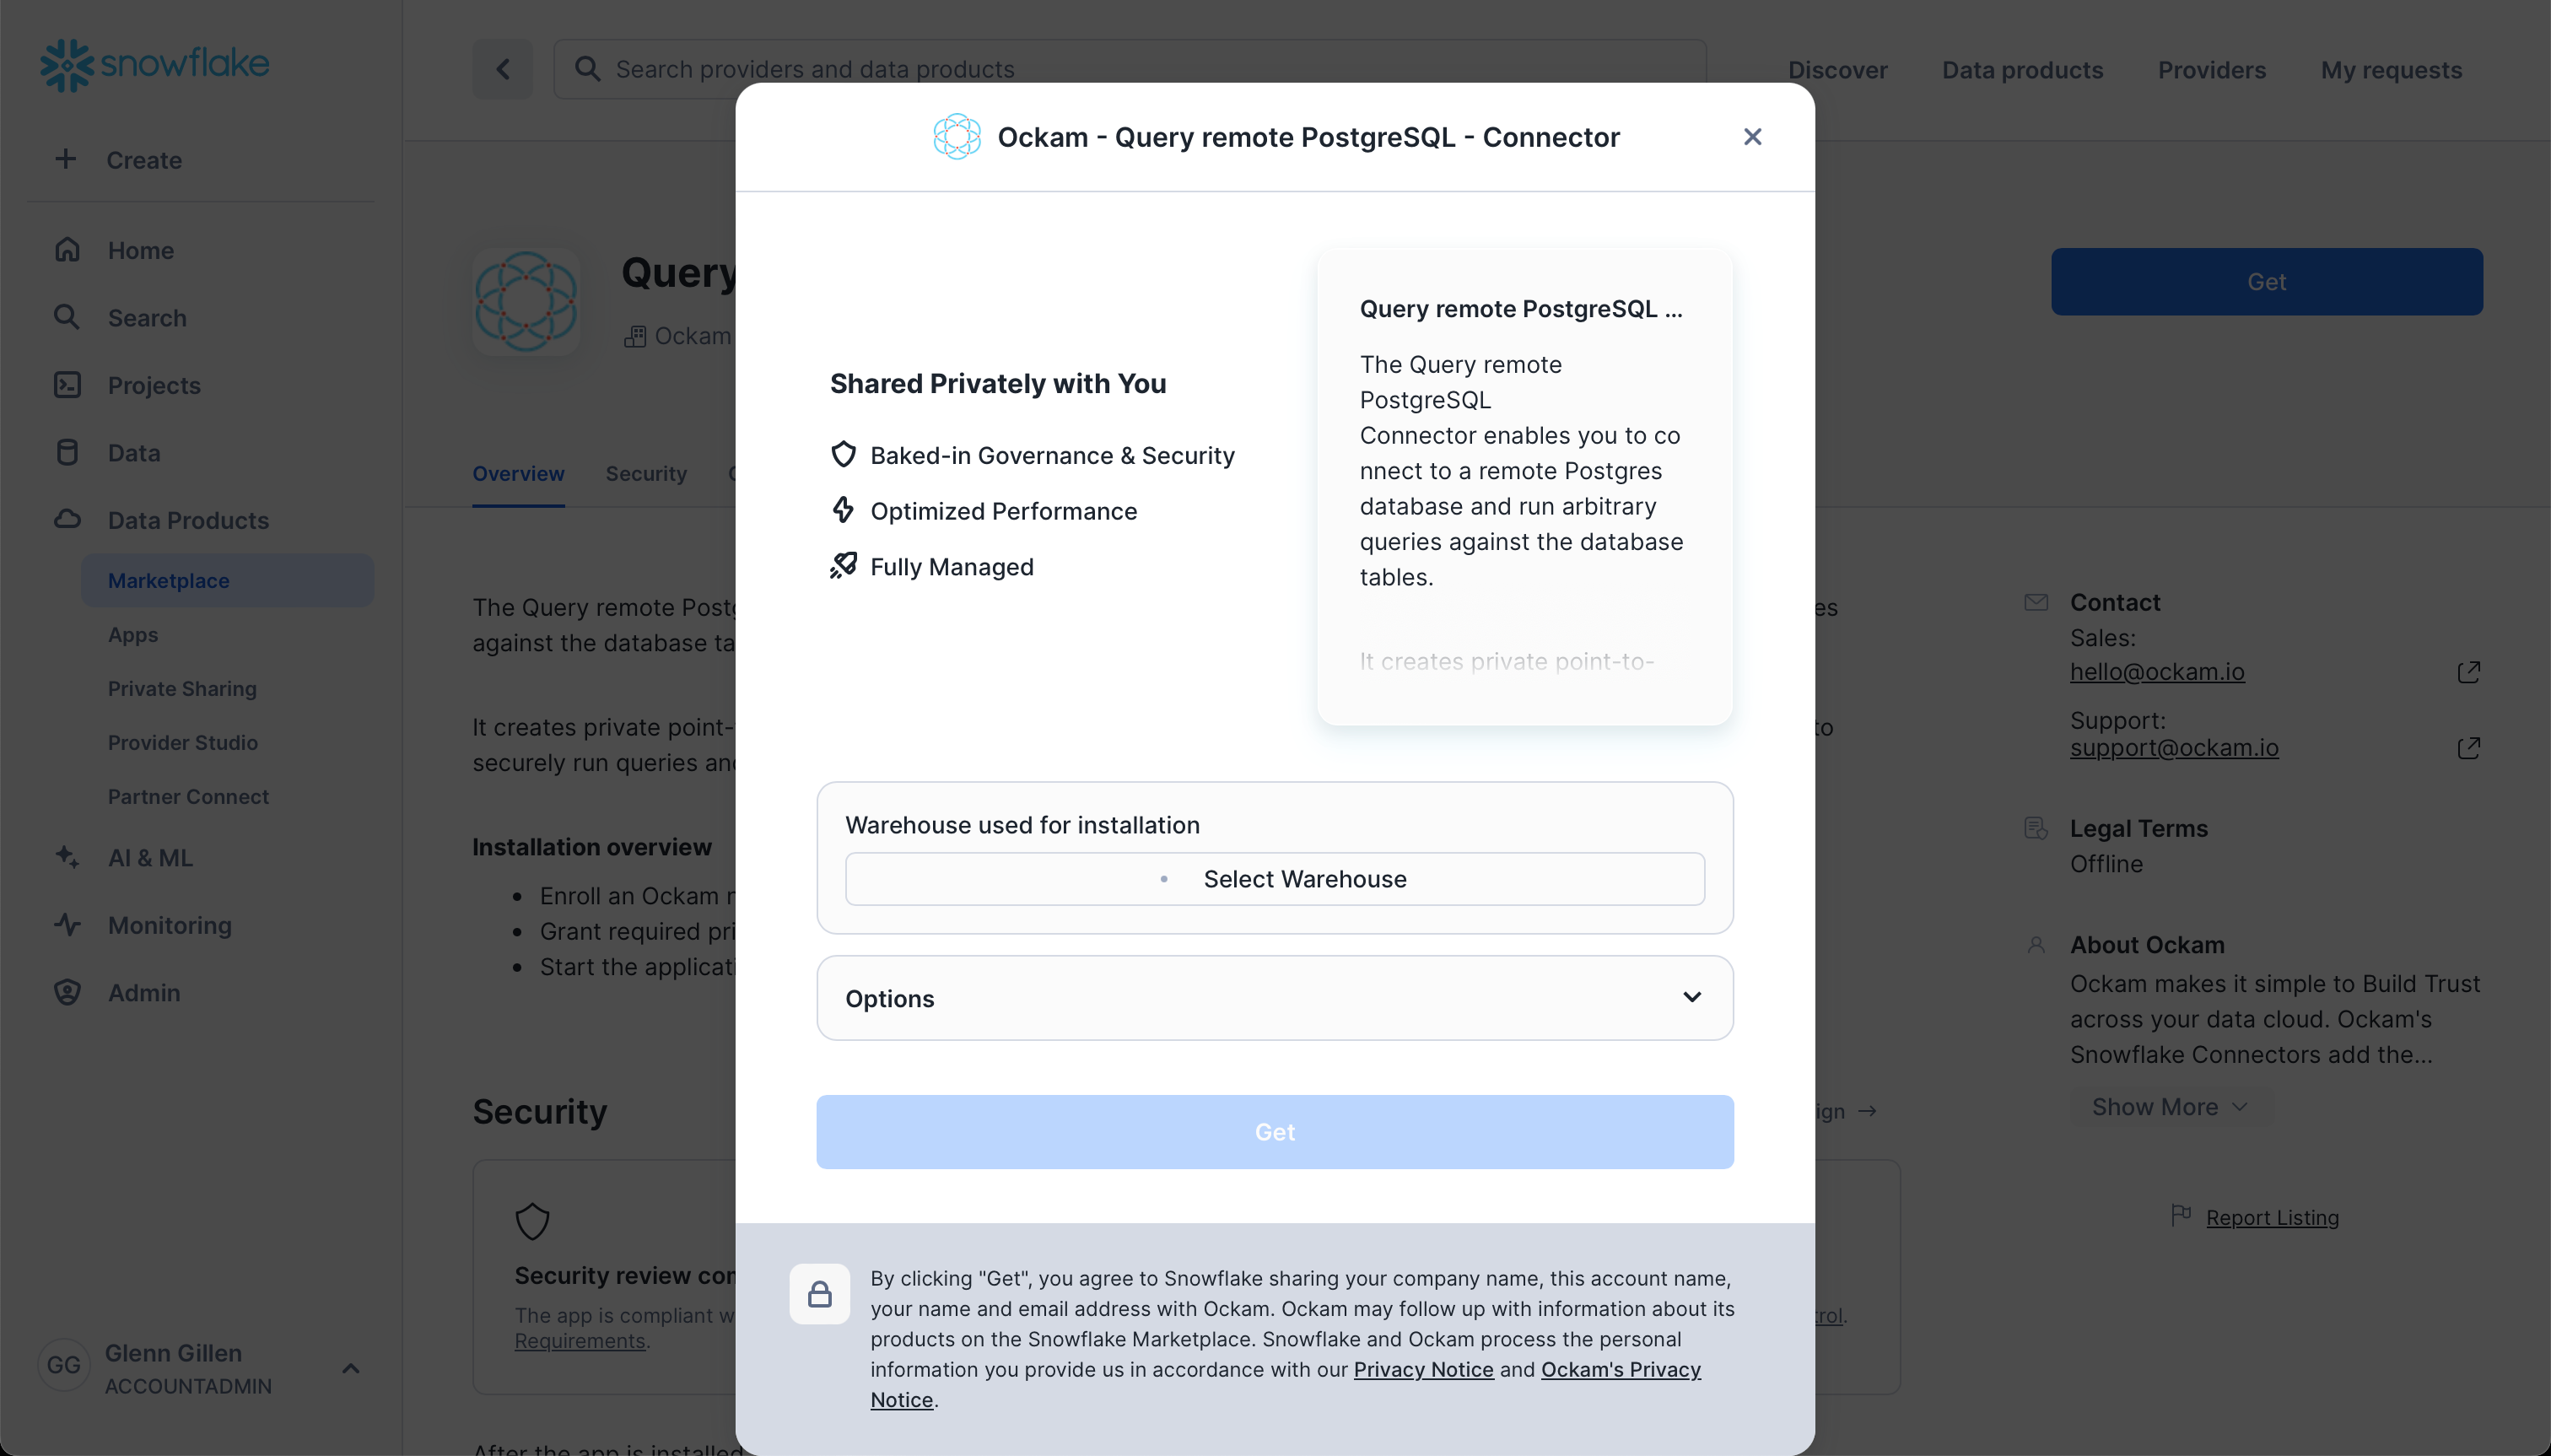
Select a warehouse
The first screen you're presented with will ask you to select the warehouse to utilize to activate the app.
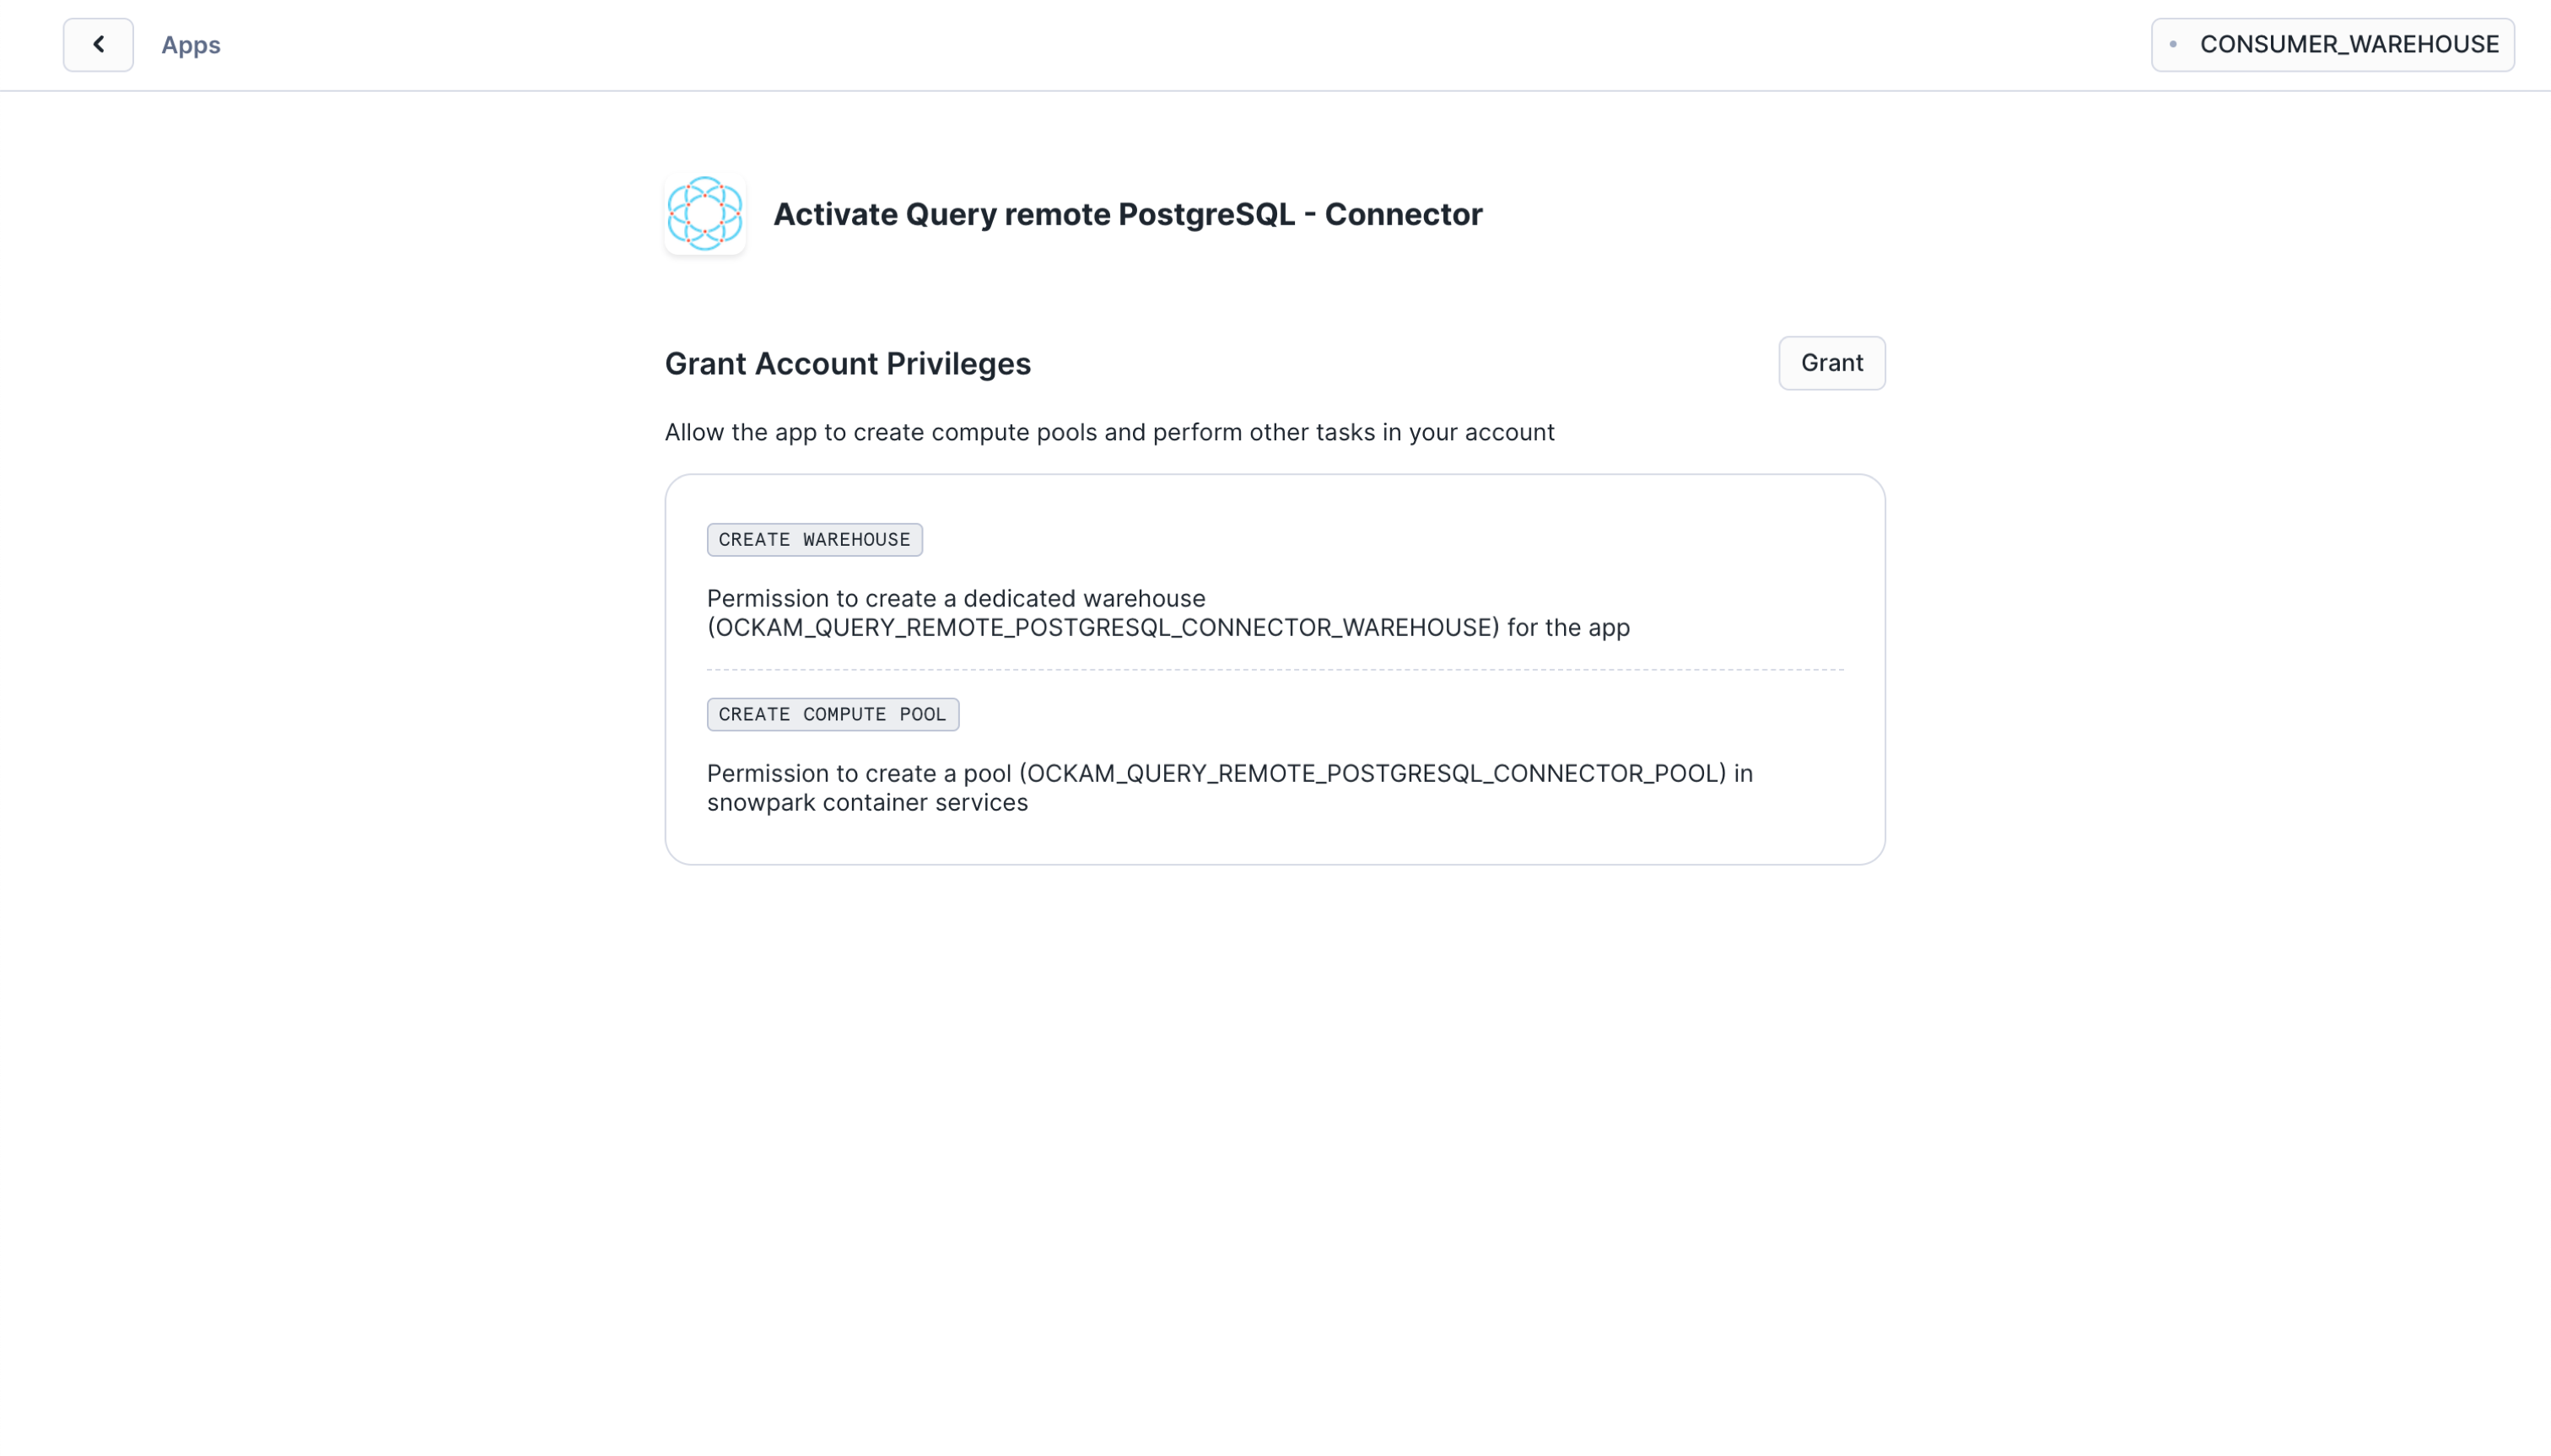
Grant account privileges
Click the Grant button to the right of this screen. The app will then be
automatically granted permissions to create a warehouse and create a compute
pool.
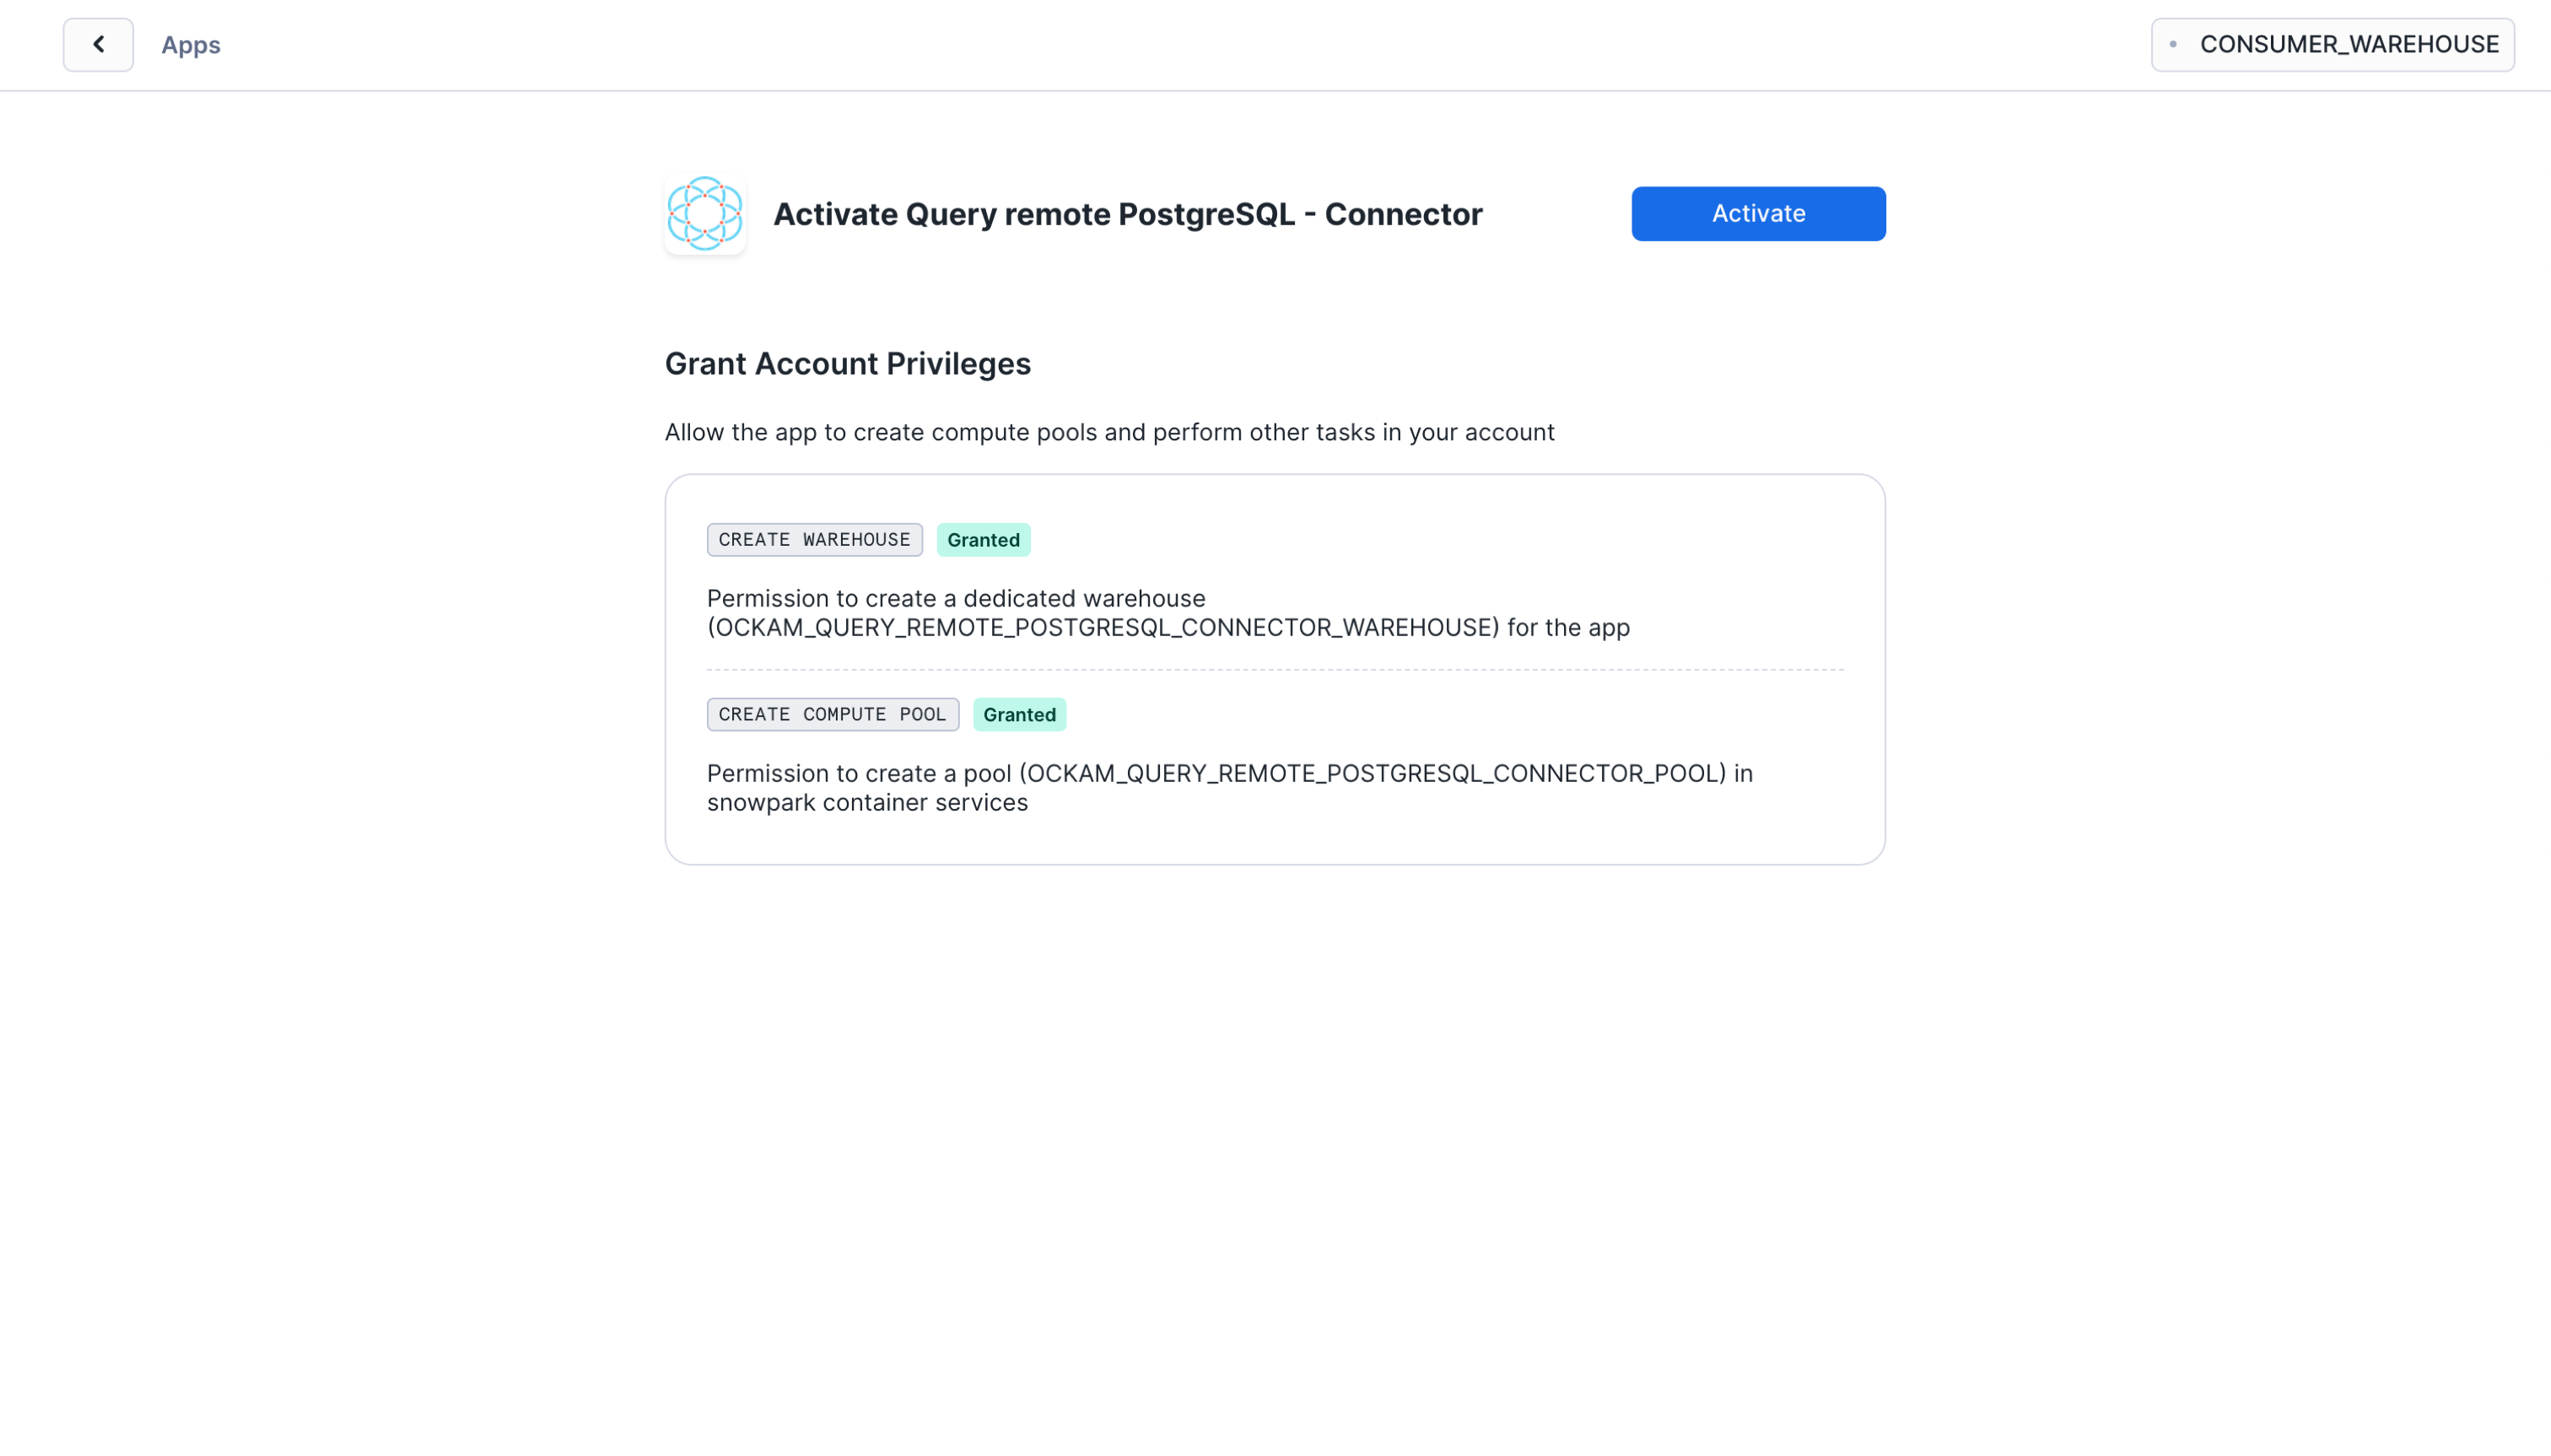
Activate app
Once the permissions grants complete, an Activate button will appear. Click
it and the activation process will begin.
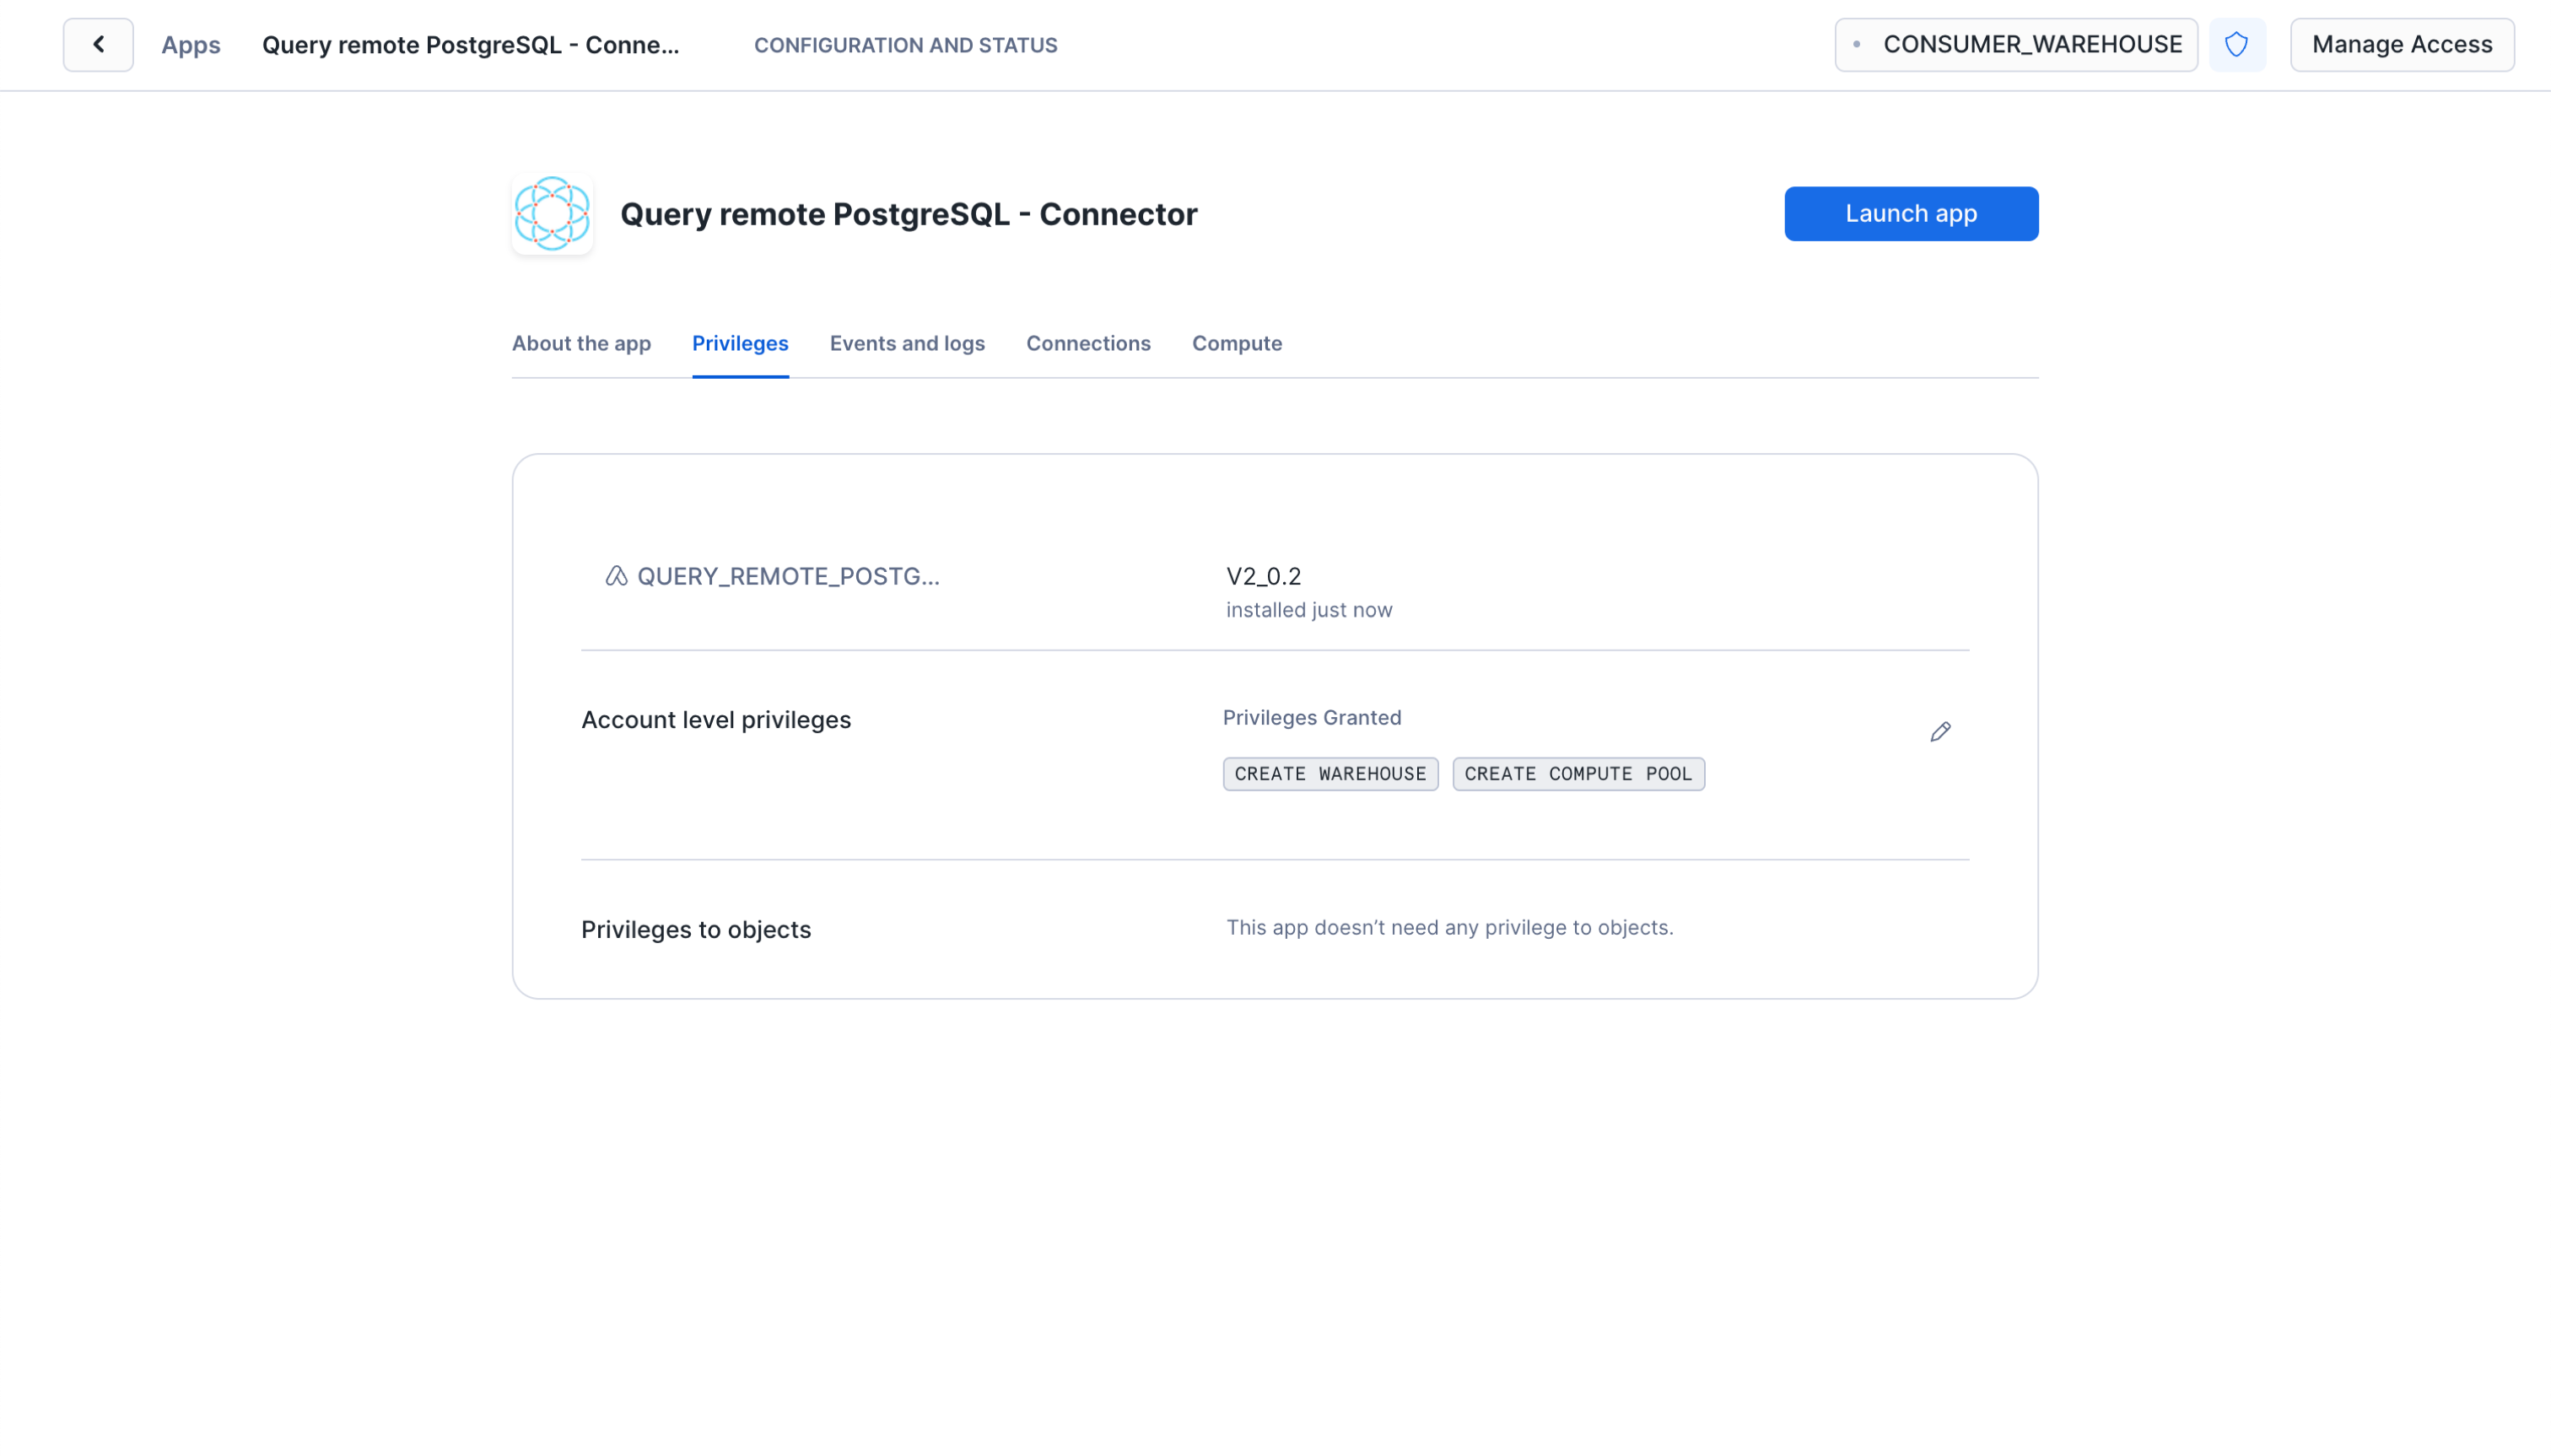
Launch app
After the app activates you'll see a page that summarizes the
privileges that the application now has. There's nothing we need
to review or update on these screens yet, so proceed by clicking the Launch app button.
Setup Ockam
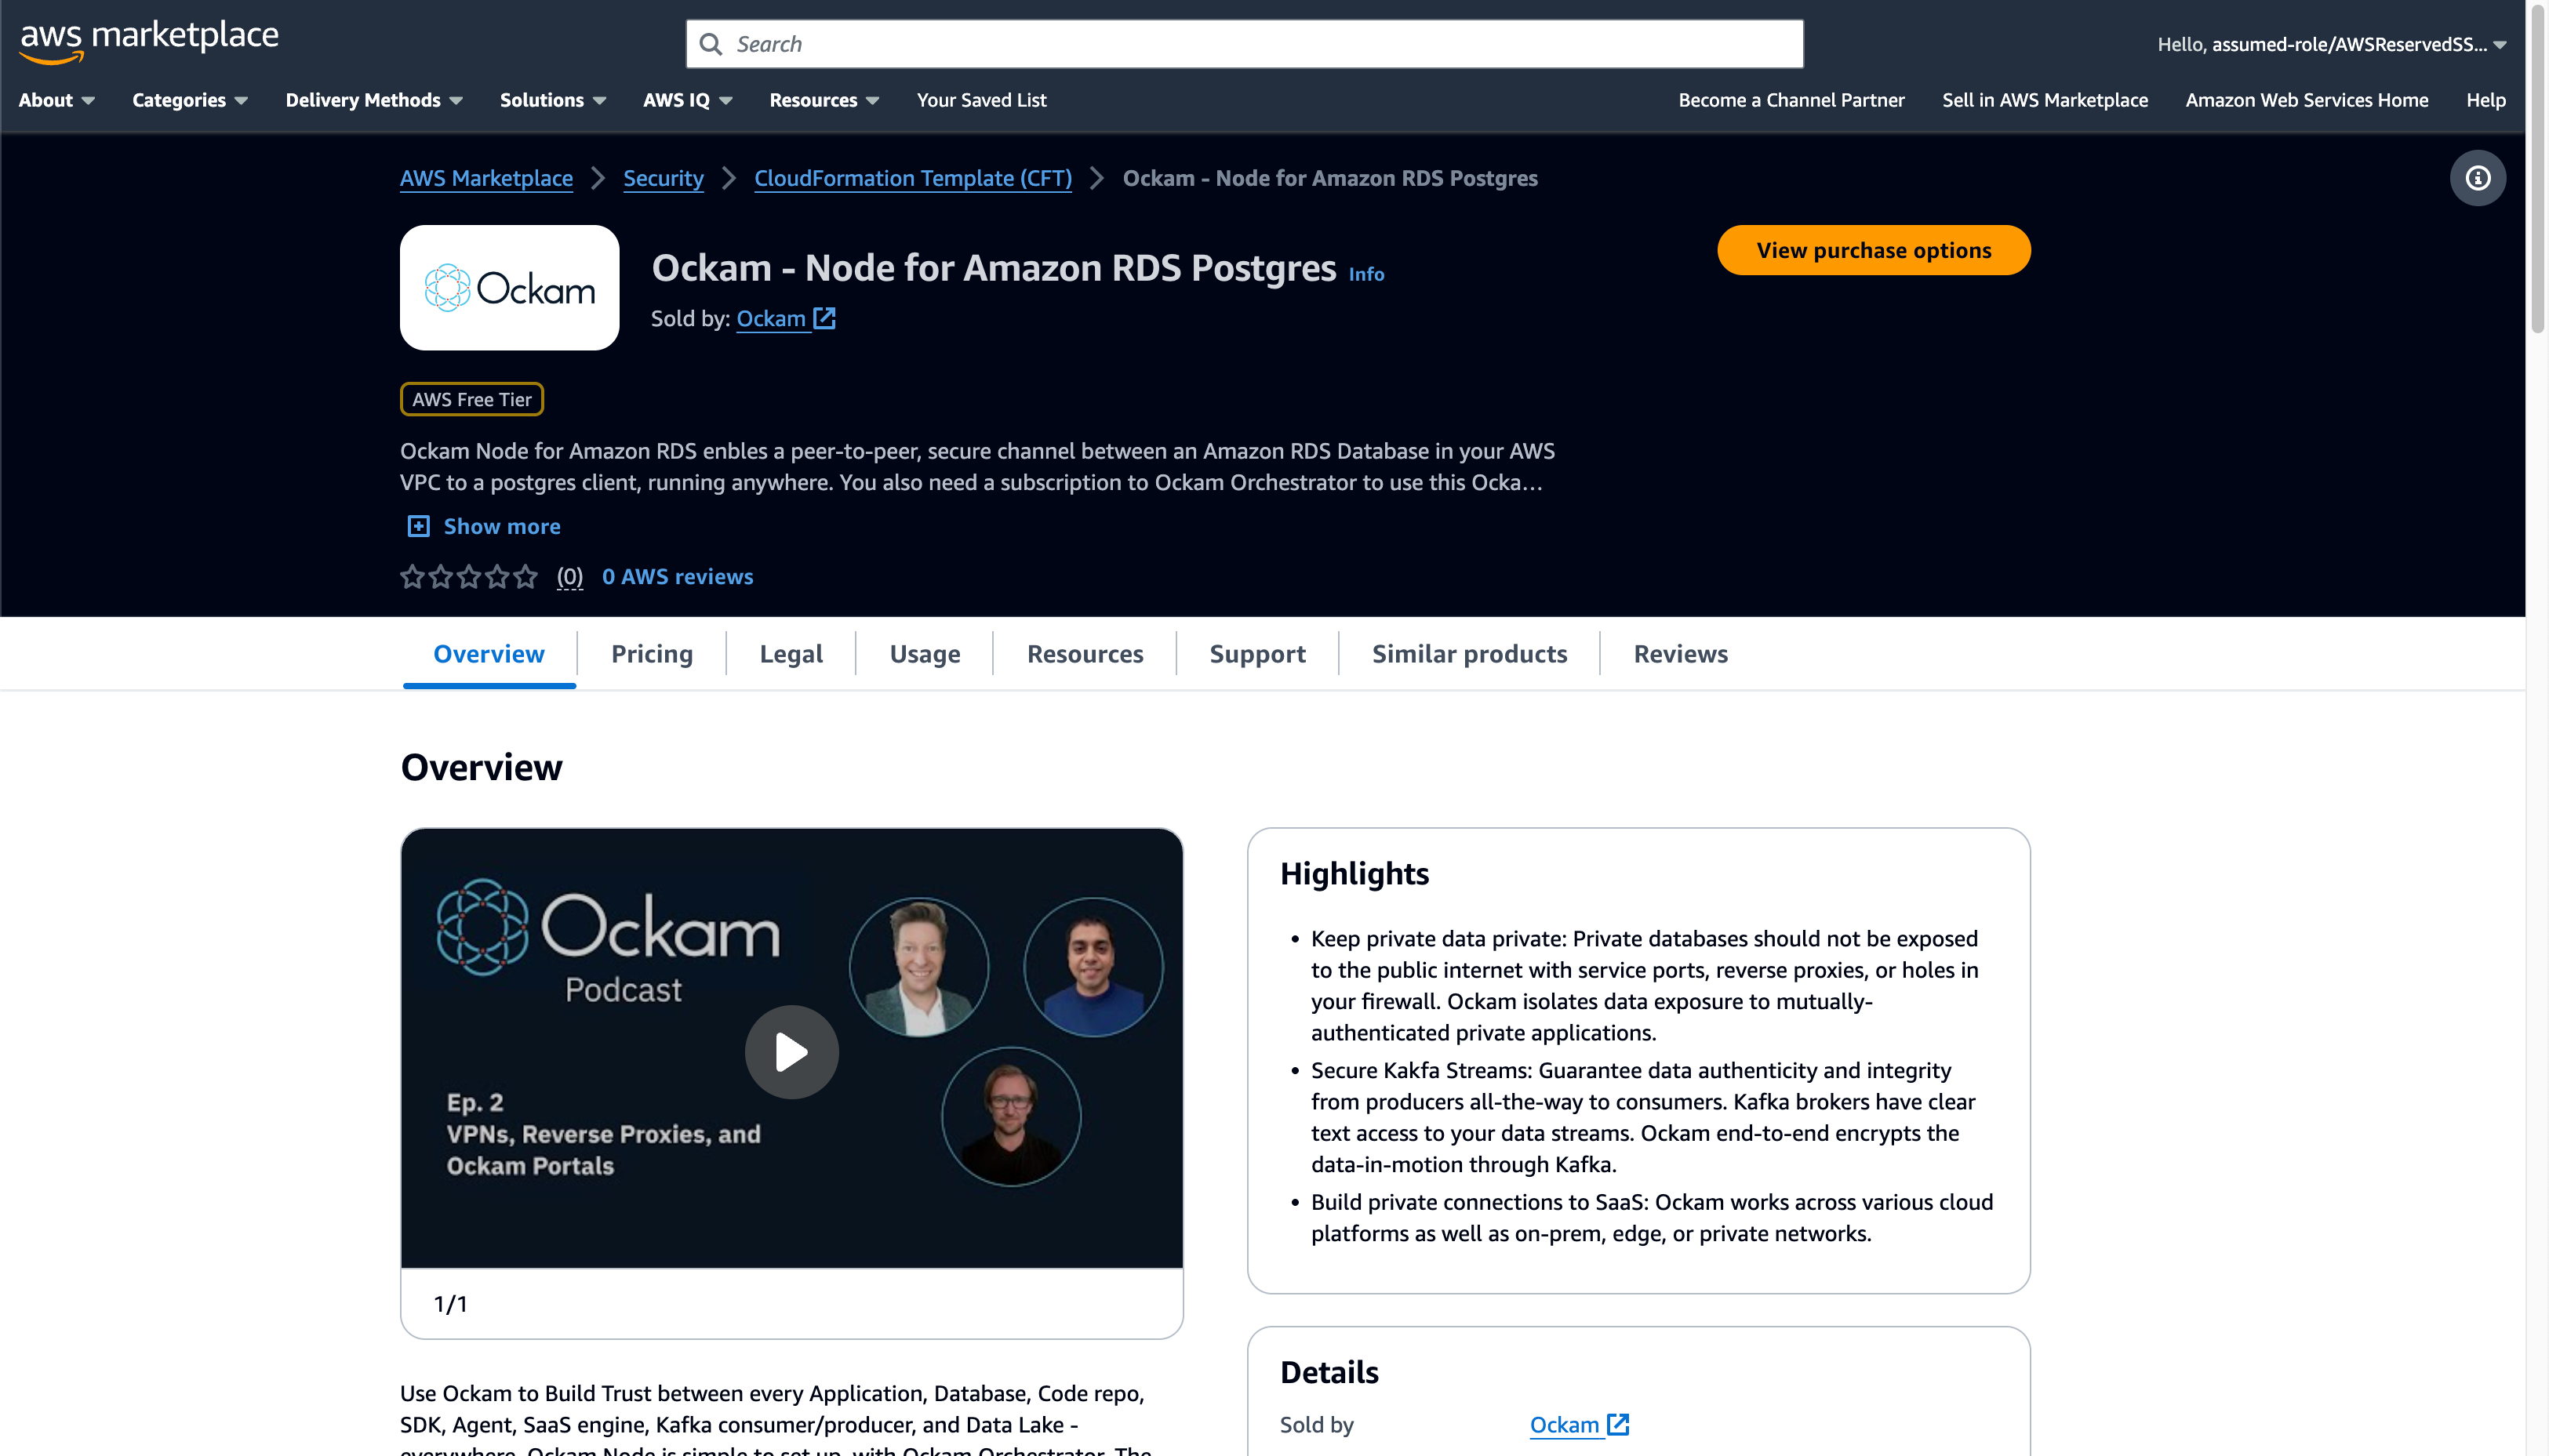
Option 1 - Run an Ockam node next to PostgreSQL via the AWS Marketplace
The Ockam Node for Amazon RDS is a streamlined way to provision a managed Ockam Node within your private AWS VPC. If you'd prefer the ability to deploy your Ockam Node yourself (for example on an existing machine or in a container) jump to our instructions on how to run an Ockam Node manually.
To deploy the node that will allow Snowflake to reach your Amazon RDS PostgreSQL database visit
the Ockam Node for Amazon RDS PostgreSQL listing in the AWS Marketplace, and click the Continue to Subscribe button, and then
Continue to Configuration.
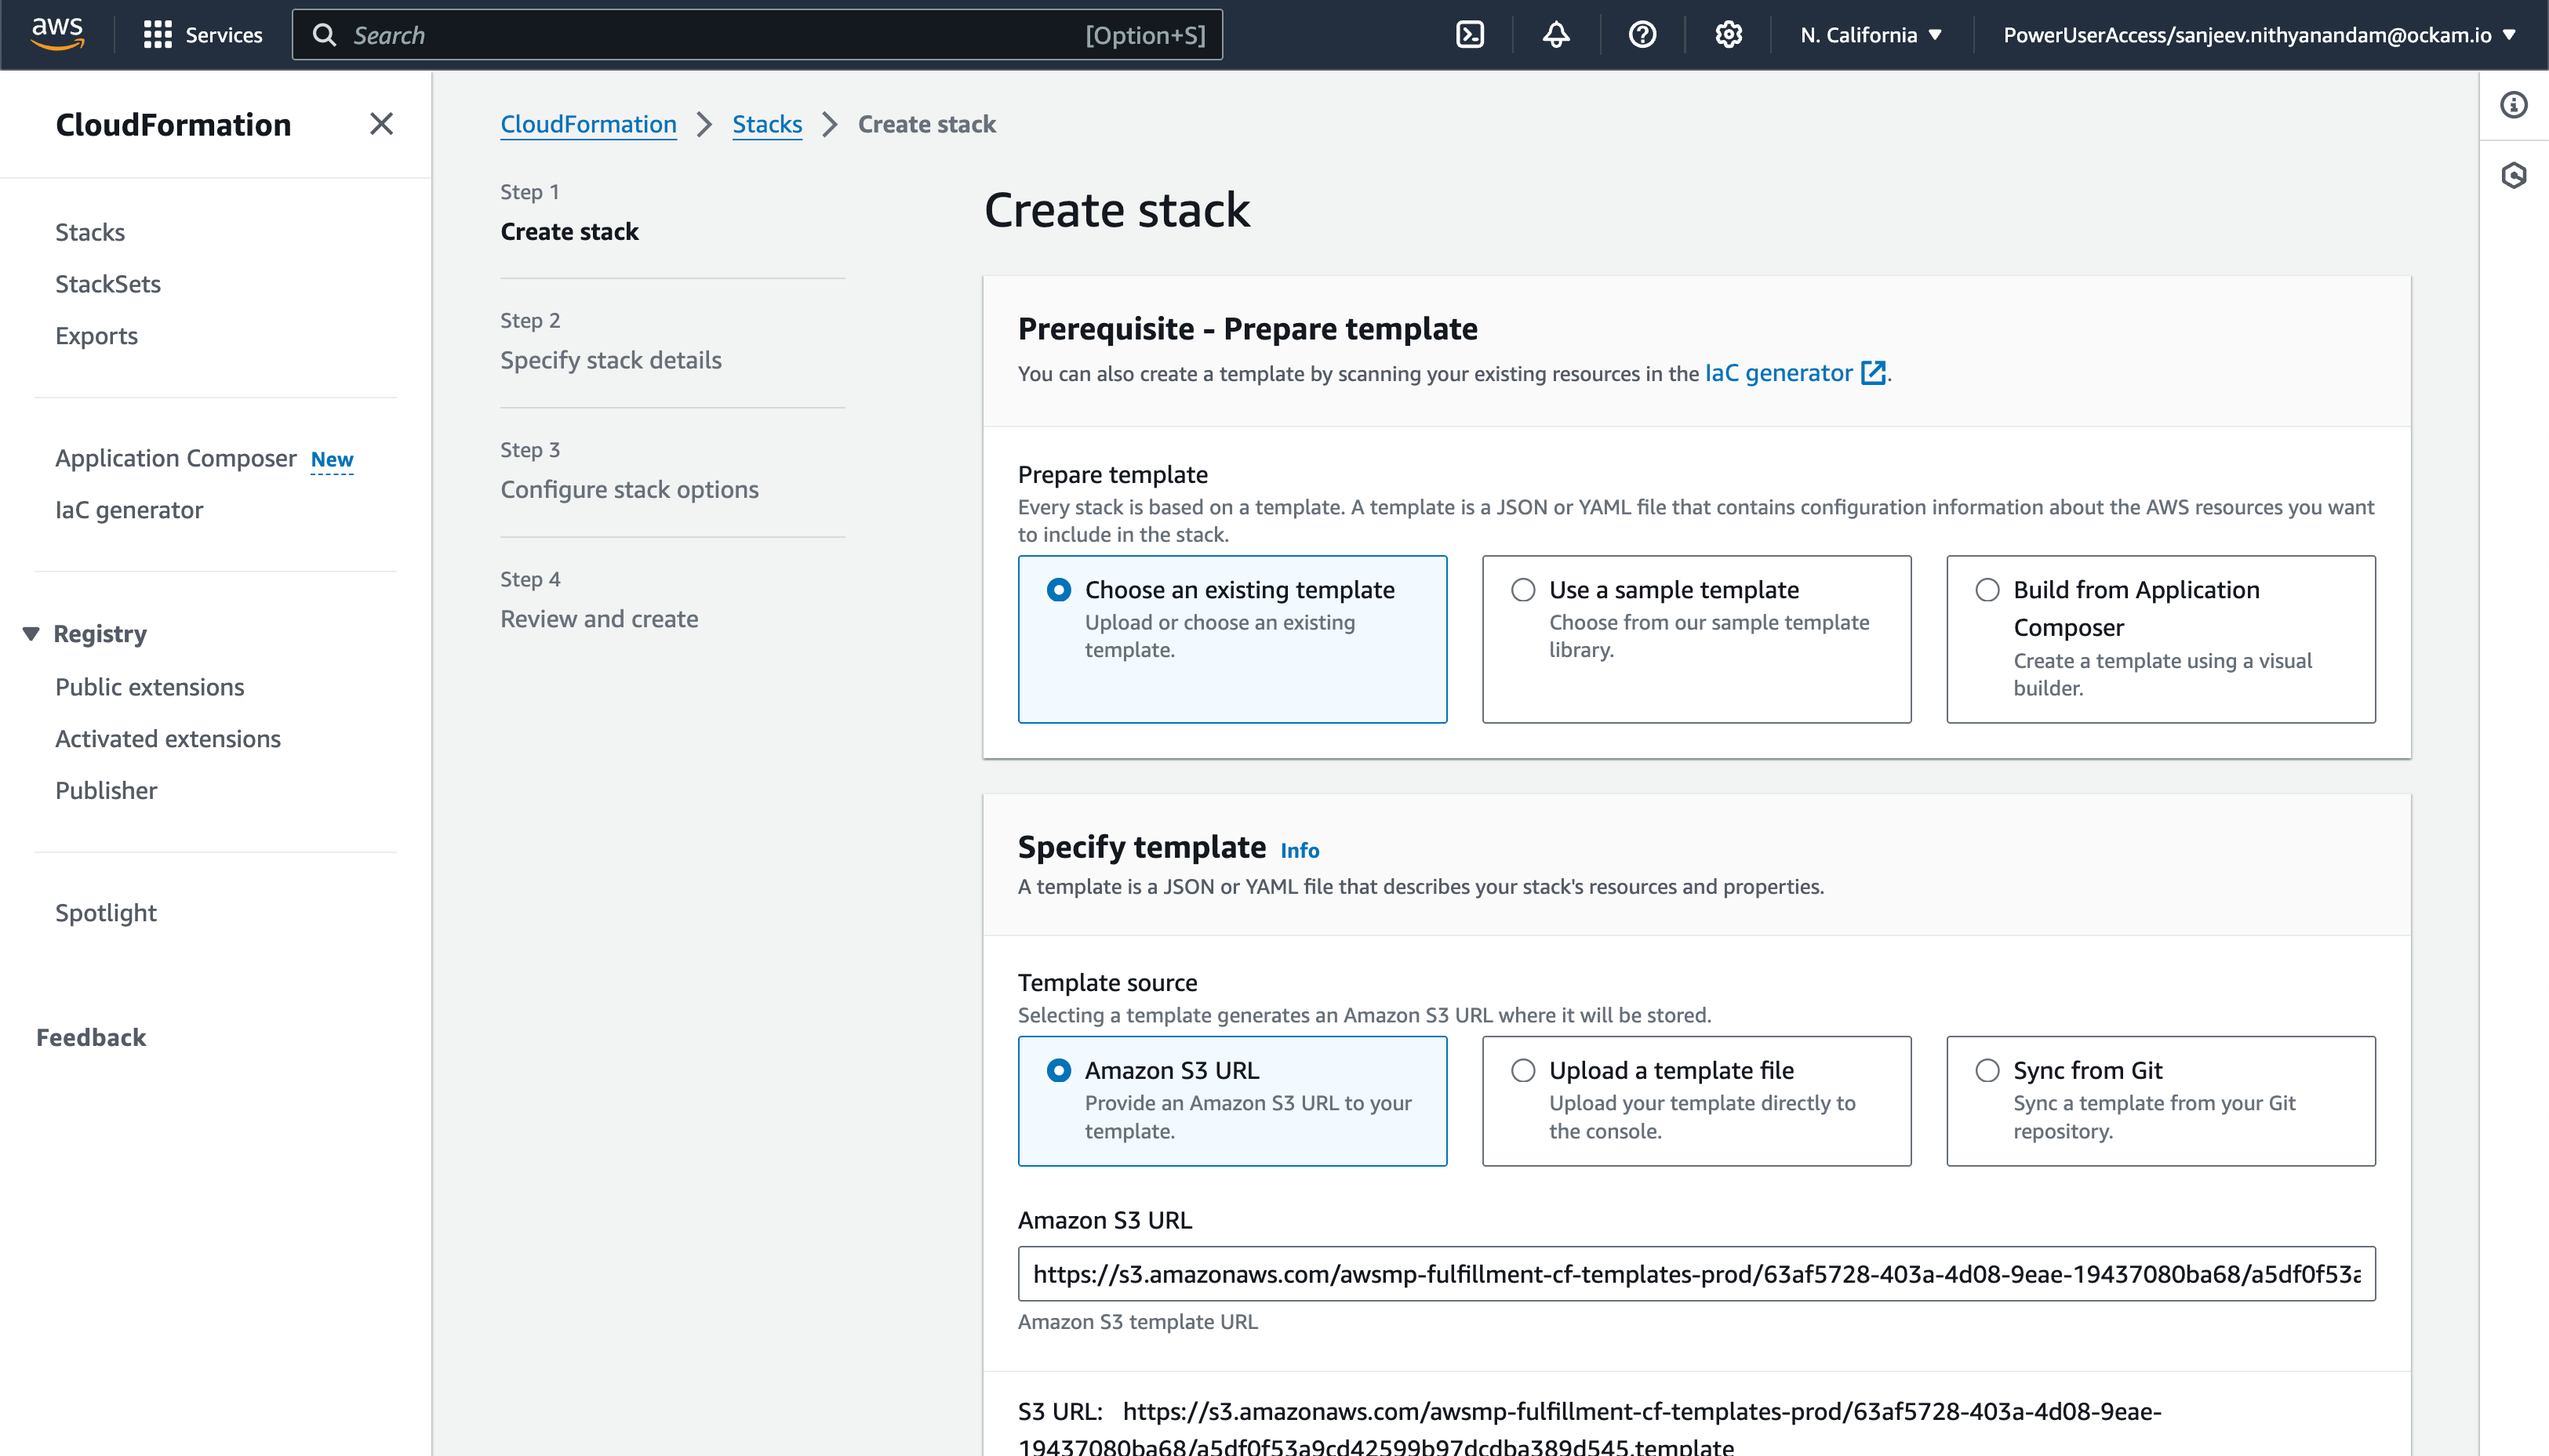
On the configuration page choose the region that your Amazon RDS cluster is
running in, and then click Continue to Launch followed by Launch.
Enter stack details
The initial Create Stack screen pre-fills the fields with the correct
information for your node, so you can press Next to proceed.
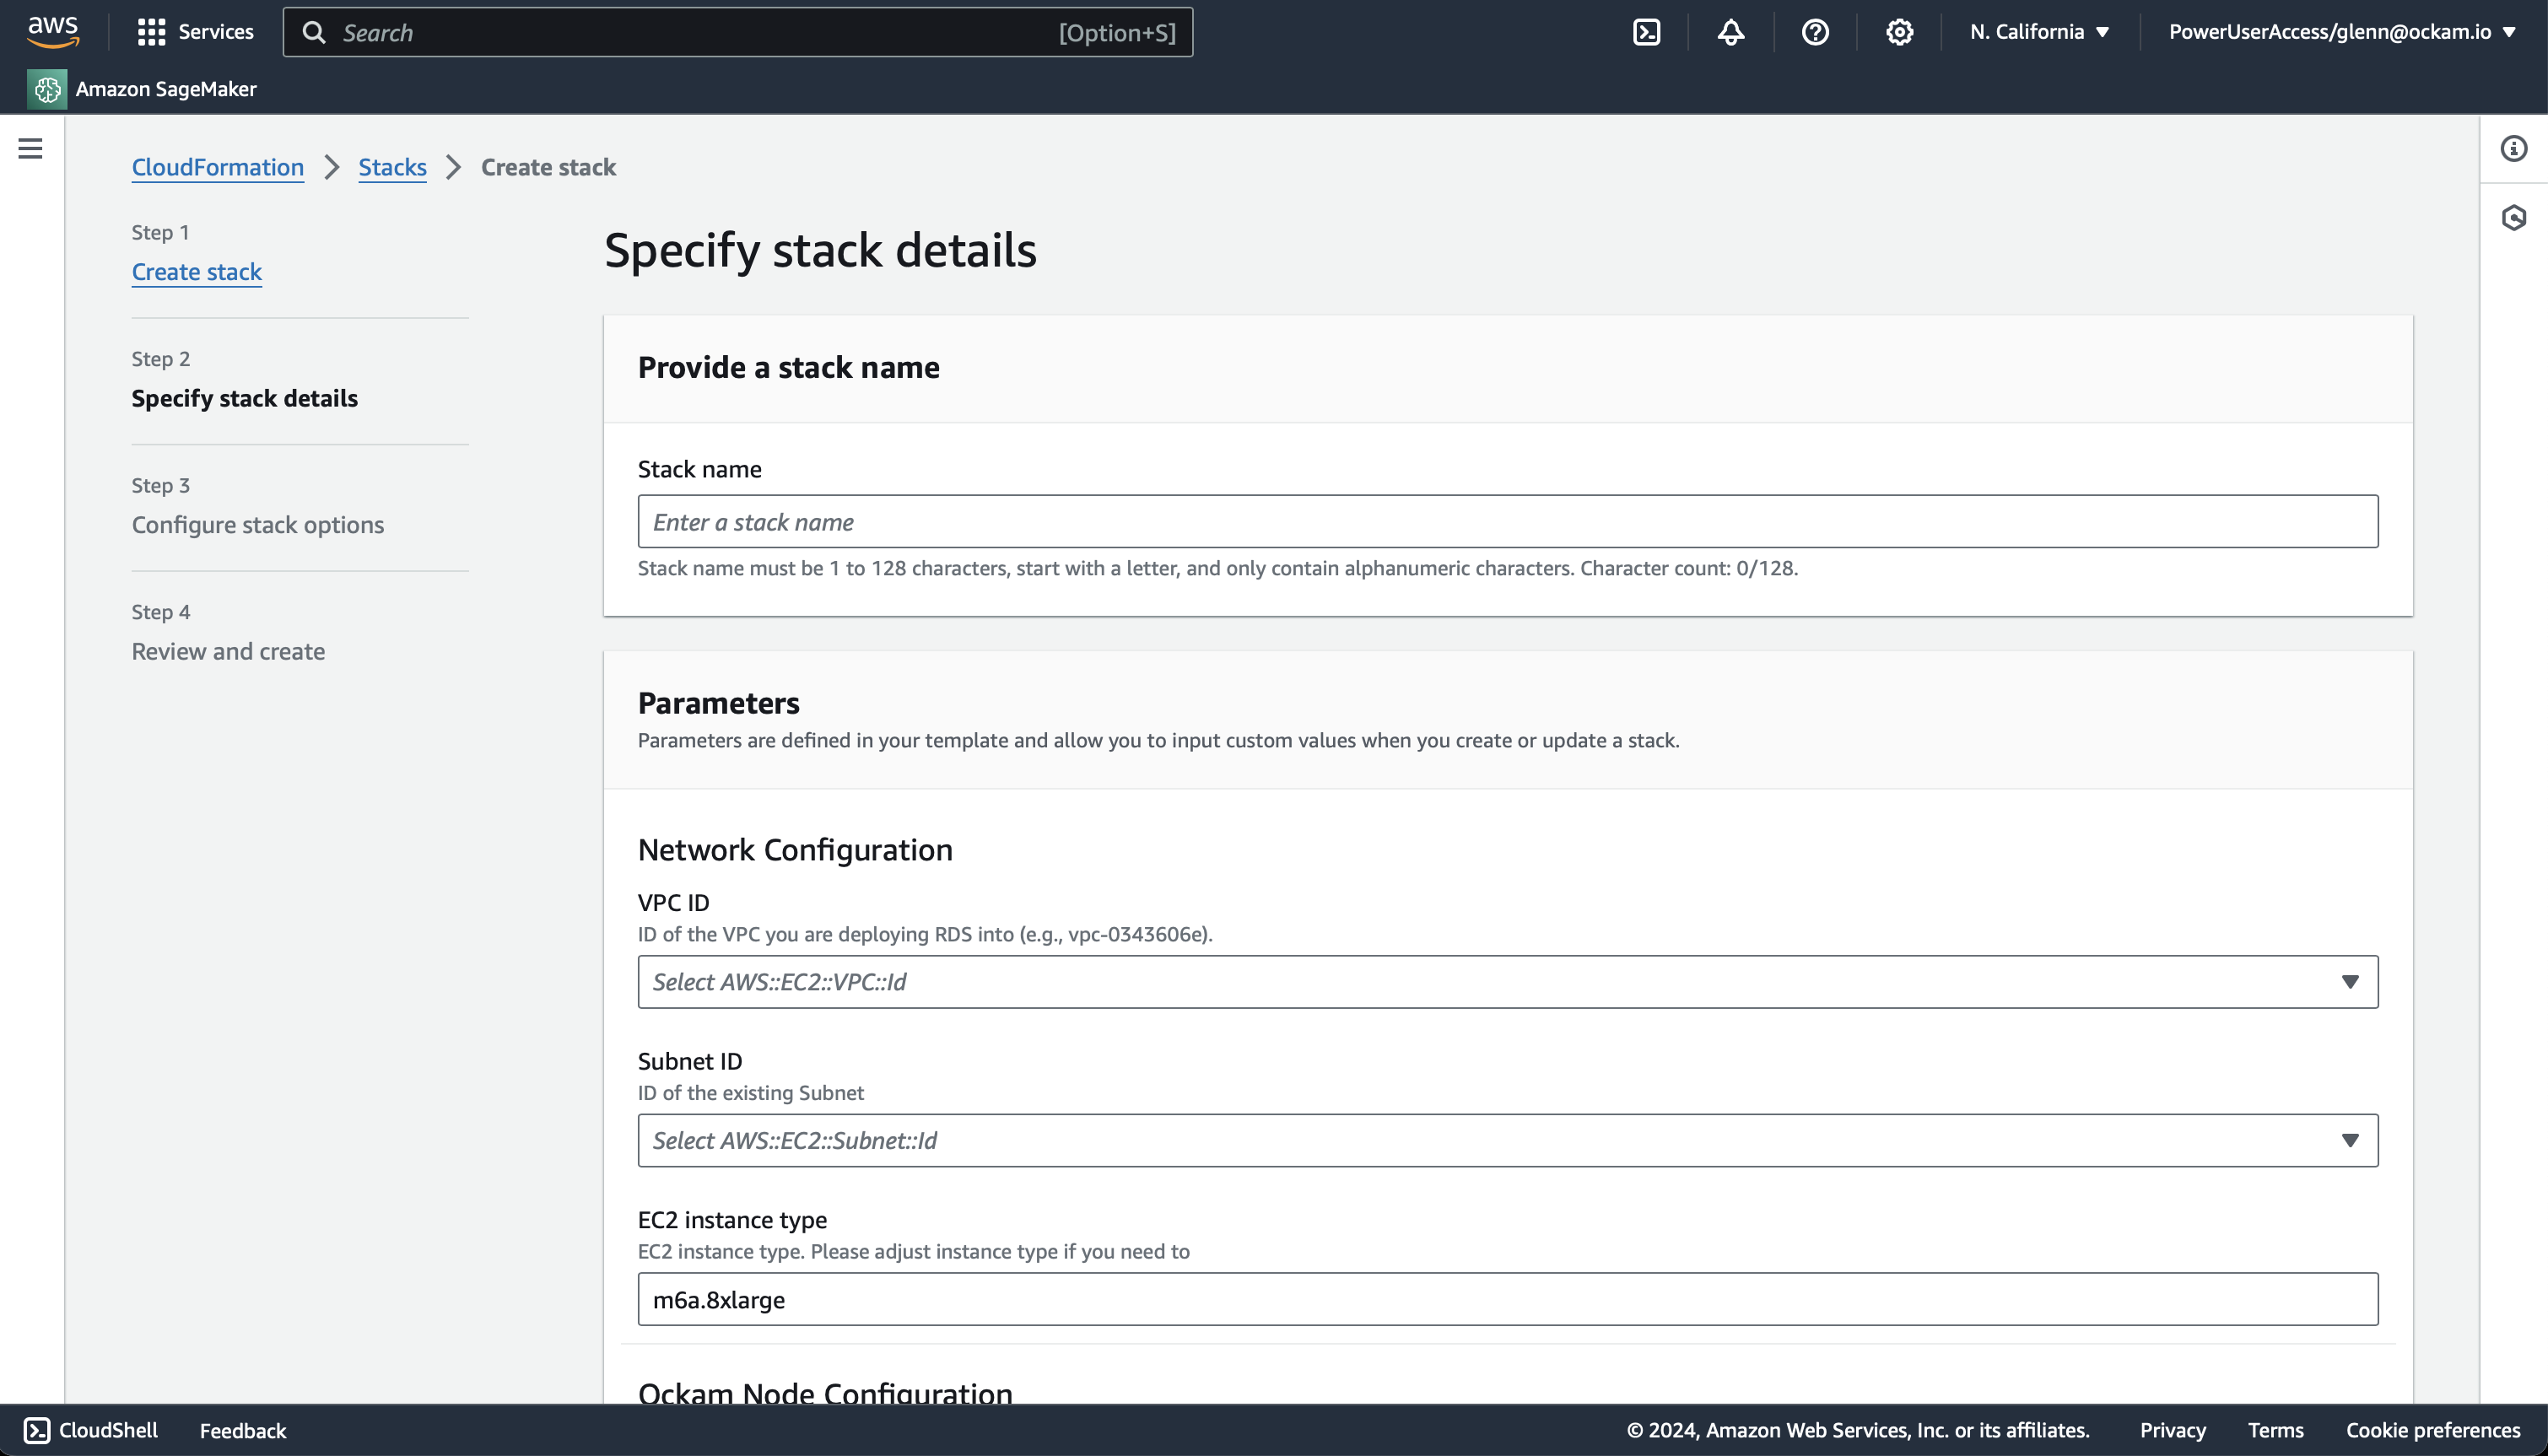
Enter node configuration
This screen has important details to you need to fill in:
- Stack name: Give this stack a recognisable name, you'll see this in various locations in the AWS Console. It'll also make it easier to clean these resources up later if you wish to remove them.
- VPC ID: The ID of the Virtual Private Cloud network to deploy the node in. Make sure it's the same VPC where you've deployed your RDS instance.
- Subnet ID: Choose same subnet where your RDS instance is deployed.
- Enrollment ticket: Copy the contents of the
postgres.ticketfile we created earlier and paste it in here. - RDS PostgreSQL Database Endpoint: In the Connectivity & security for
your Amazon RDS Database you will find Endpoint details. Copy the
Endpointvalue for the Private RDS Database that's in the same subnet you chose above. - JSON Node Configuration: Copy the contents of the
postgres.jsonfile we created earlier and paste it in here.
Once the stack has completed, you will need to modify the security group on your
RDS instance to allow access on port 5432 from the instance that was just
created.
We've now completed the highlighted part of the diagram below, and our Amazon RDS PostgreSQL node is waiting for another node to connect.
Option 2 - Run an Ockam Node next to PostgreSQL manually
Connect the Ockam node in Snowflake
Configure connection details
Click "Get started" to open the Snowflake setup screen.
Take the contents of the file snowflake.ticket that we just created and paste
it into "Provide the above Enrollment Ticket" form field in the "Configure app"
setup screen in Snowflake.
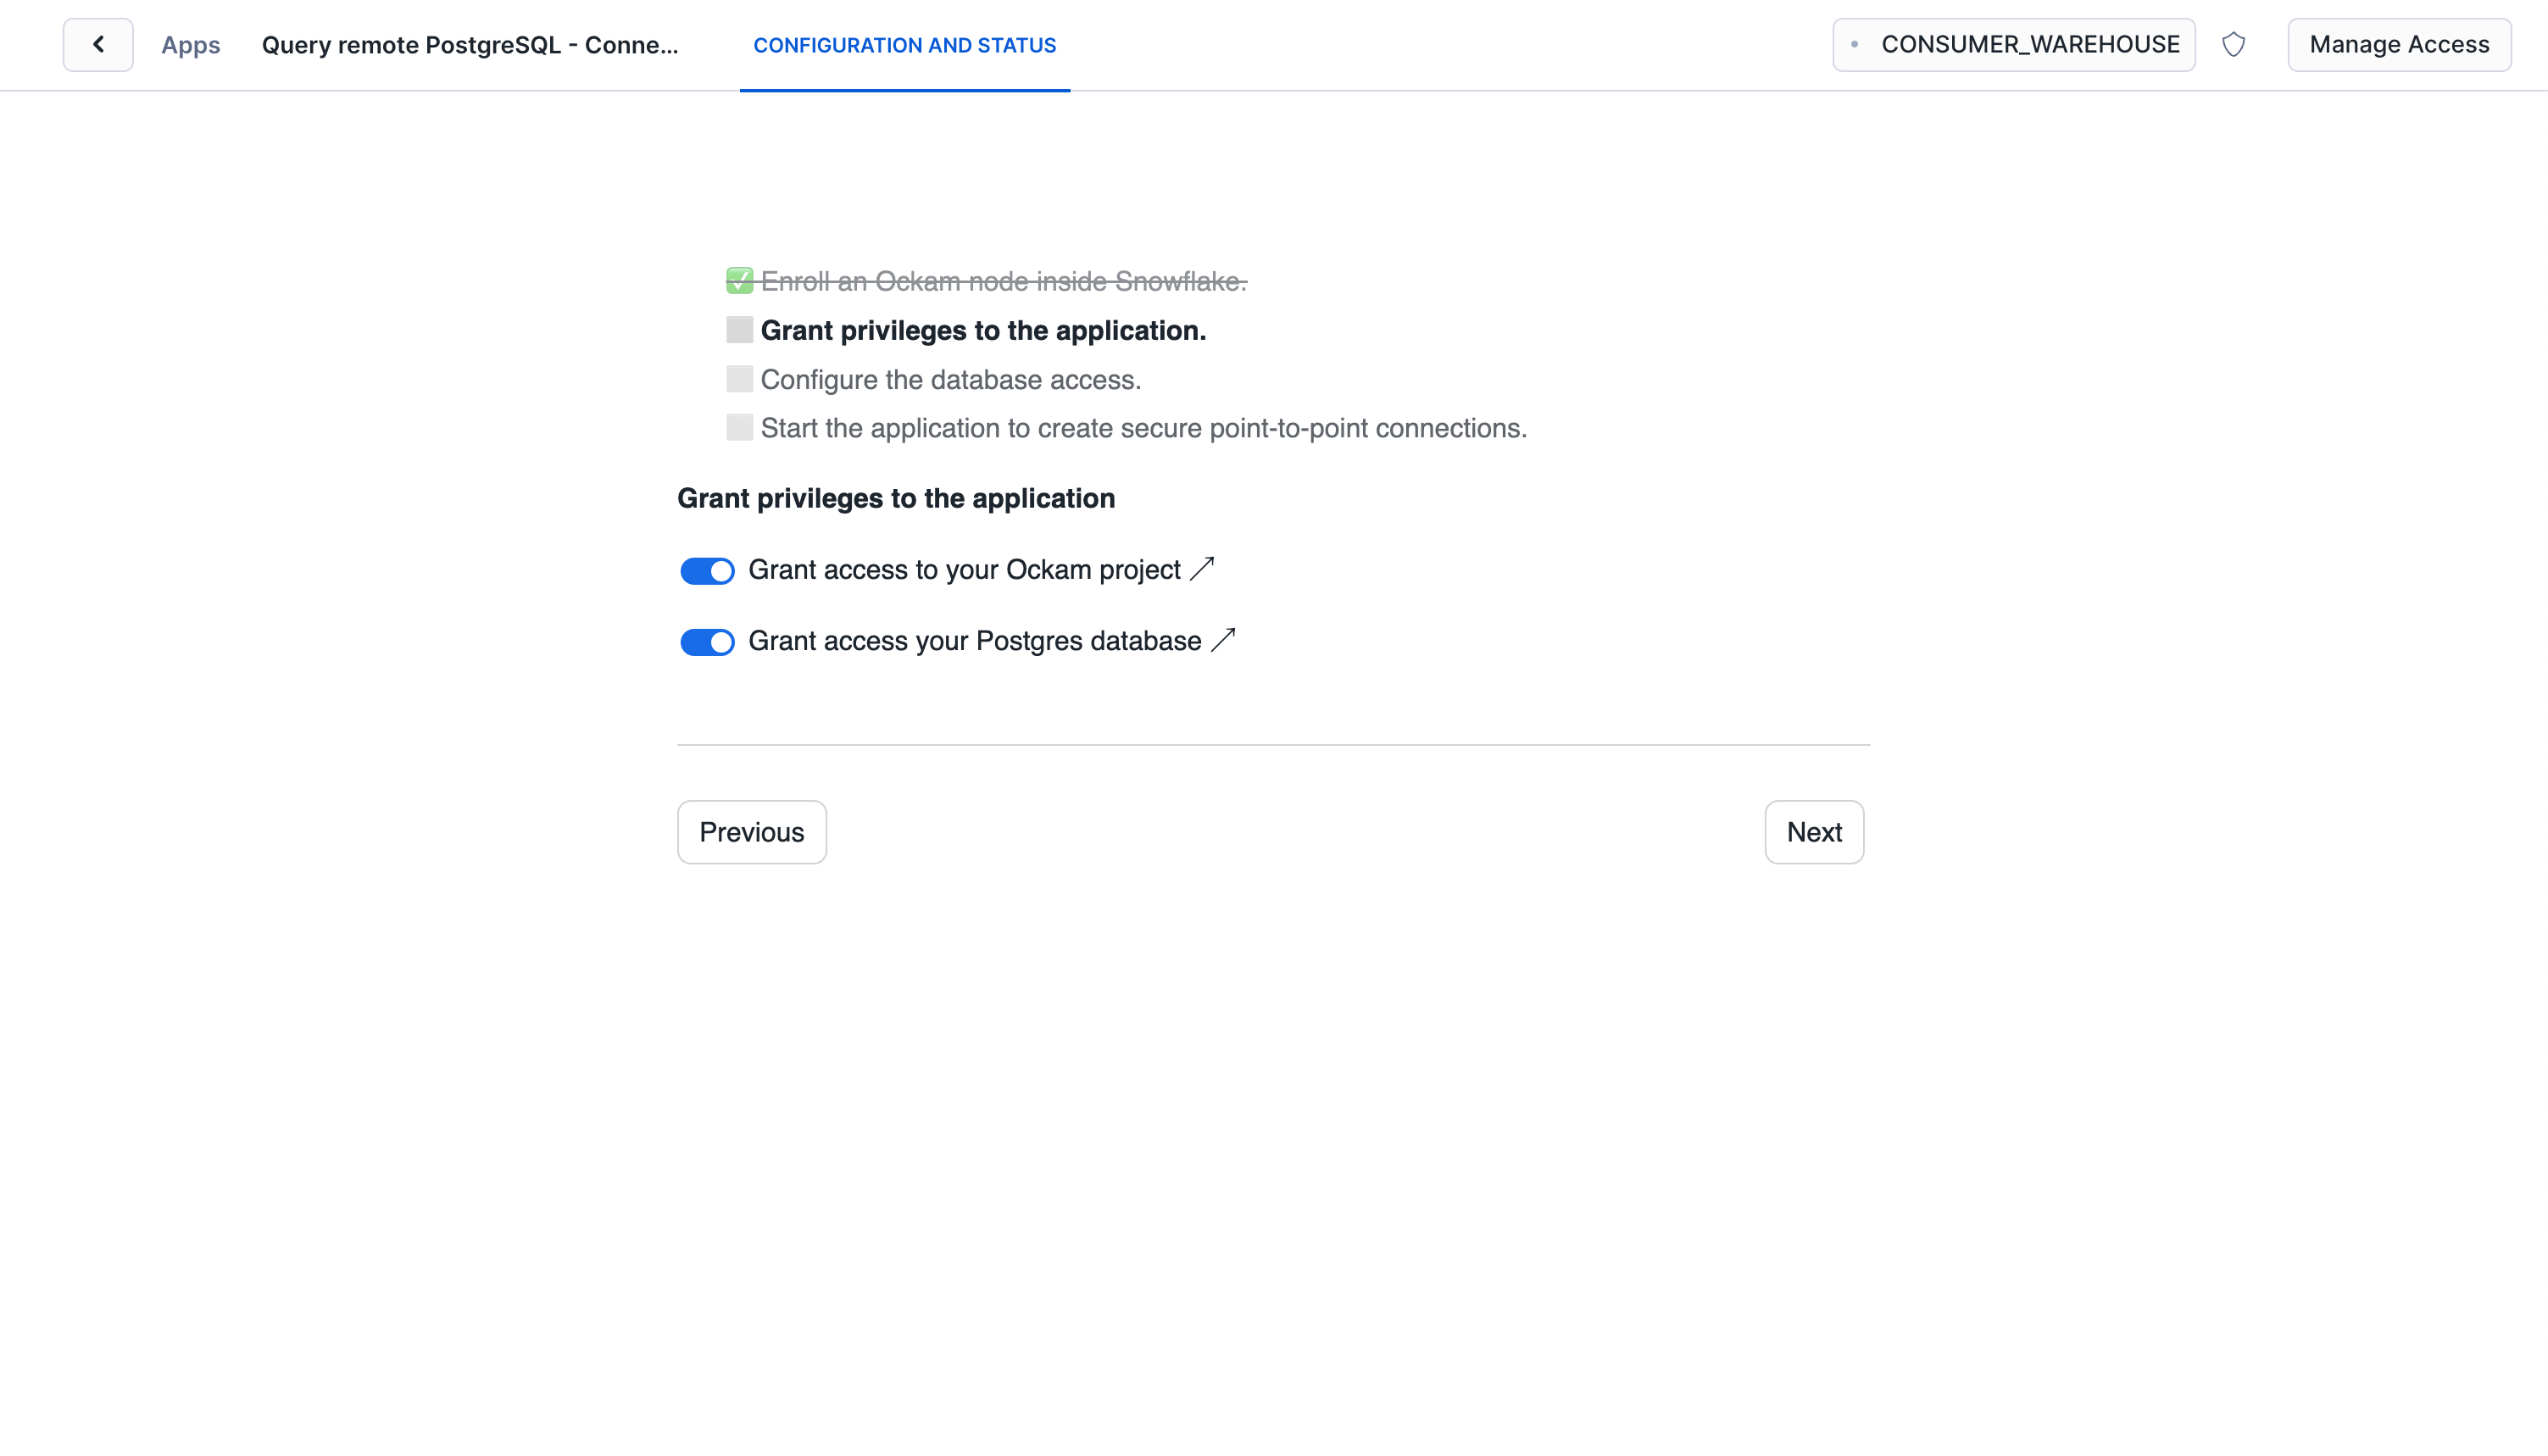
Grant privileges
To be able to authenticate with Ockam Orchestrator and then discover the route to our outlet, the Snowflake app needs to allow outbound connections to your Ockam project.
Toggle the Grant access to egress and reach your Project and approve the connection by
pressing Connect.
Toggle the Grant access to your postgre database and enter the username and password for your
PostgreSQL database and store it as a secret in snowflake.
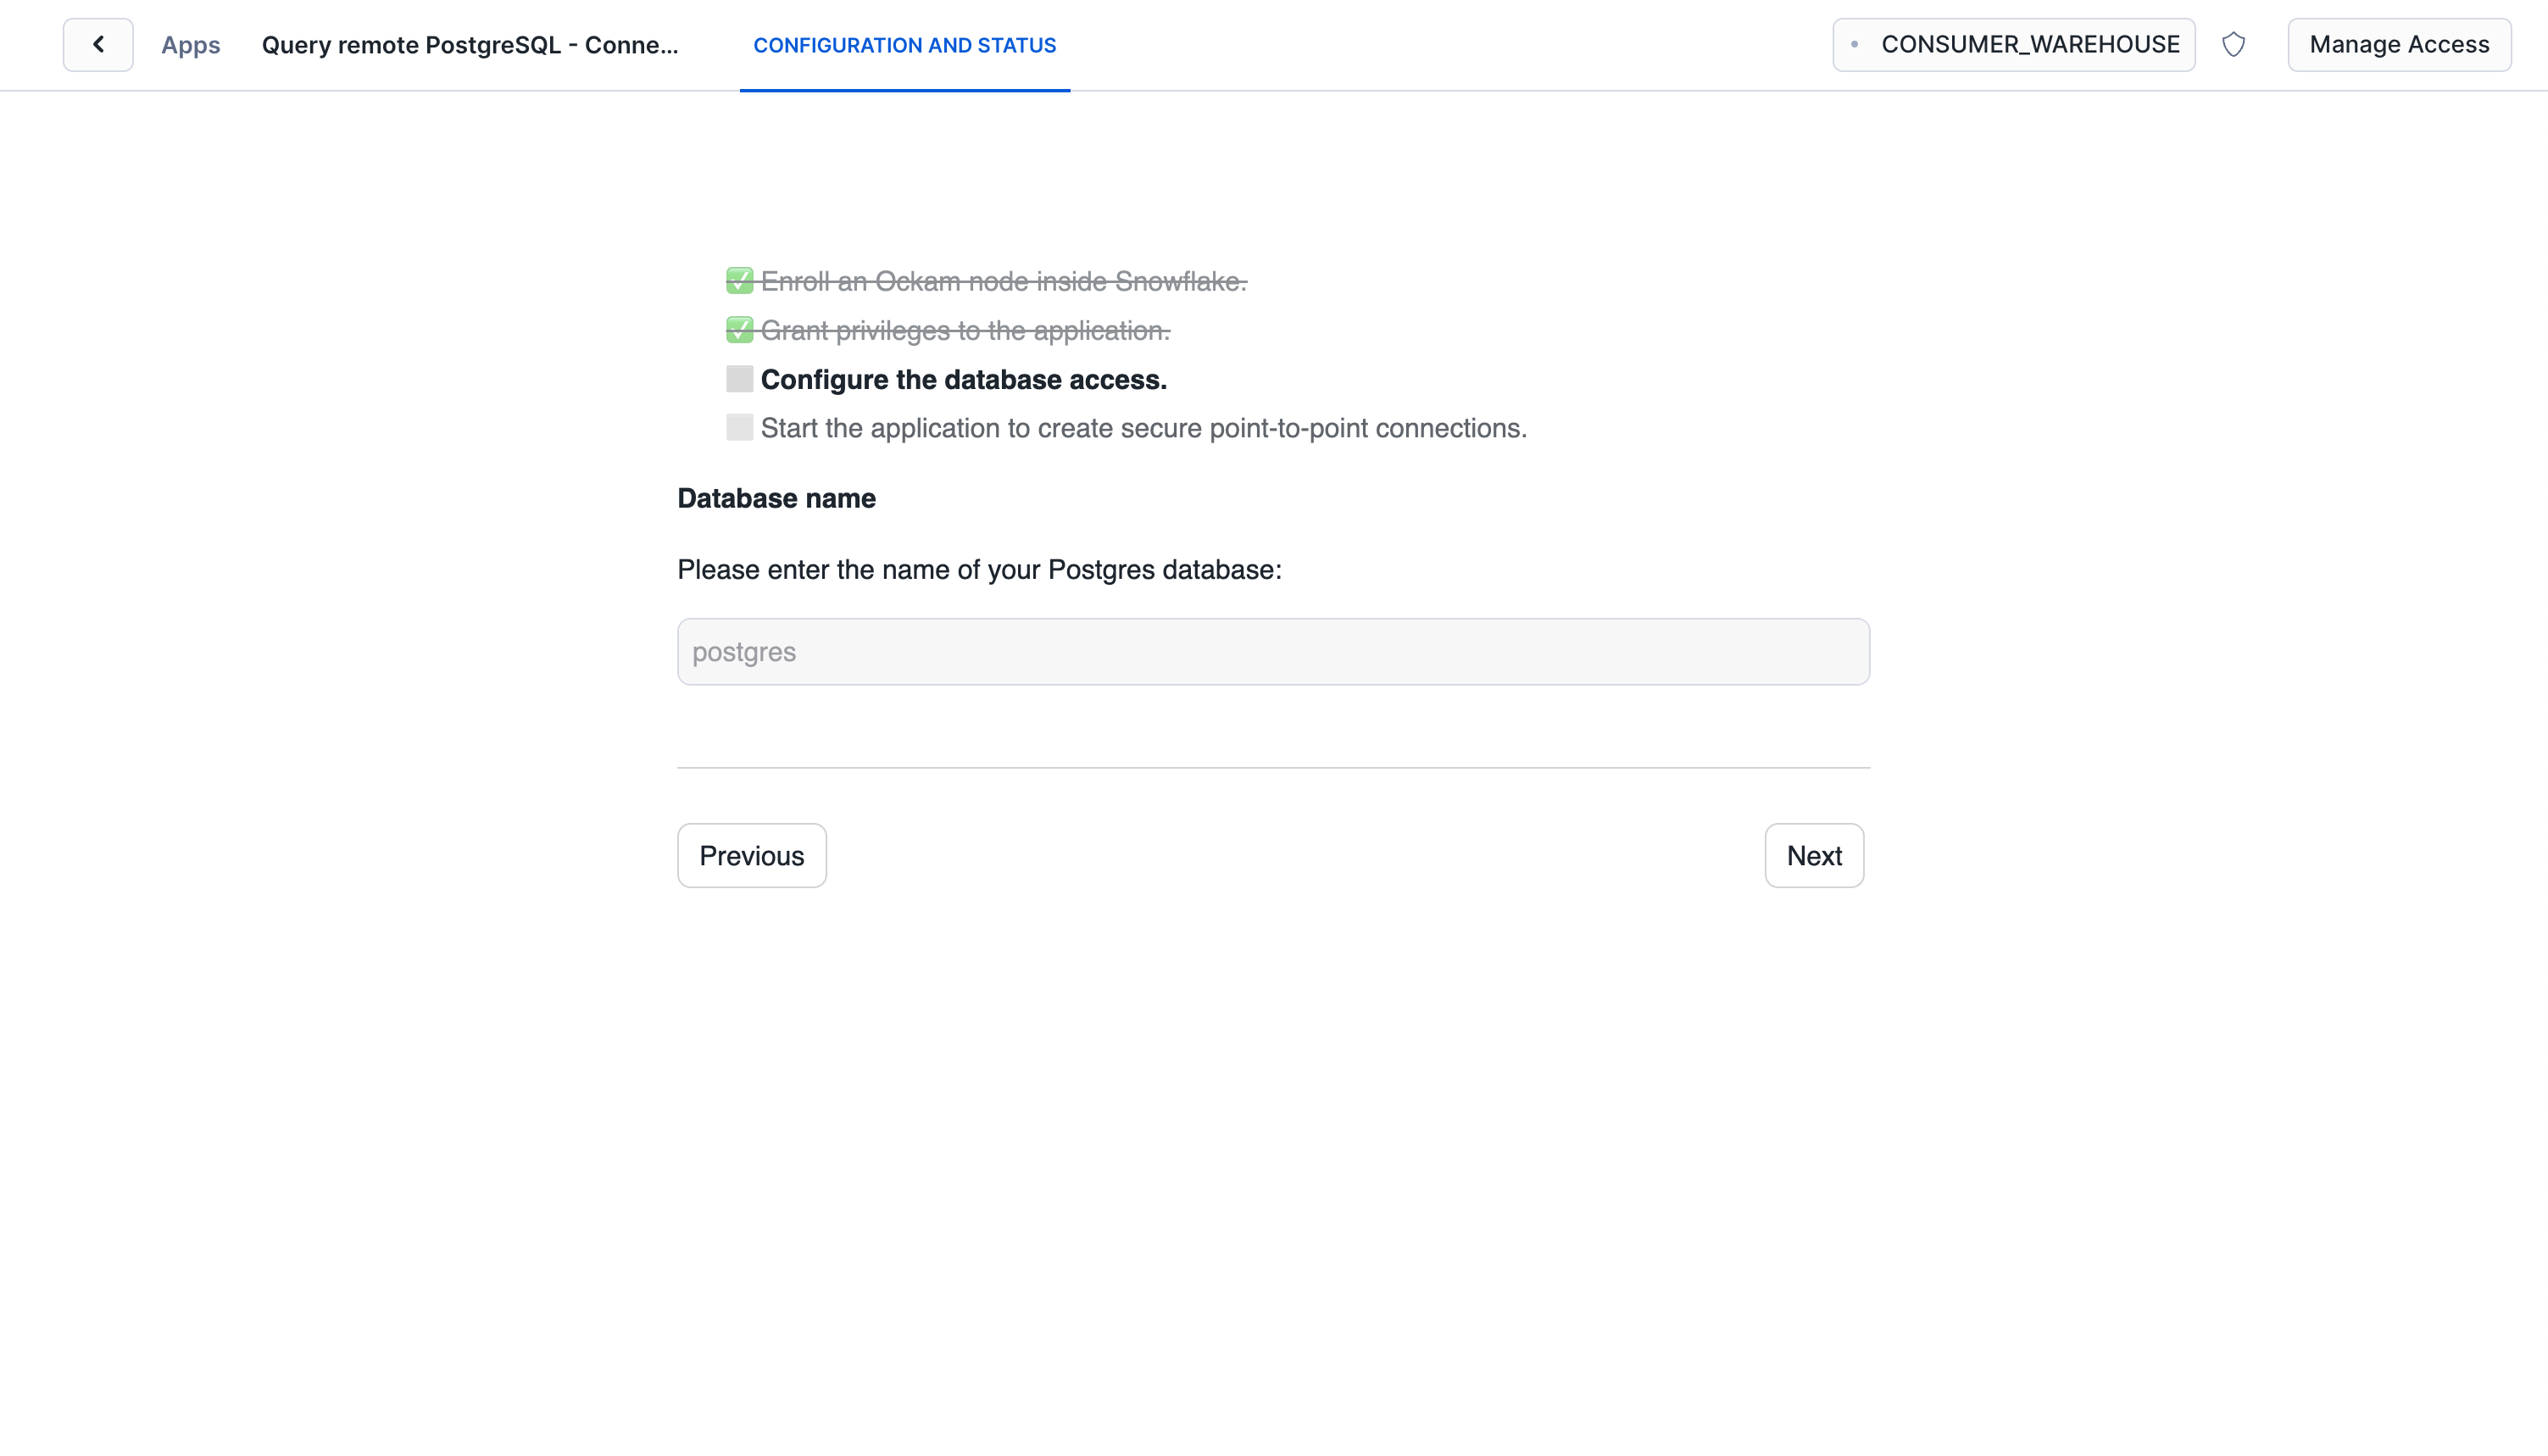
Configure PostgreSQL database
Enter the name of the PostgreSQL database.

With that, we've completed the last step in the setup. We've now got a complete point-to-point connection that allows our Snowflake warehouse to securely query private PostgreSQL database.
Running a Query
Now that we have our secure connection set up between Snowflake and PostgreSQL, let's run some queries!
The result of this query should be a table with two rows:
| NAME | BREED |
|---|---|
| Max | Golden Retriever |
| Bella | Poodle |
As you can see, we've successfully created a table in PostgreSQL and queried it directly from Snowflake, all through our secure, point-to-point connection!
Next steps
You now have a secure, point-to-point connection that allows your Snowflake warehouse to query your private PostgreSQL database directly. This opens up a world of possibilities for data integration and analysis.
From here you can:
- Join data from Snowflake and PostgreSQL in a single query
- Use PostgreSQL data to enrich your Snowflake datasets
- Perform real-time queries on your operational PostgreSQL database from within Snowflake
If you'd like to explore some other capabilities of Ockam I'd recommend:
- Replicate tables from PostgreSQL to Snowflake
- Sync tables from Snowflake to PostgreSQL
- Creating private point-to-point connections with any database
- Adding security as a feature in your SaaS product
Previous Article
Real-Time Data Ingestion from Kafka to Snowflake
Next Article
Build completely private APIs in Snowflake