Access a Snowflake stage with WebDAV

Glenn Gillen
VP of Product, GTM


Wouldn't it be nice to upload and manage files in a Snowflake stage the same way you would if they were files on your local machine? Wouldn't it be even better if it wasn't necessary to manage IP allow lists, open firewall ports, or setup services like PrivateLink to make that happen?
I'm about to walk you through setting this up, and it will take you less than 15 minutes to have everything working.
Introducing the Snowflake Stage Data with WebDAV Connector!
Quick links
Snowflake 💙 WebDAV
WebDAV is a protocol for authoring and exchanging documents, based on the HTTP protocol.
One way to import data into Snowflake is to use the snow command line client
or the snowflake-connector-python Python library to upload files and
have them be mapped to tables for later processing. Unfortunately, both those
tools require a specific installation, and an OAuth authentication,
whereas HTTP commands can be easily executed with an ubiquitous utility like curl.
In this post I'm going to show you how to securely access a Snowflake stage in your account with WebDAV. In just a few minutes we will:
- Create a stage associated to your Snowflake account.
- Create a WebDAV server on Snowflake with a private encrypted connection.
- Upload, list, download and remove files with WebDAV commands.
- Mount the Snowflake stage as a filesystem on your local workstation.
Create a stage
This can be done with just a few commands in the Snowsight editor:
_10-- create a test database_10CREATE DATABASE IF NOT EXISTS WEBDAV_TEST_DATABASE;_10USE DATABASE WEBDAV_TEST_DATABASE;_10_10-- create a test schema_10CREATE SCHEMA IF NOT EXISTS WEBDAV_TEST_SCHEMA;_10USE SCHEMA WEBDAV_TEST_SCHEMA;_10_10-- create an internal stage_10CREATE STAGE IF NOT EXISTS SECURE ENCRYPTION = (type = 'SNOWFLAKE_SSE');
The files contained in that stage can be listed with:
_10LIST @"SECURE";
And the stage should be empty for now!
Setup a WebDAV server inside Snowflake
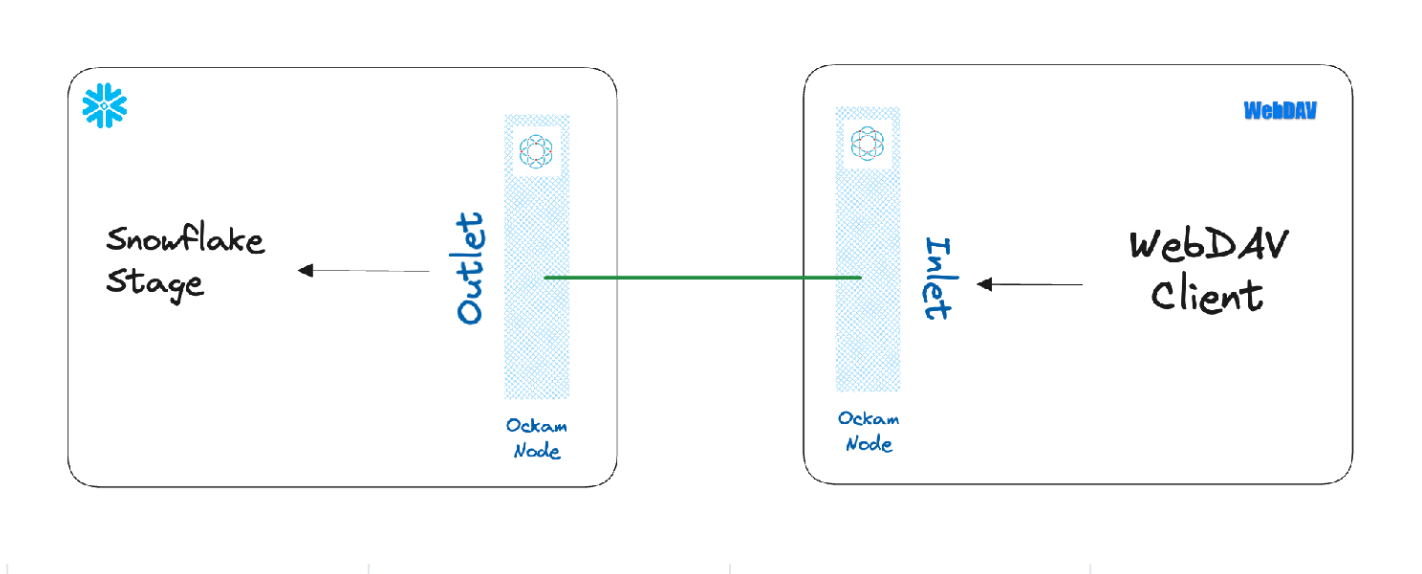
We are now going to create a WebDAV server for the previous stage inside Snowflake. This will create a point-to-point connection between the two systems — without the need to expose any systems to the public internet!
Get the app
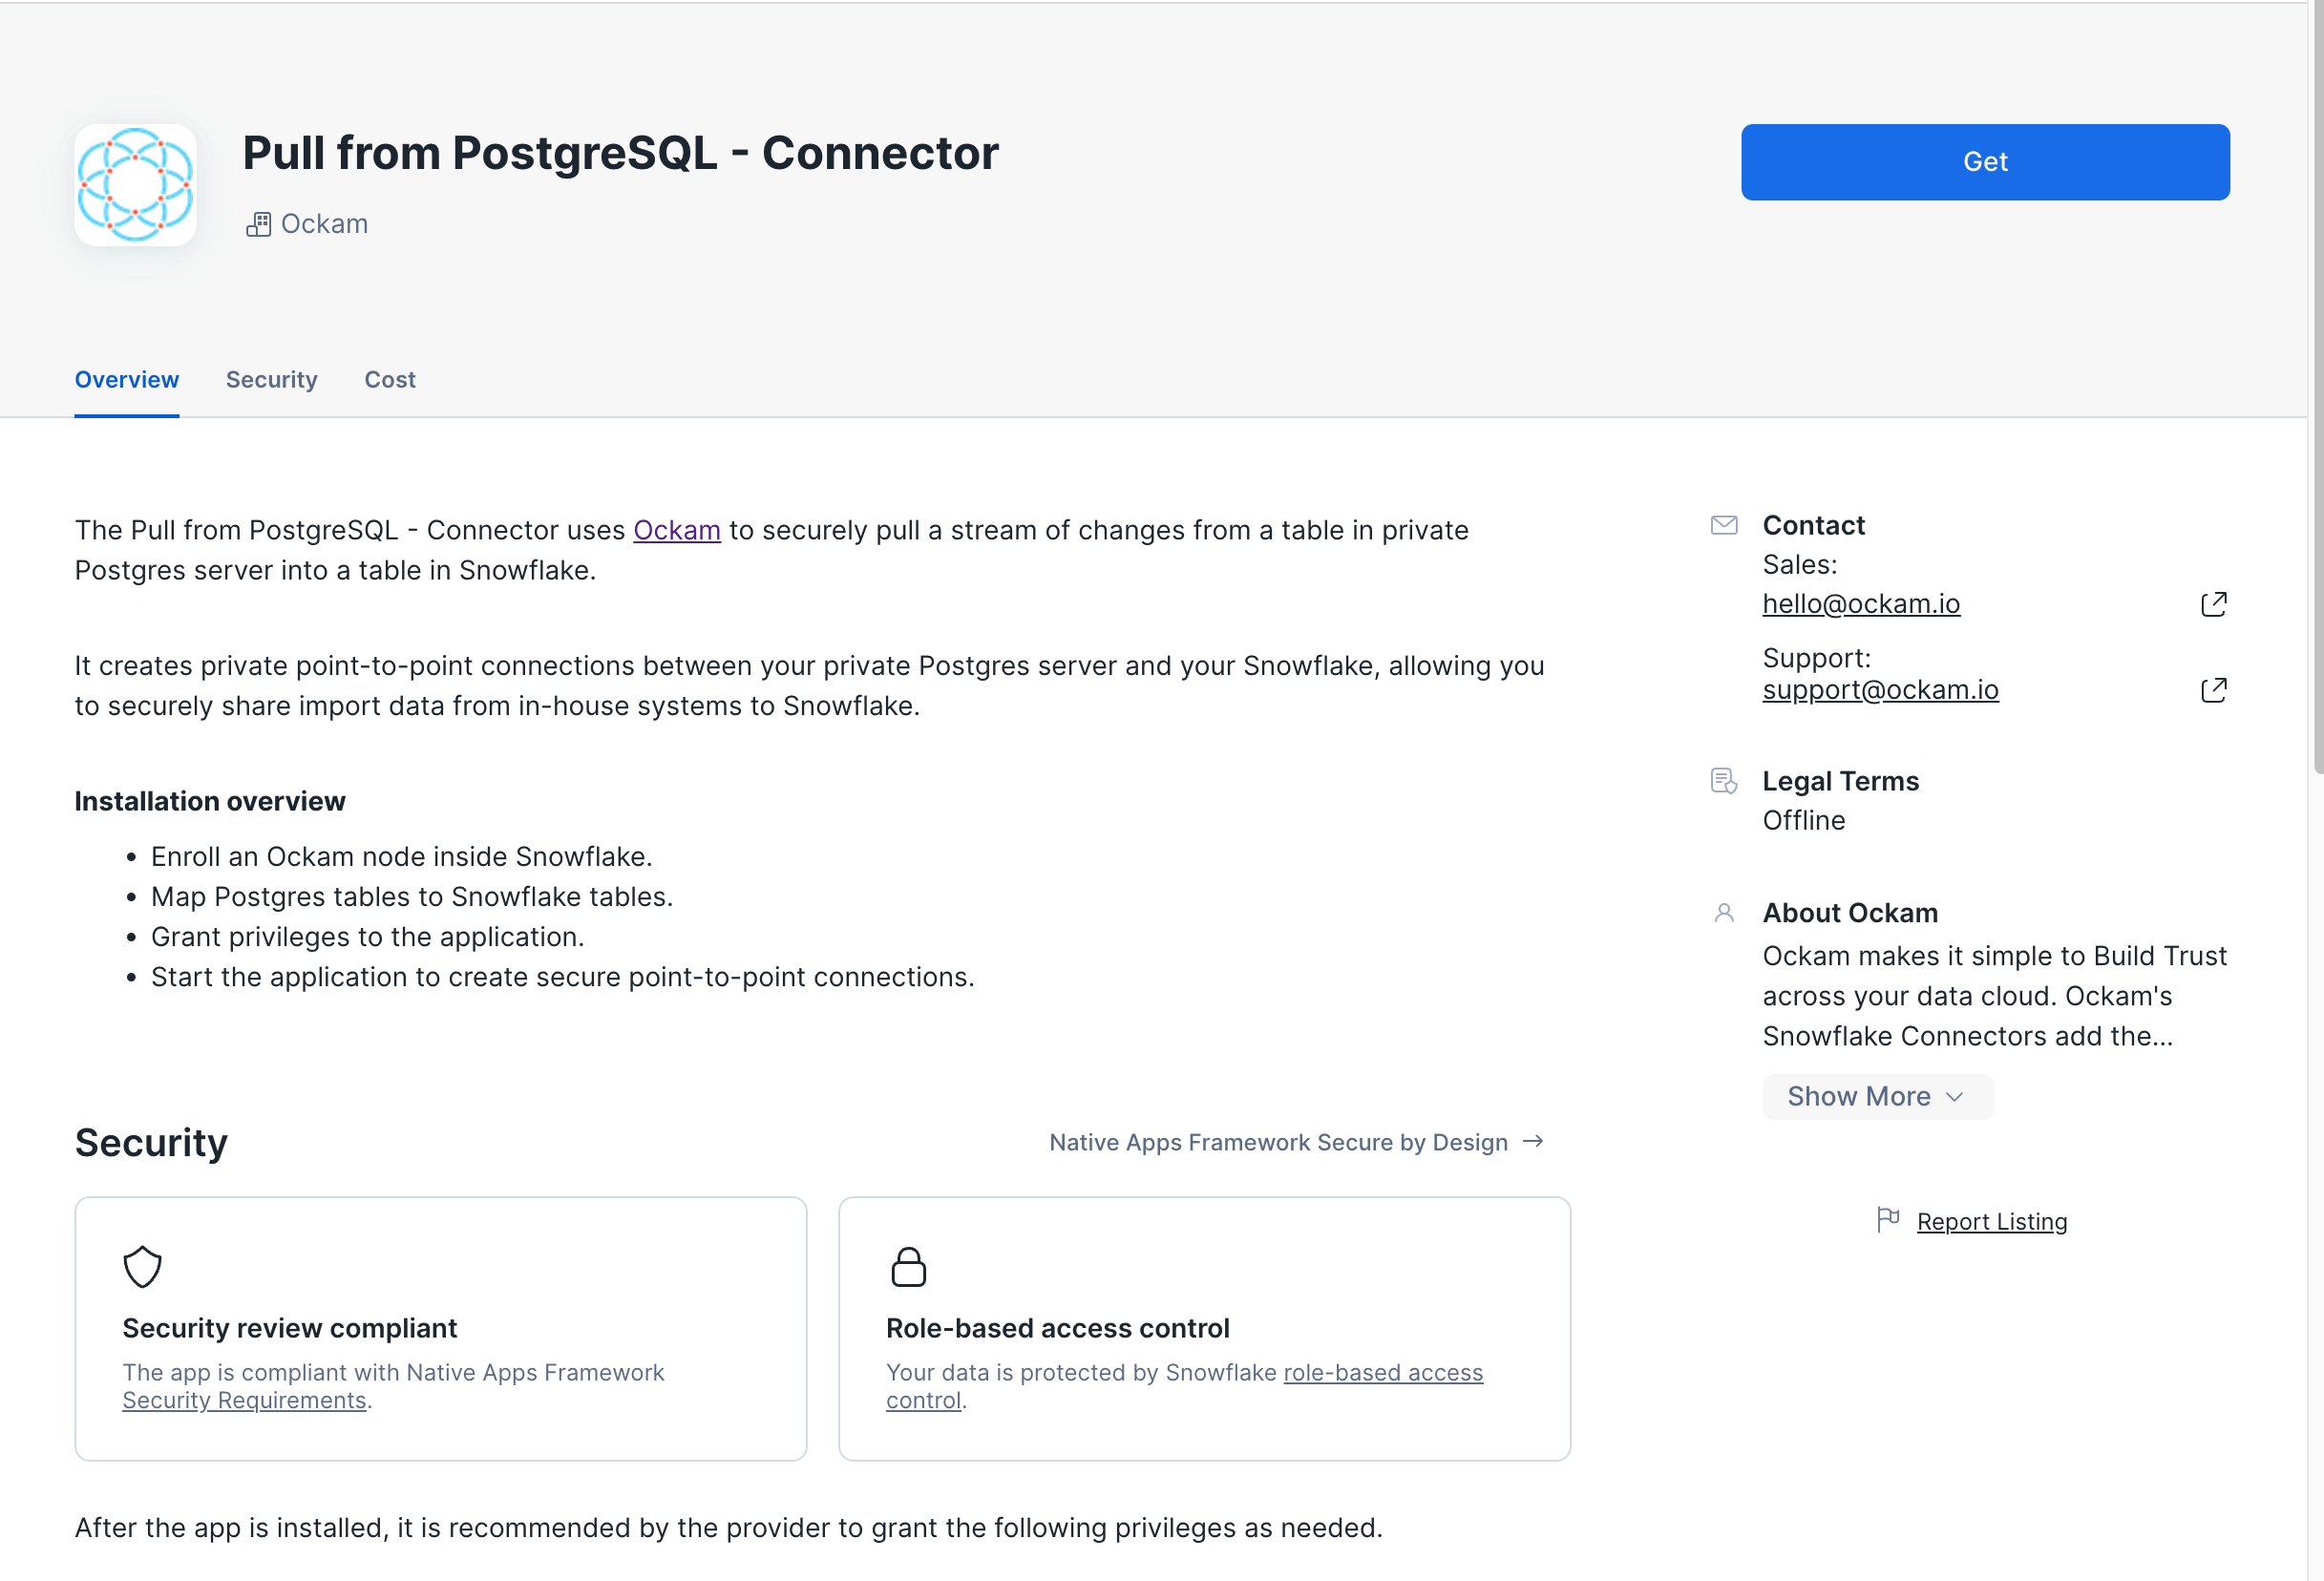
The Snowflake stage data with WebDAV Connector by Ockam is available in the Snowflake Marketplace.
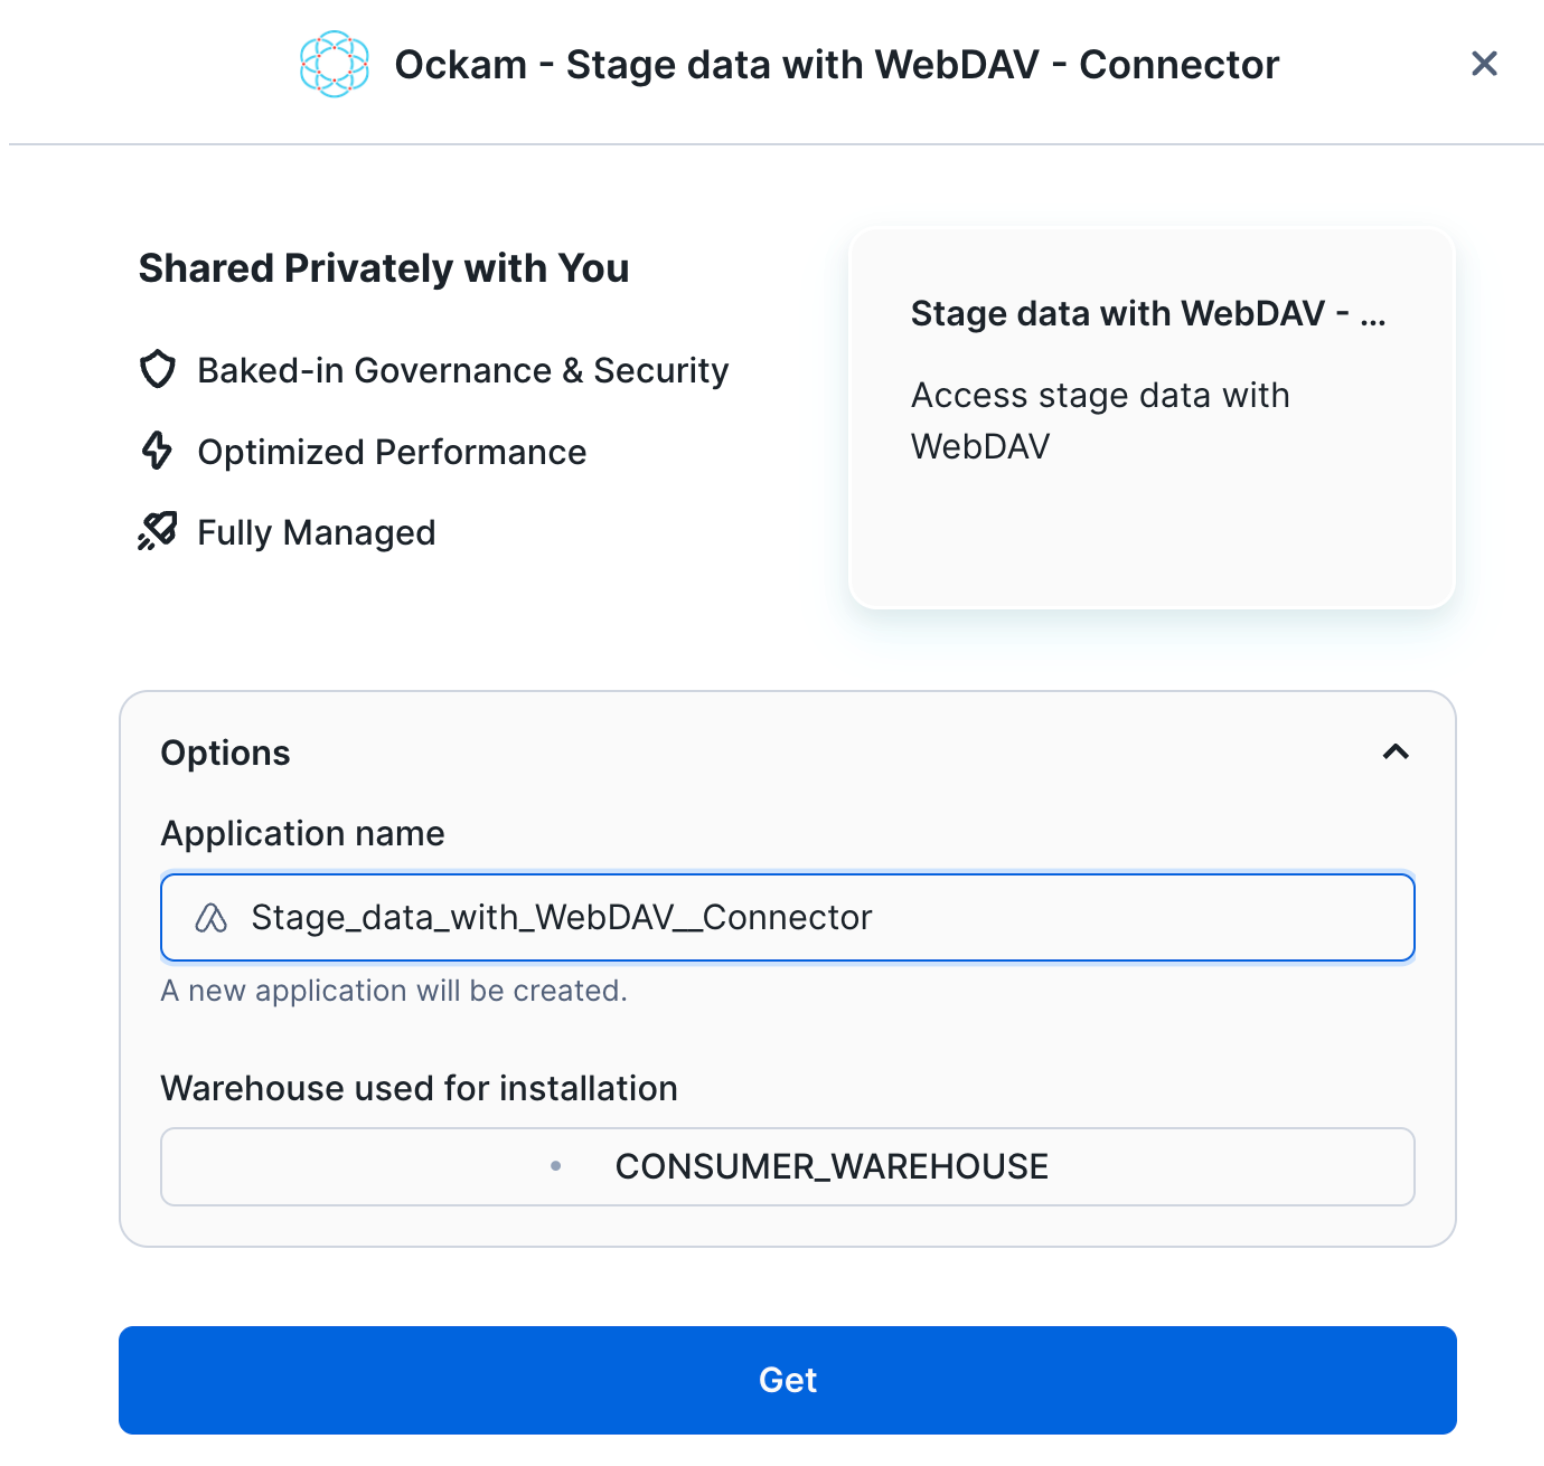
Select a warehouse
The first screen you're presented with will ask you to select the warehouse to utilize to activate the app and can choose to change the application name.
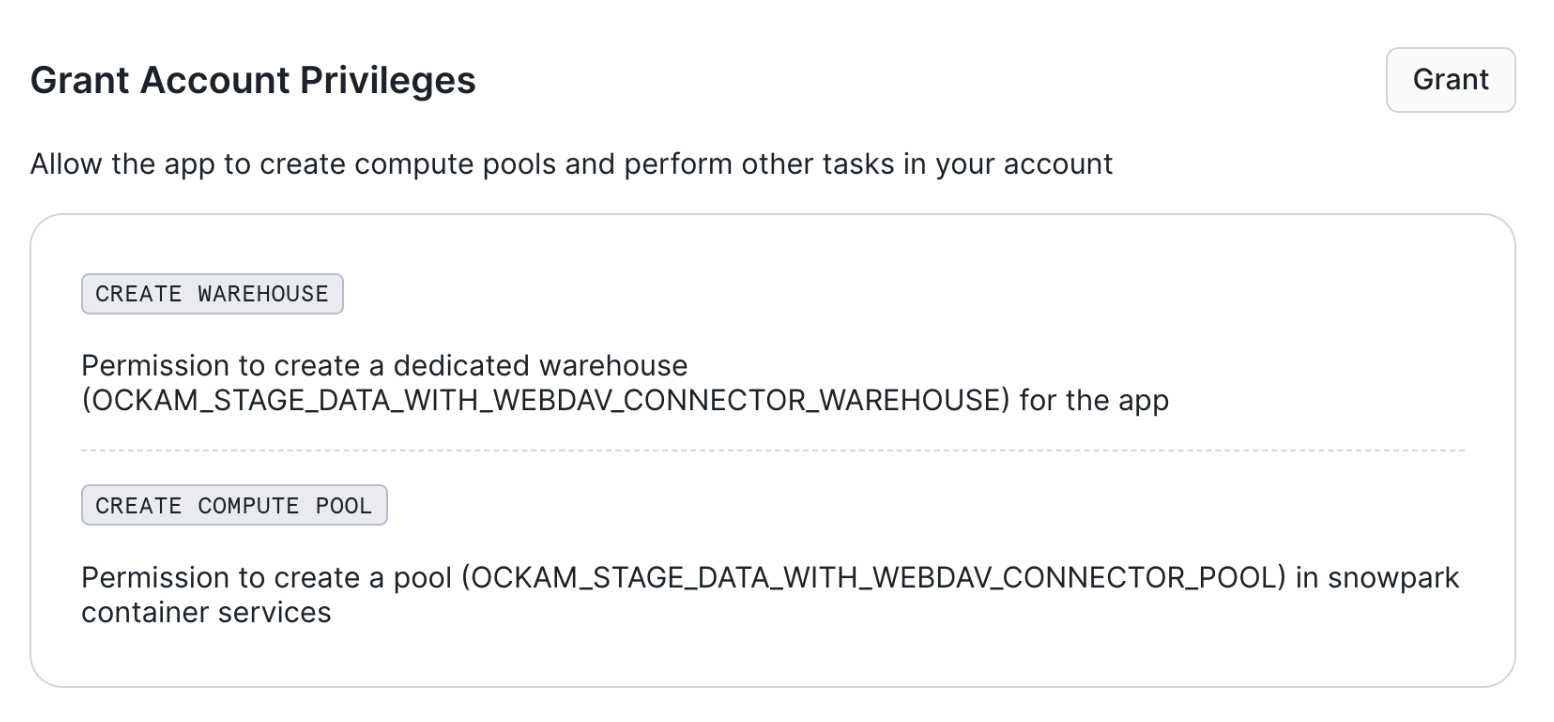
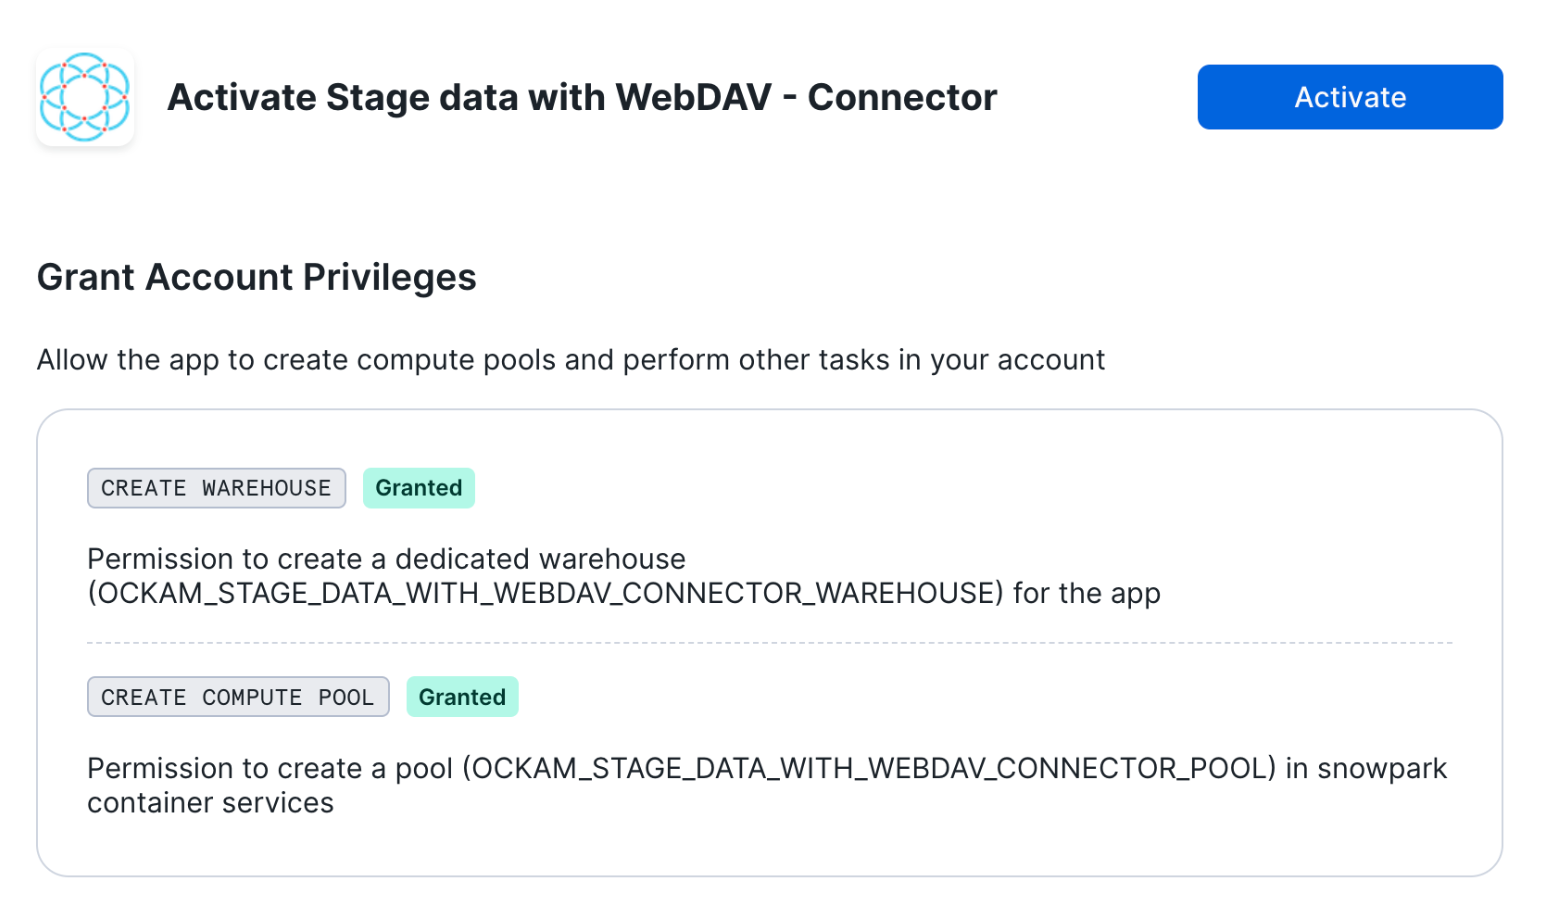
Grant account privileges
Click the Grant button to the right of this screen. The app will then be
automatically granted permissions to create a warehouse and create a compute
pool.
Activate app
Once the permissions grants complete, an Activate button will appear. Click
it and the activation process will begin.
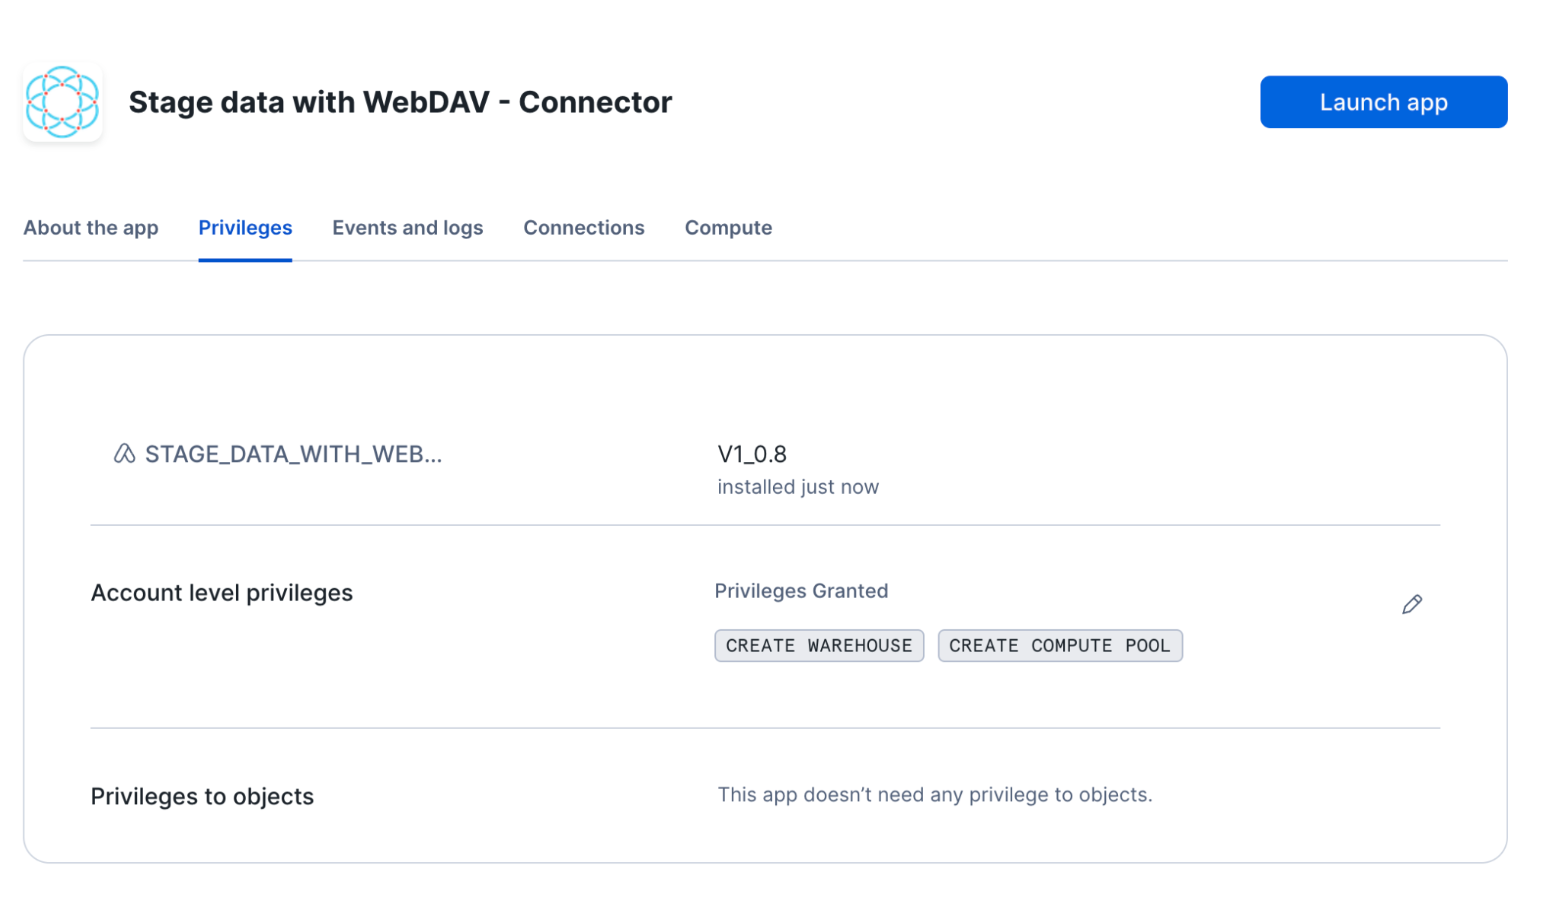
Launch app
After the app activates you'll see a page that summarizes the
privileges that the application now has. There's nothing we need
to review or update on these screens yet, so proceed by clicking the Launch app button.
Setup your administrator access
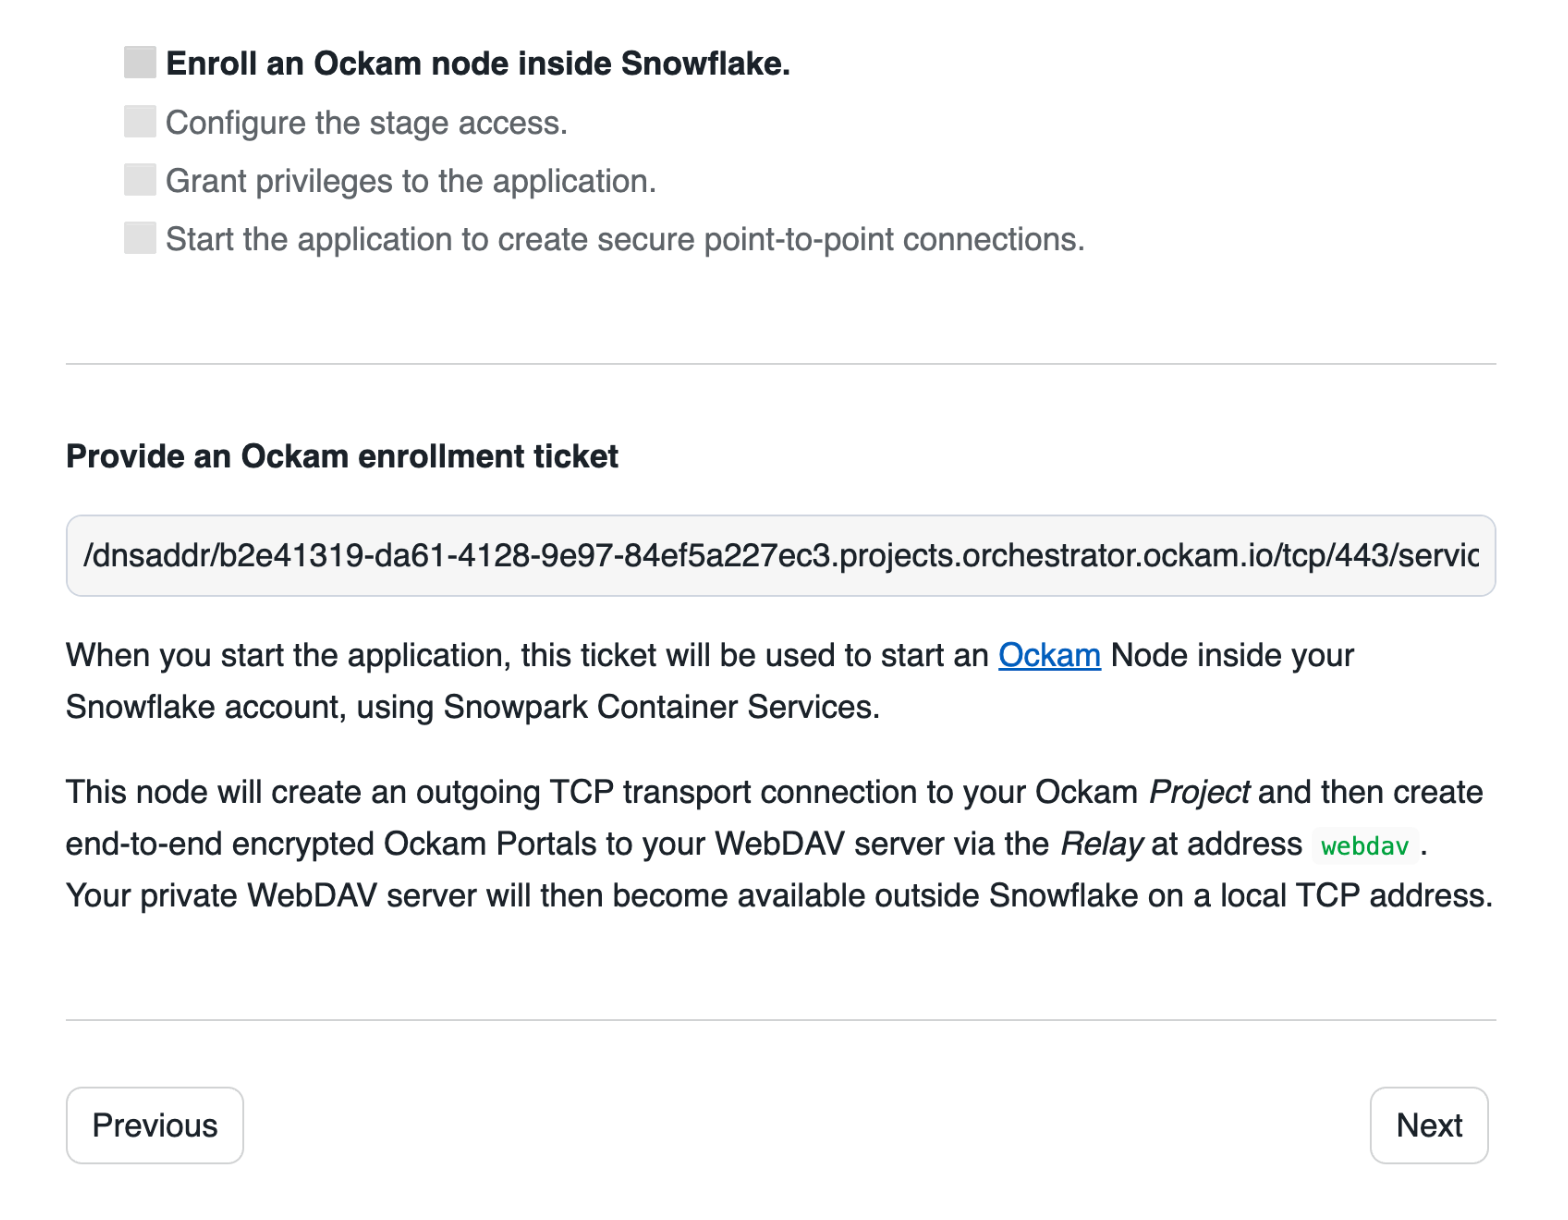
We are now going to configure the application. We first need to:
- Create an Ockam project and issue an enrollment ticket
- Configure the user name and password which will be used to access the server.
Configuring the Snowflake app
Configure connection details
Click "Get started" to open the Snowflake setup screen.
Take the contents of the file webdav.ticket that we just created and paste
it into "Provide the above Enrollment Ticket" form field in the "Configure app"
setup screen in Snowflake.
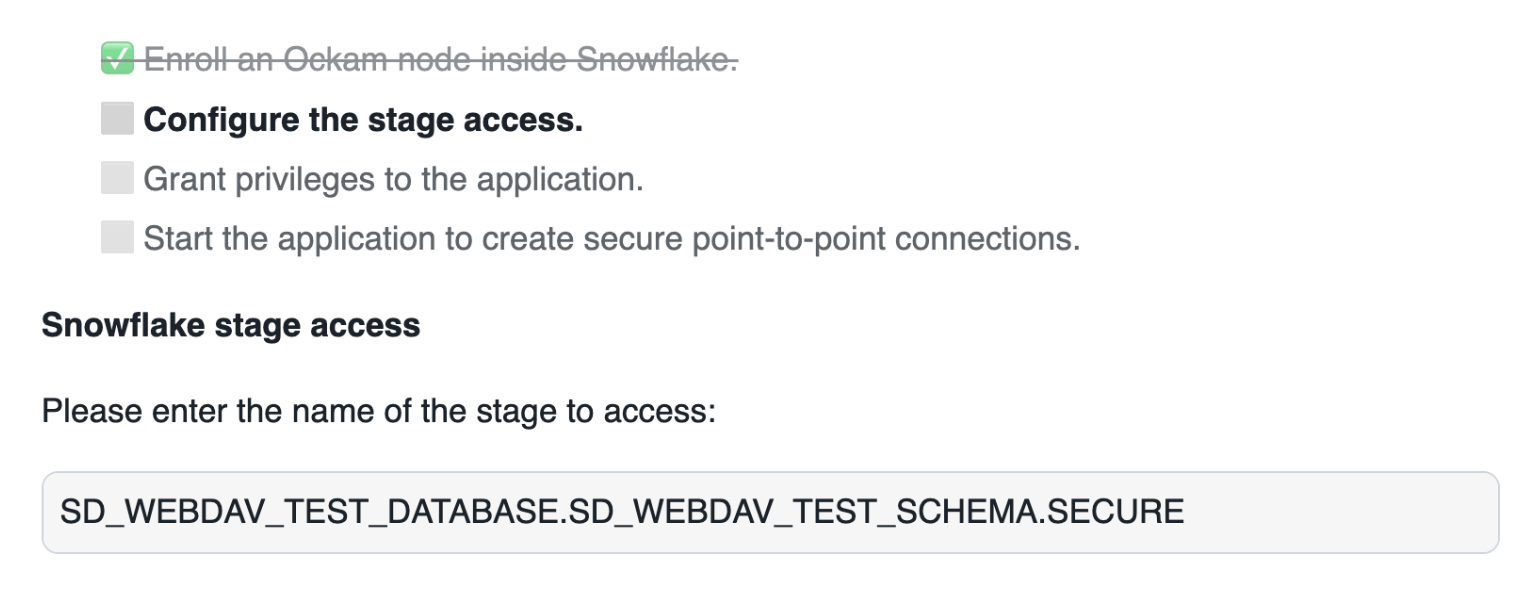
Configure the stage access
In this screen, we need to enter:
- The full name of the stage we want to access:
WEBDAV_TEST_DATABASE.WEBDAV_TEST_SCHEMA.SECURE.
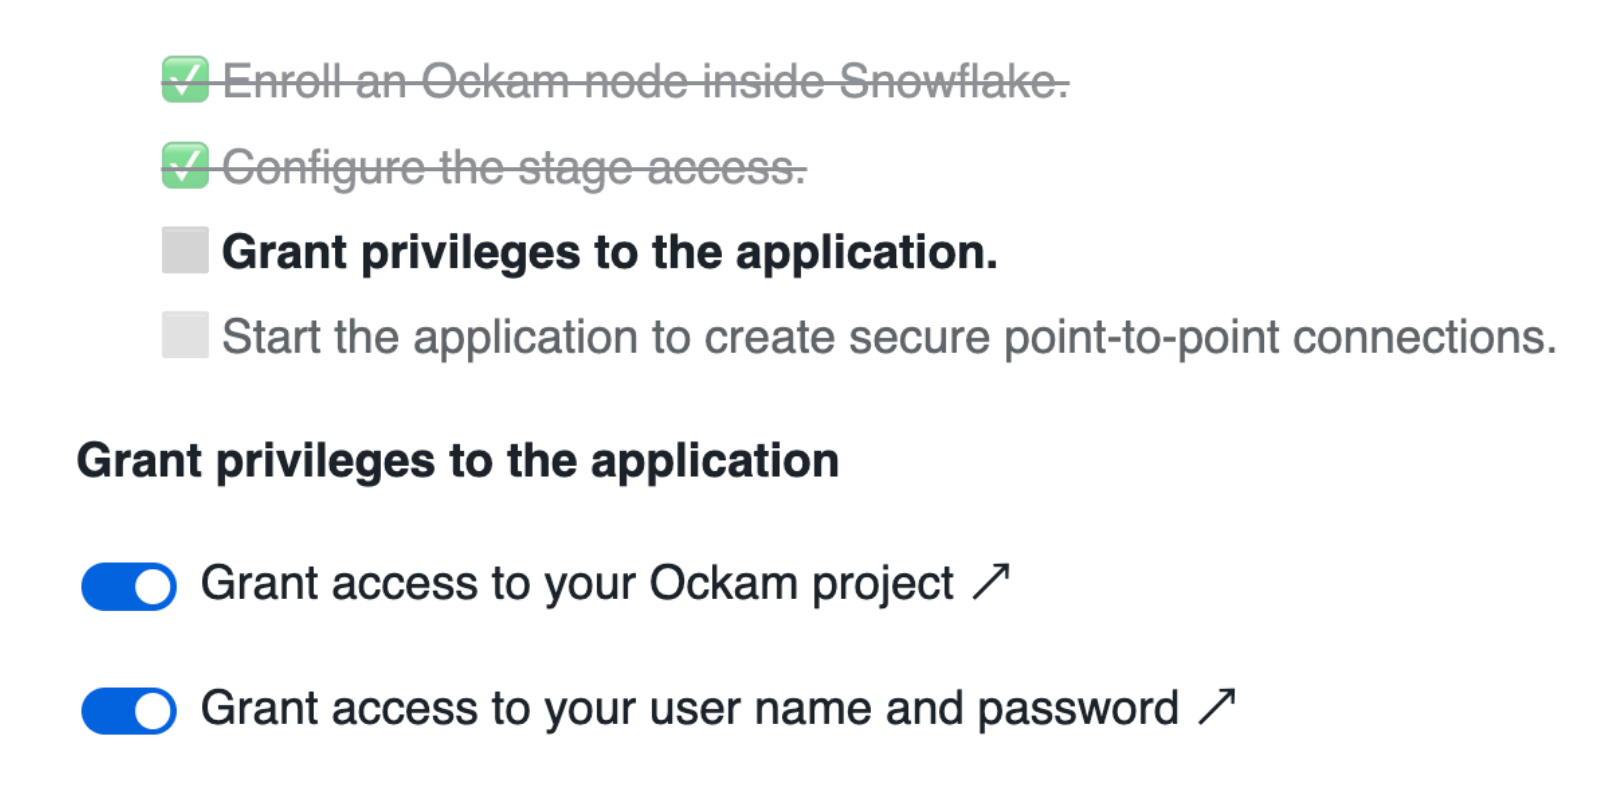
Grant privileges
To be able to authenticate with Ockam Orchestrator and then discover the route to our outlet, the Snowflake app needs to allow outbound connections to your Ockam project.
Toggle the Grant access to egress and reach your Project button and approve the connection by
pressing Connect.
Toggle the Grant access to your user button, enter user for the user name and password for the user password.
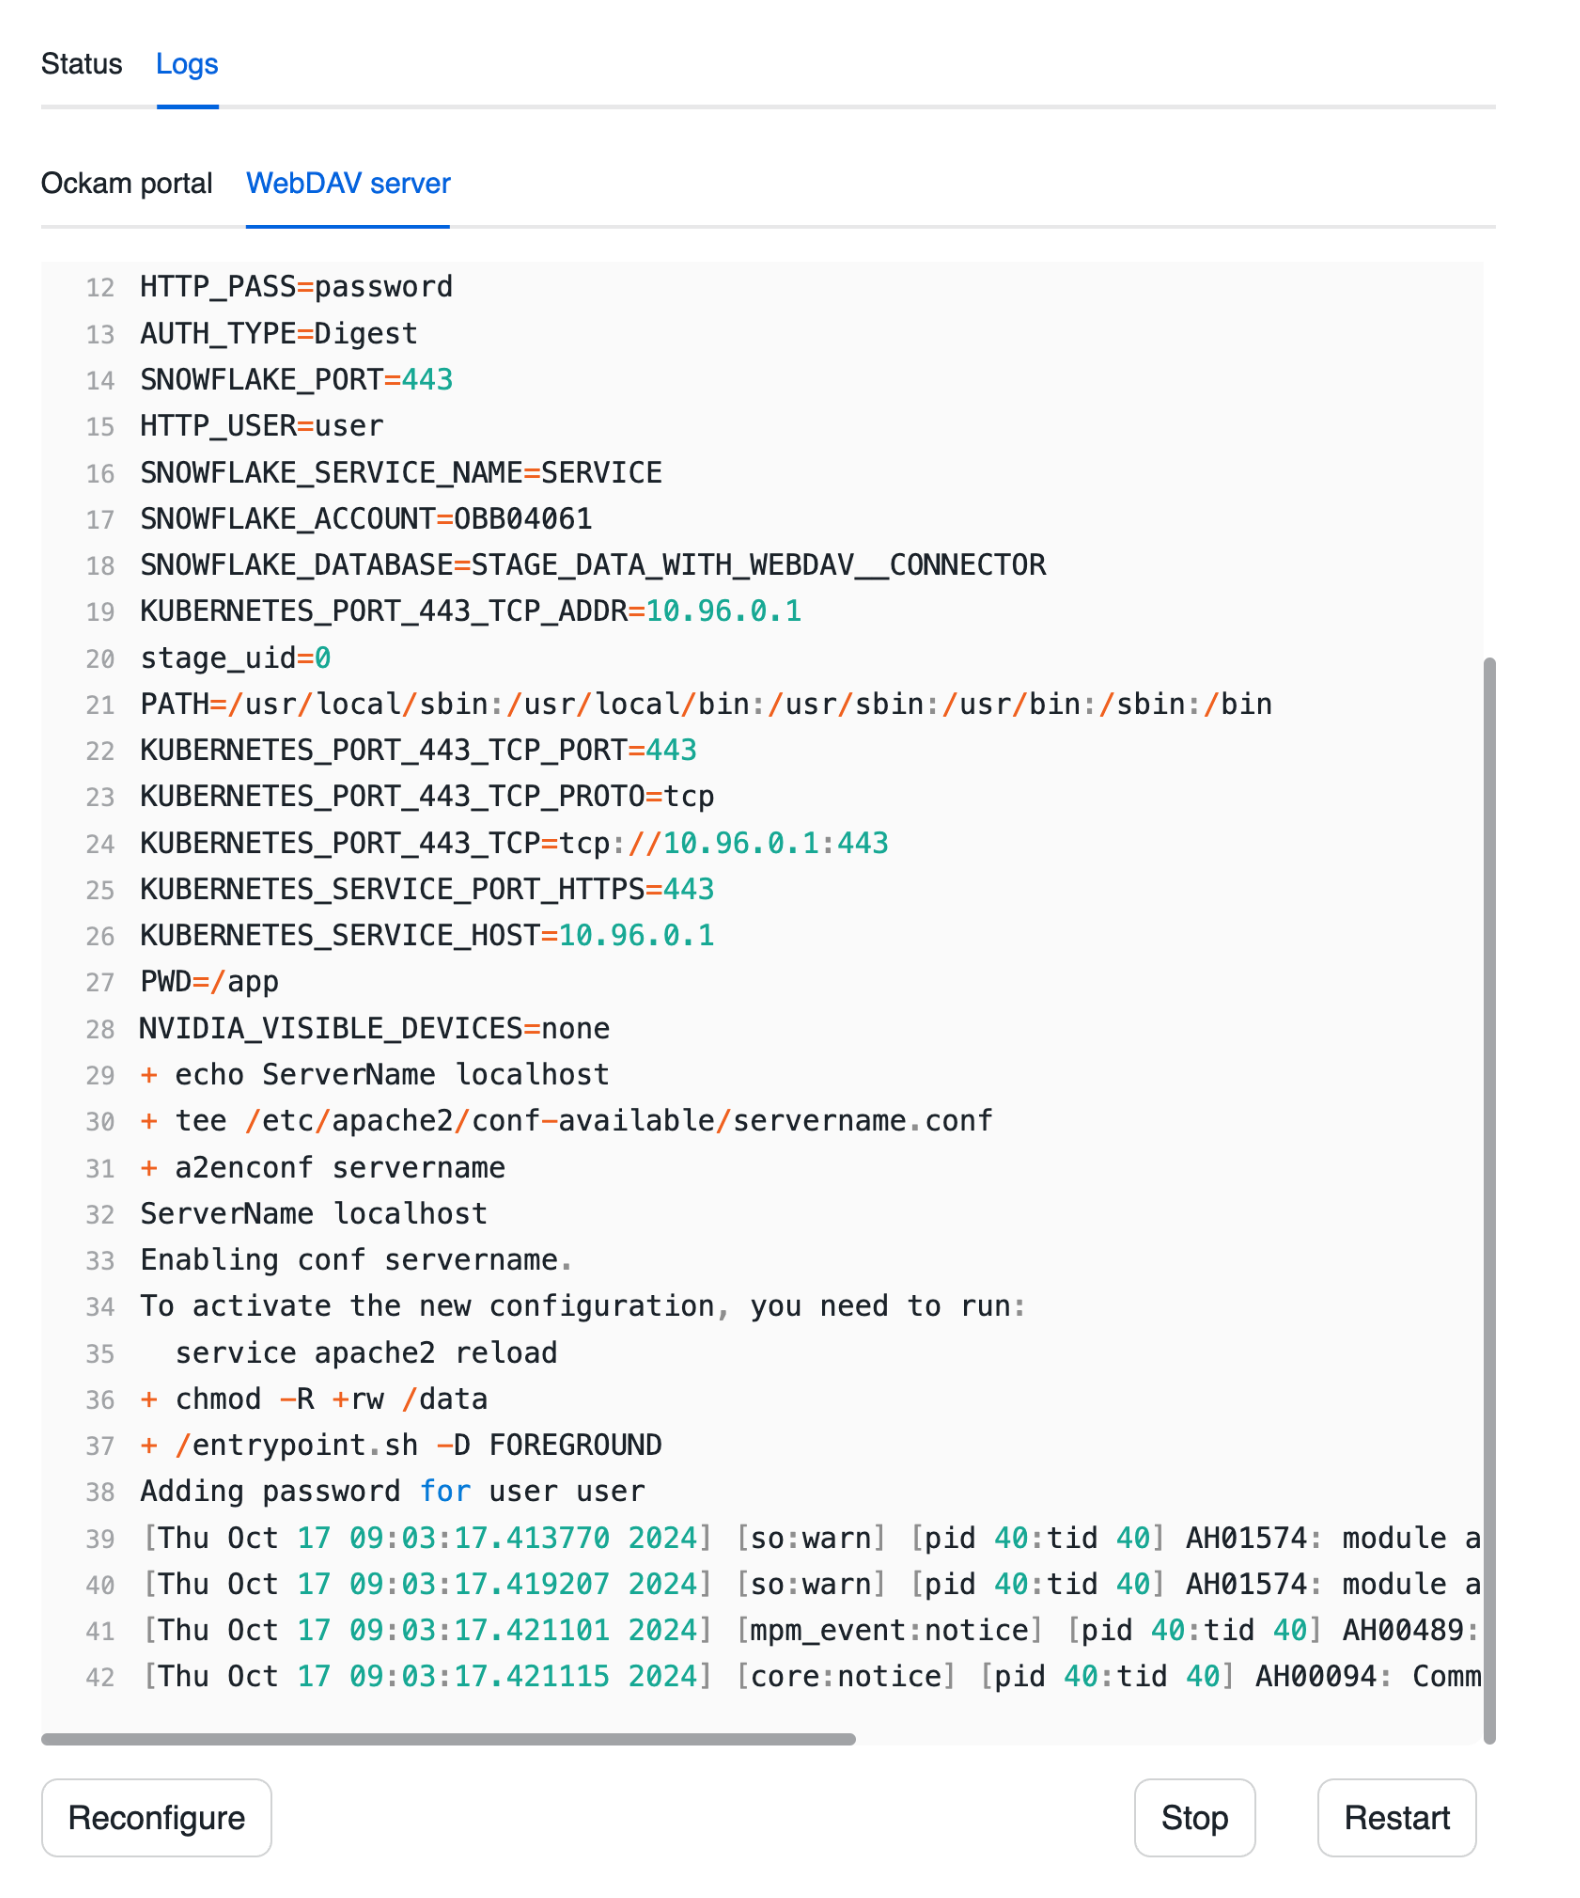
Start the WebDAV server
Press "Next" and wait for the WebDAV server to start. Once started, you should be able to see the WebDAV server logs.
You can also notice a tab containing the logs for an Ockam node. That Ockam node is a portal outlet which:
- Created a relay named
webdavin the Ockam project. - Declares that only clients with the attribute
webdav-clientcan access the relay.
Connect the WebDAV client
Accessing the stage
Mounting as a filesystem (macOS)
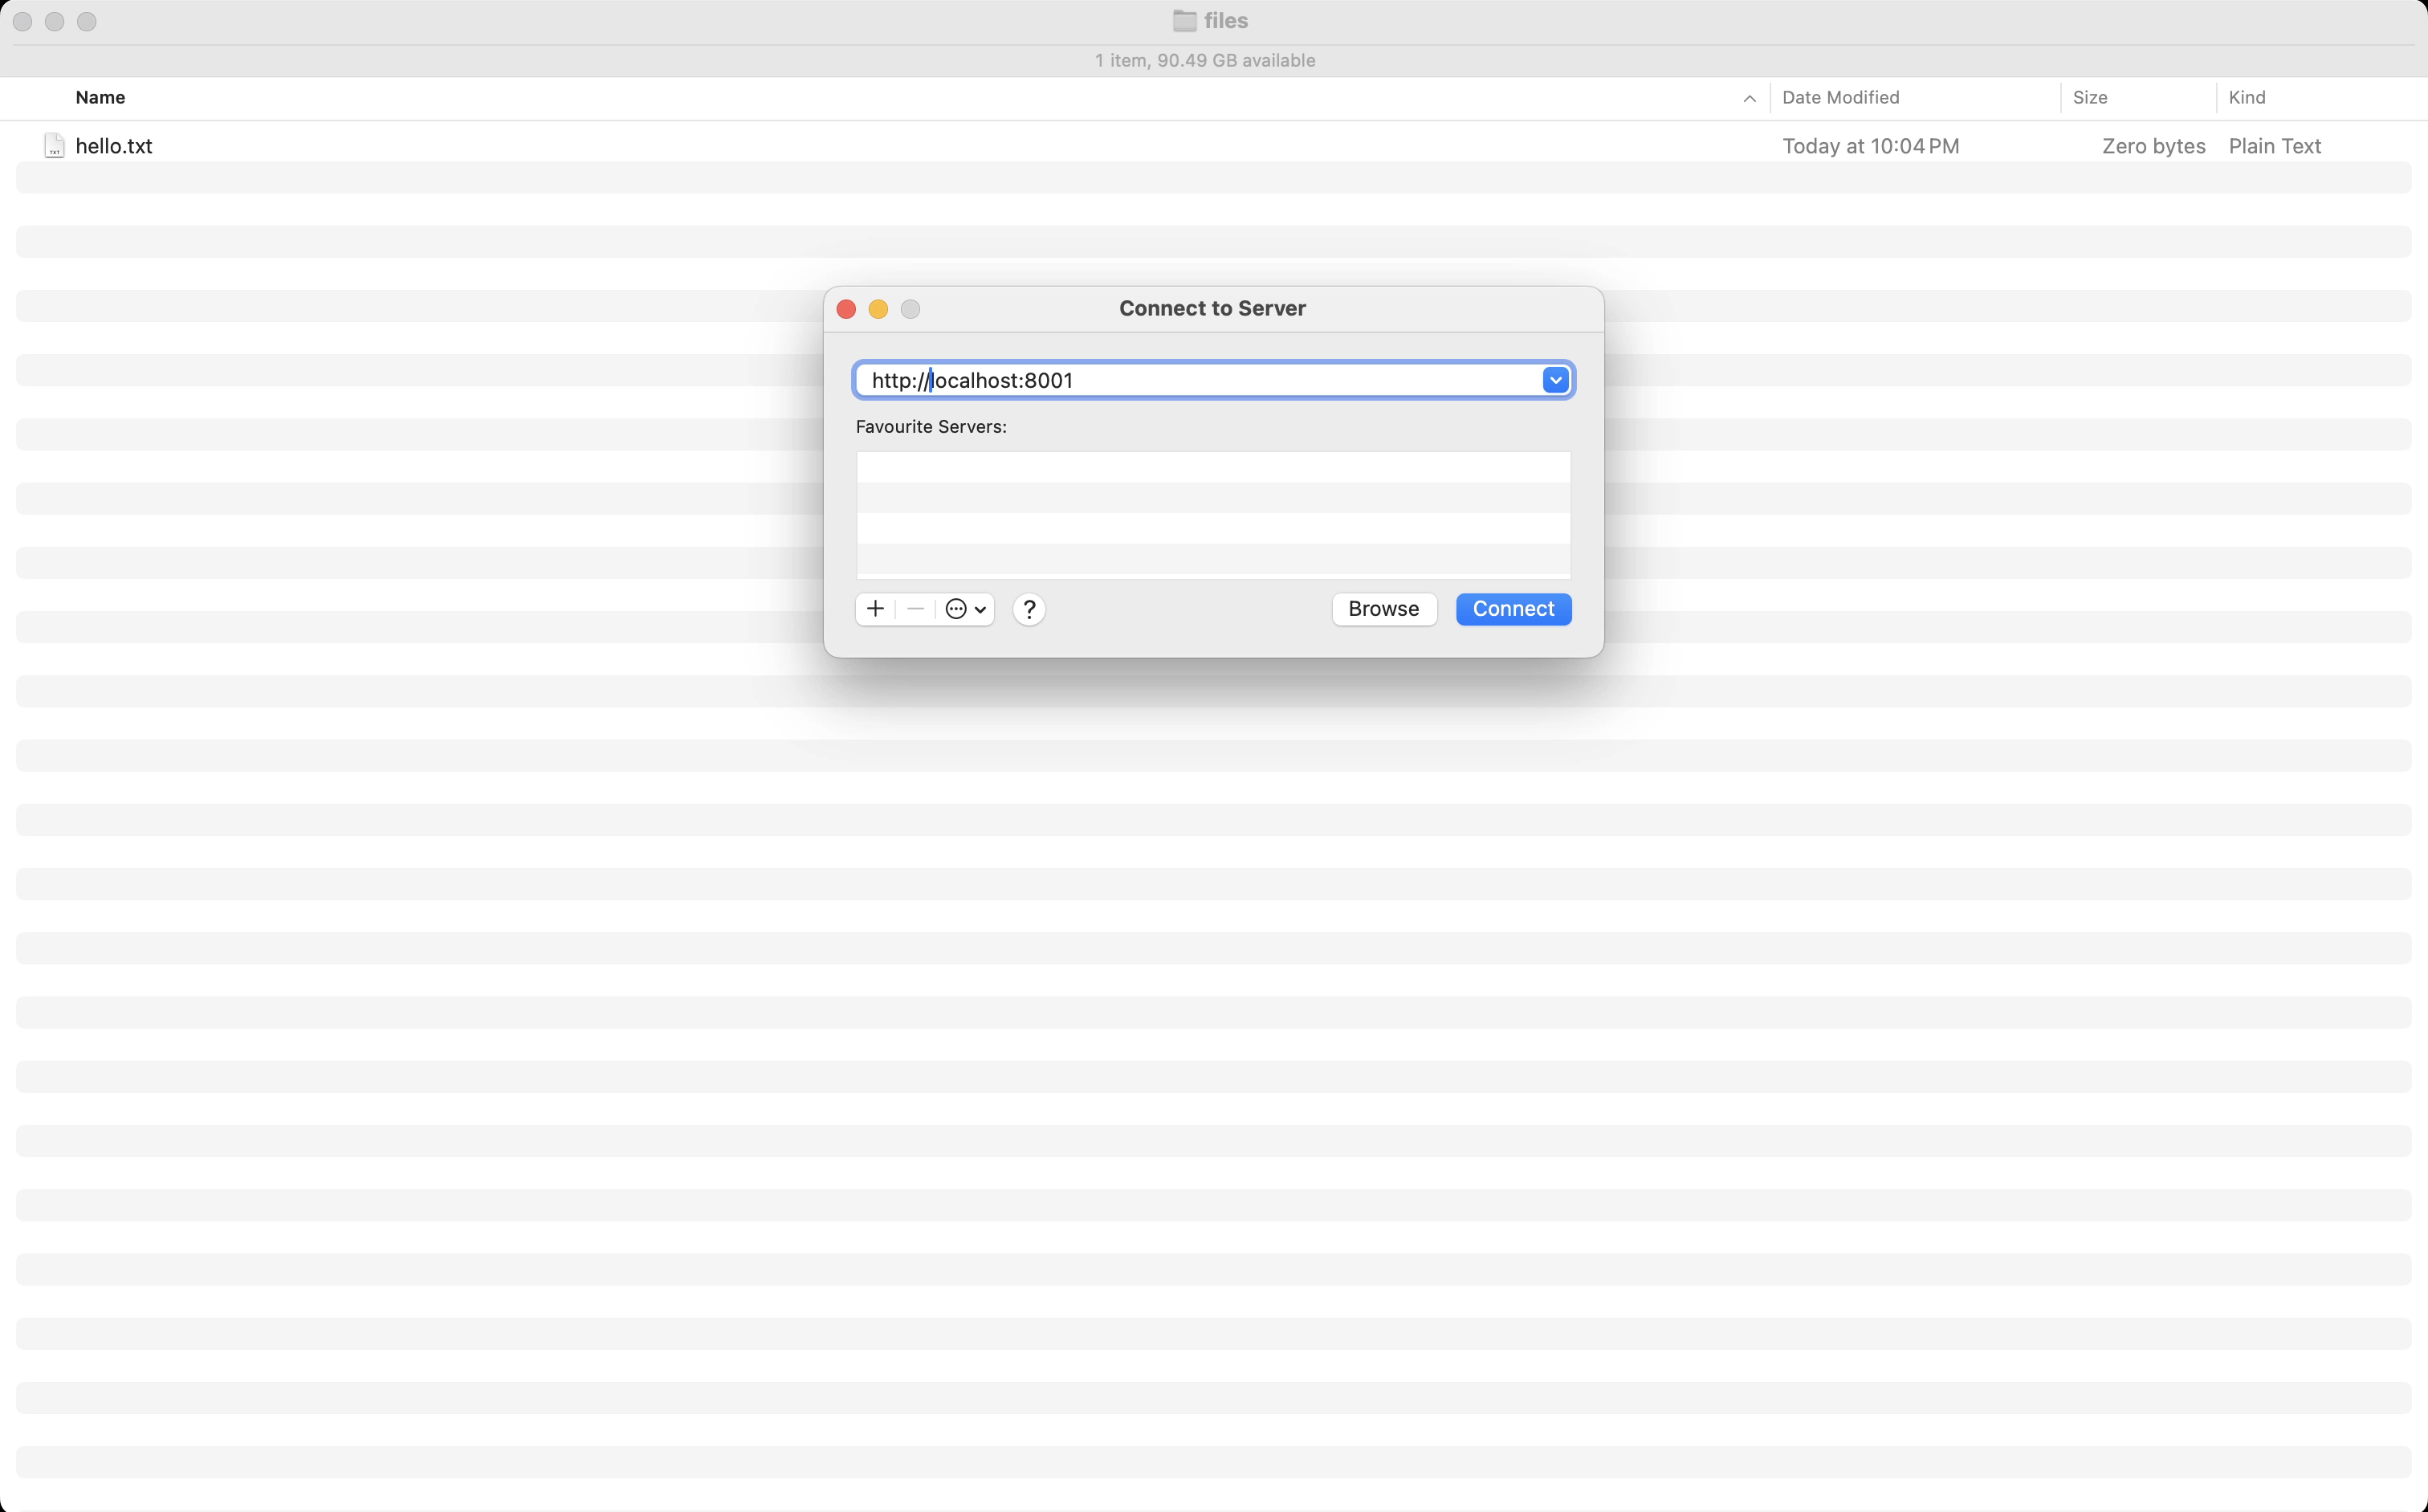
This is where things get very cool, because we've got all the pieces in place to add our Snowflake Stage as though it's another drive/filesystem on our local workstation. I'm going to walk through how to do that on a Mac, but if you're on Windows you can follow these instructions and supply the same values I suggest below.
To get started open Finder.app, and either use the shortcut to connect to a
server (⌘ + K) or select from the menu (Go > Connect to Server). In the
dialog box that appears enter the server address of http://localhost:8001.
You can safely ignore any warning you may get about the connection being
insecure. The Ockam portal connecting your system to your Snowflake Stage
is secure and end-to-end encrypted. The warning is because the interface
on your local machine is exposed as a http:// protocol rather than https://.
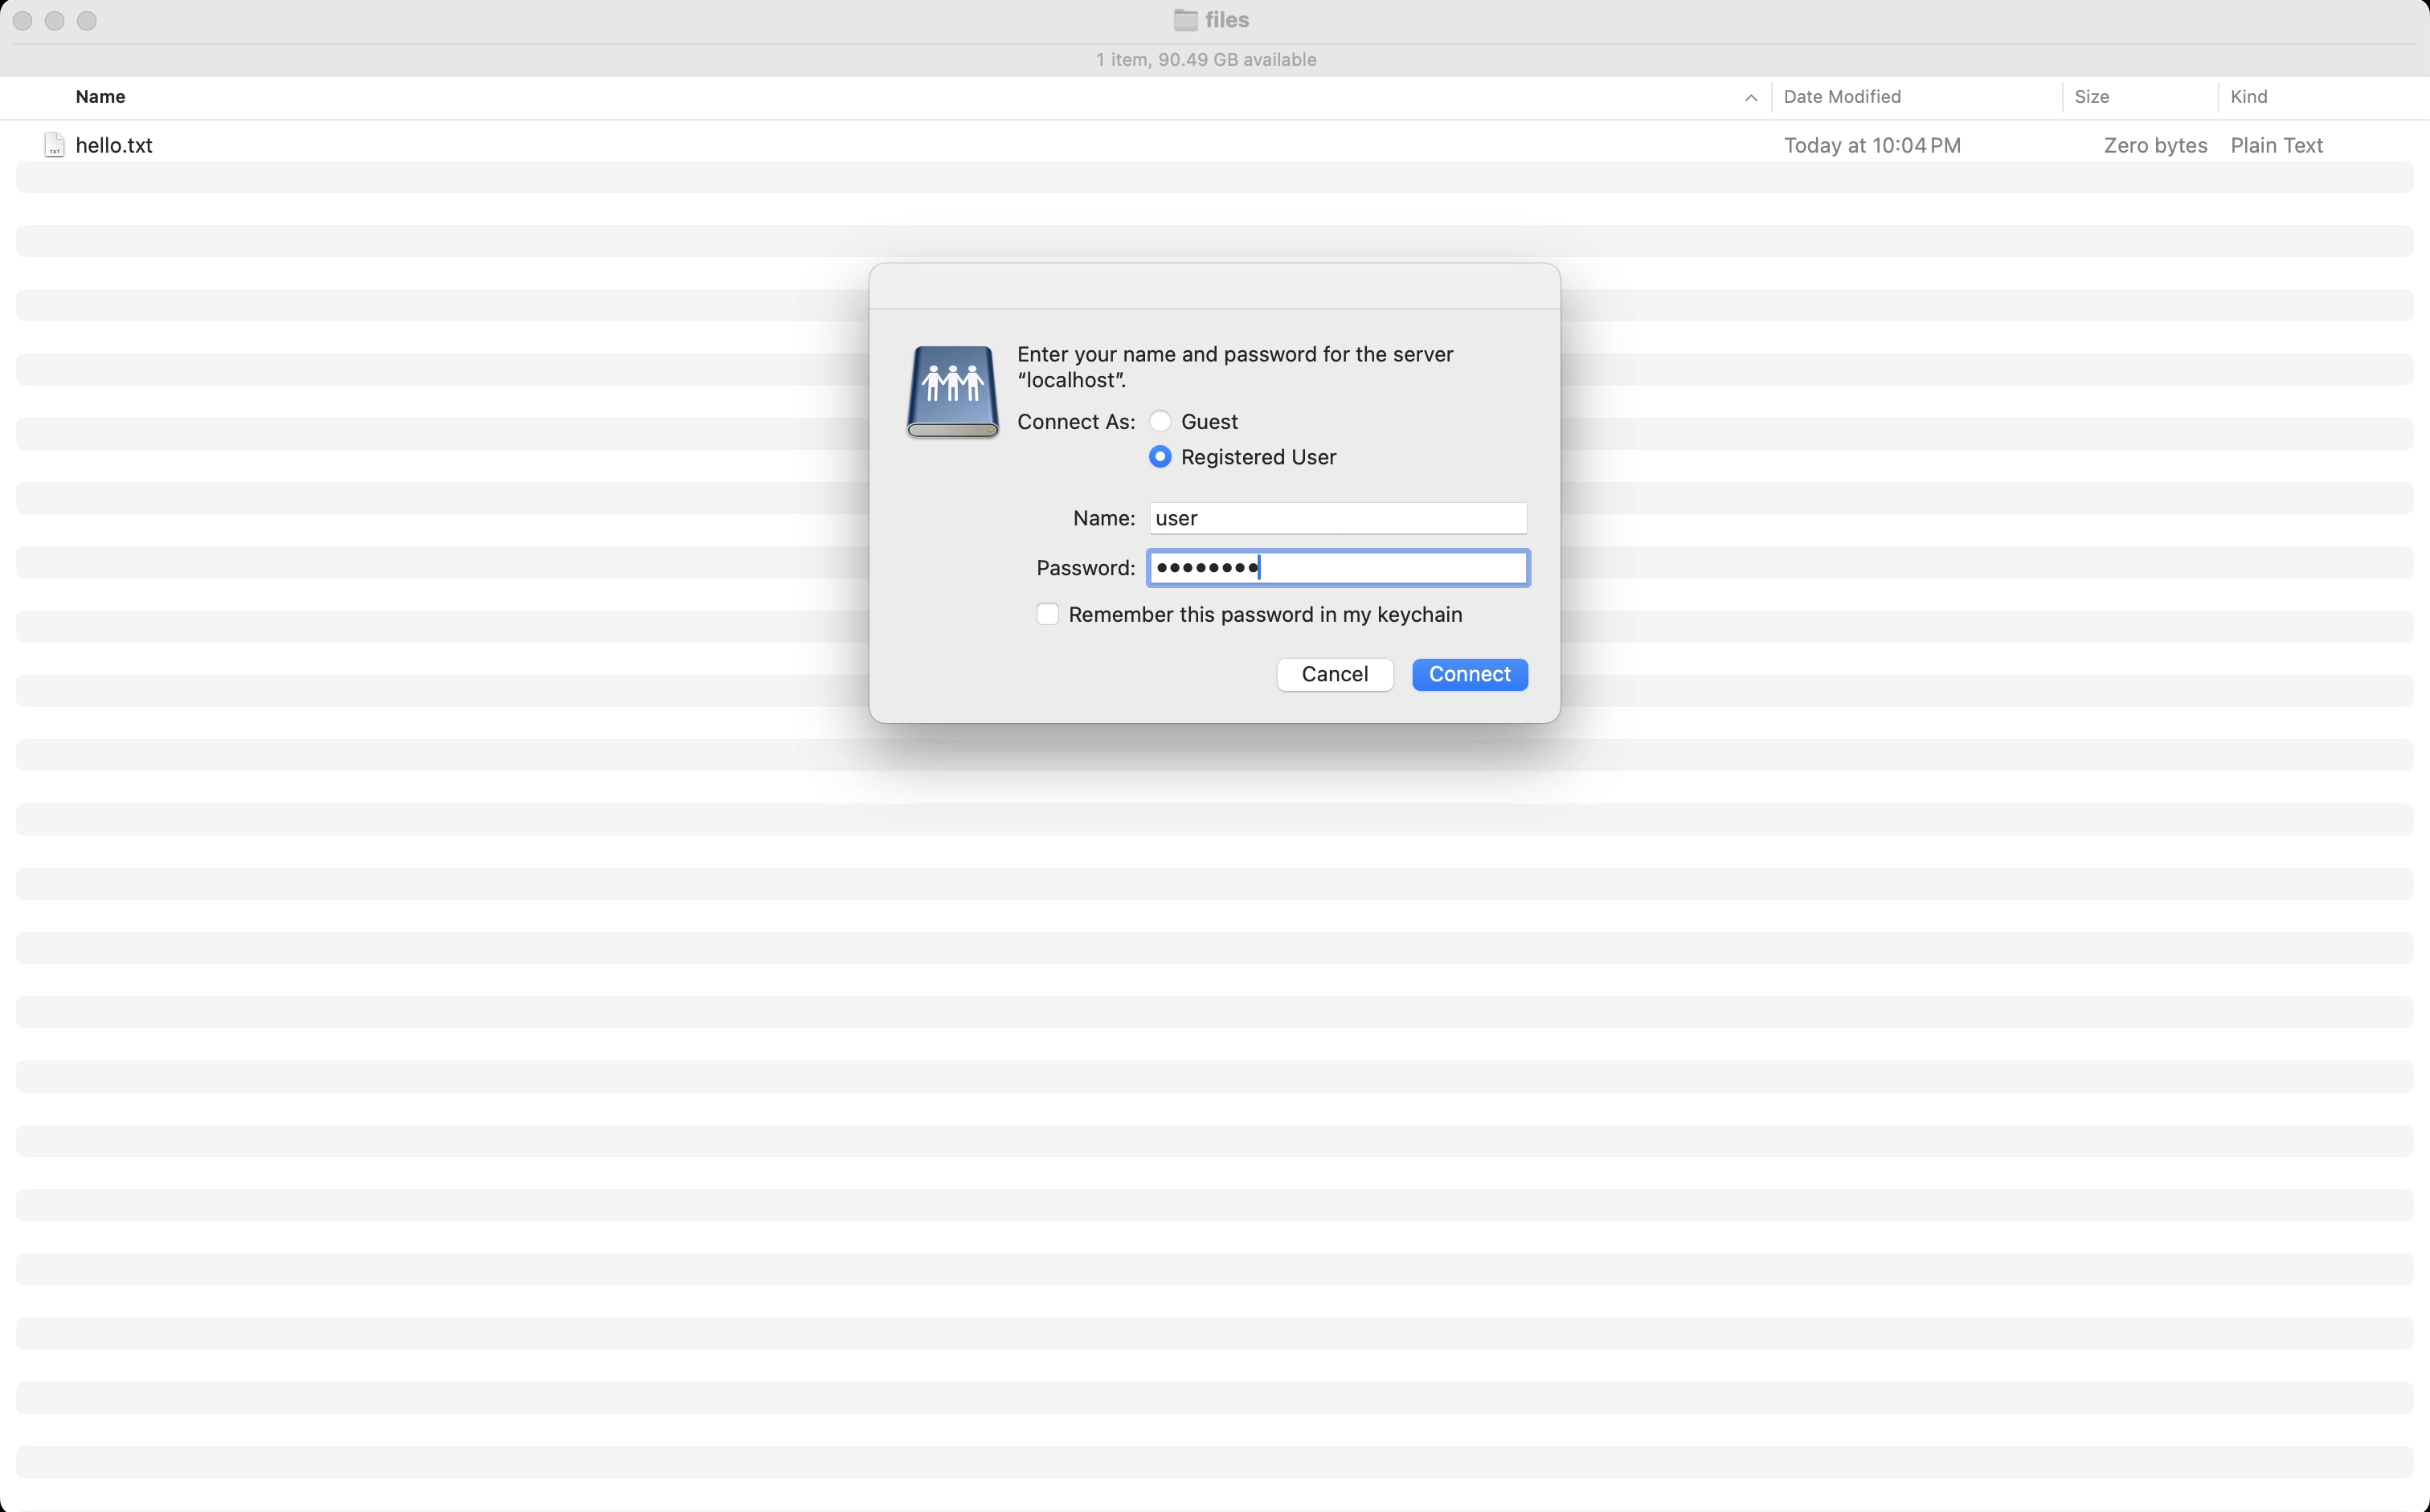
When presented with authentication screen enter in the name and password of
user and password, as we configured earlier when configuring the Snowflake
app.
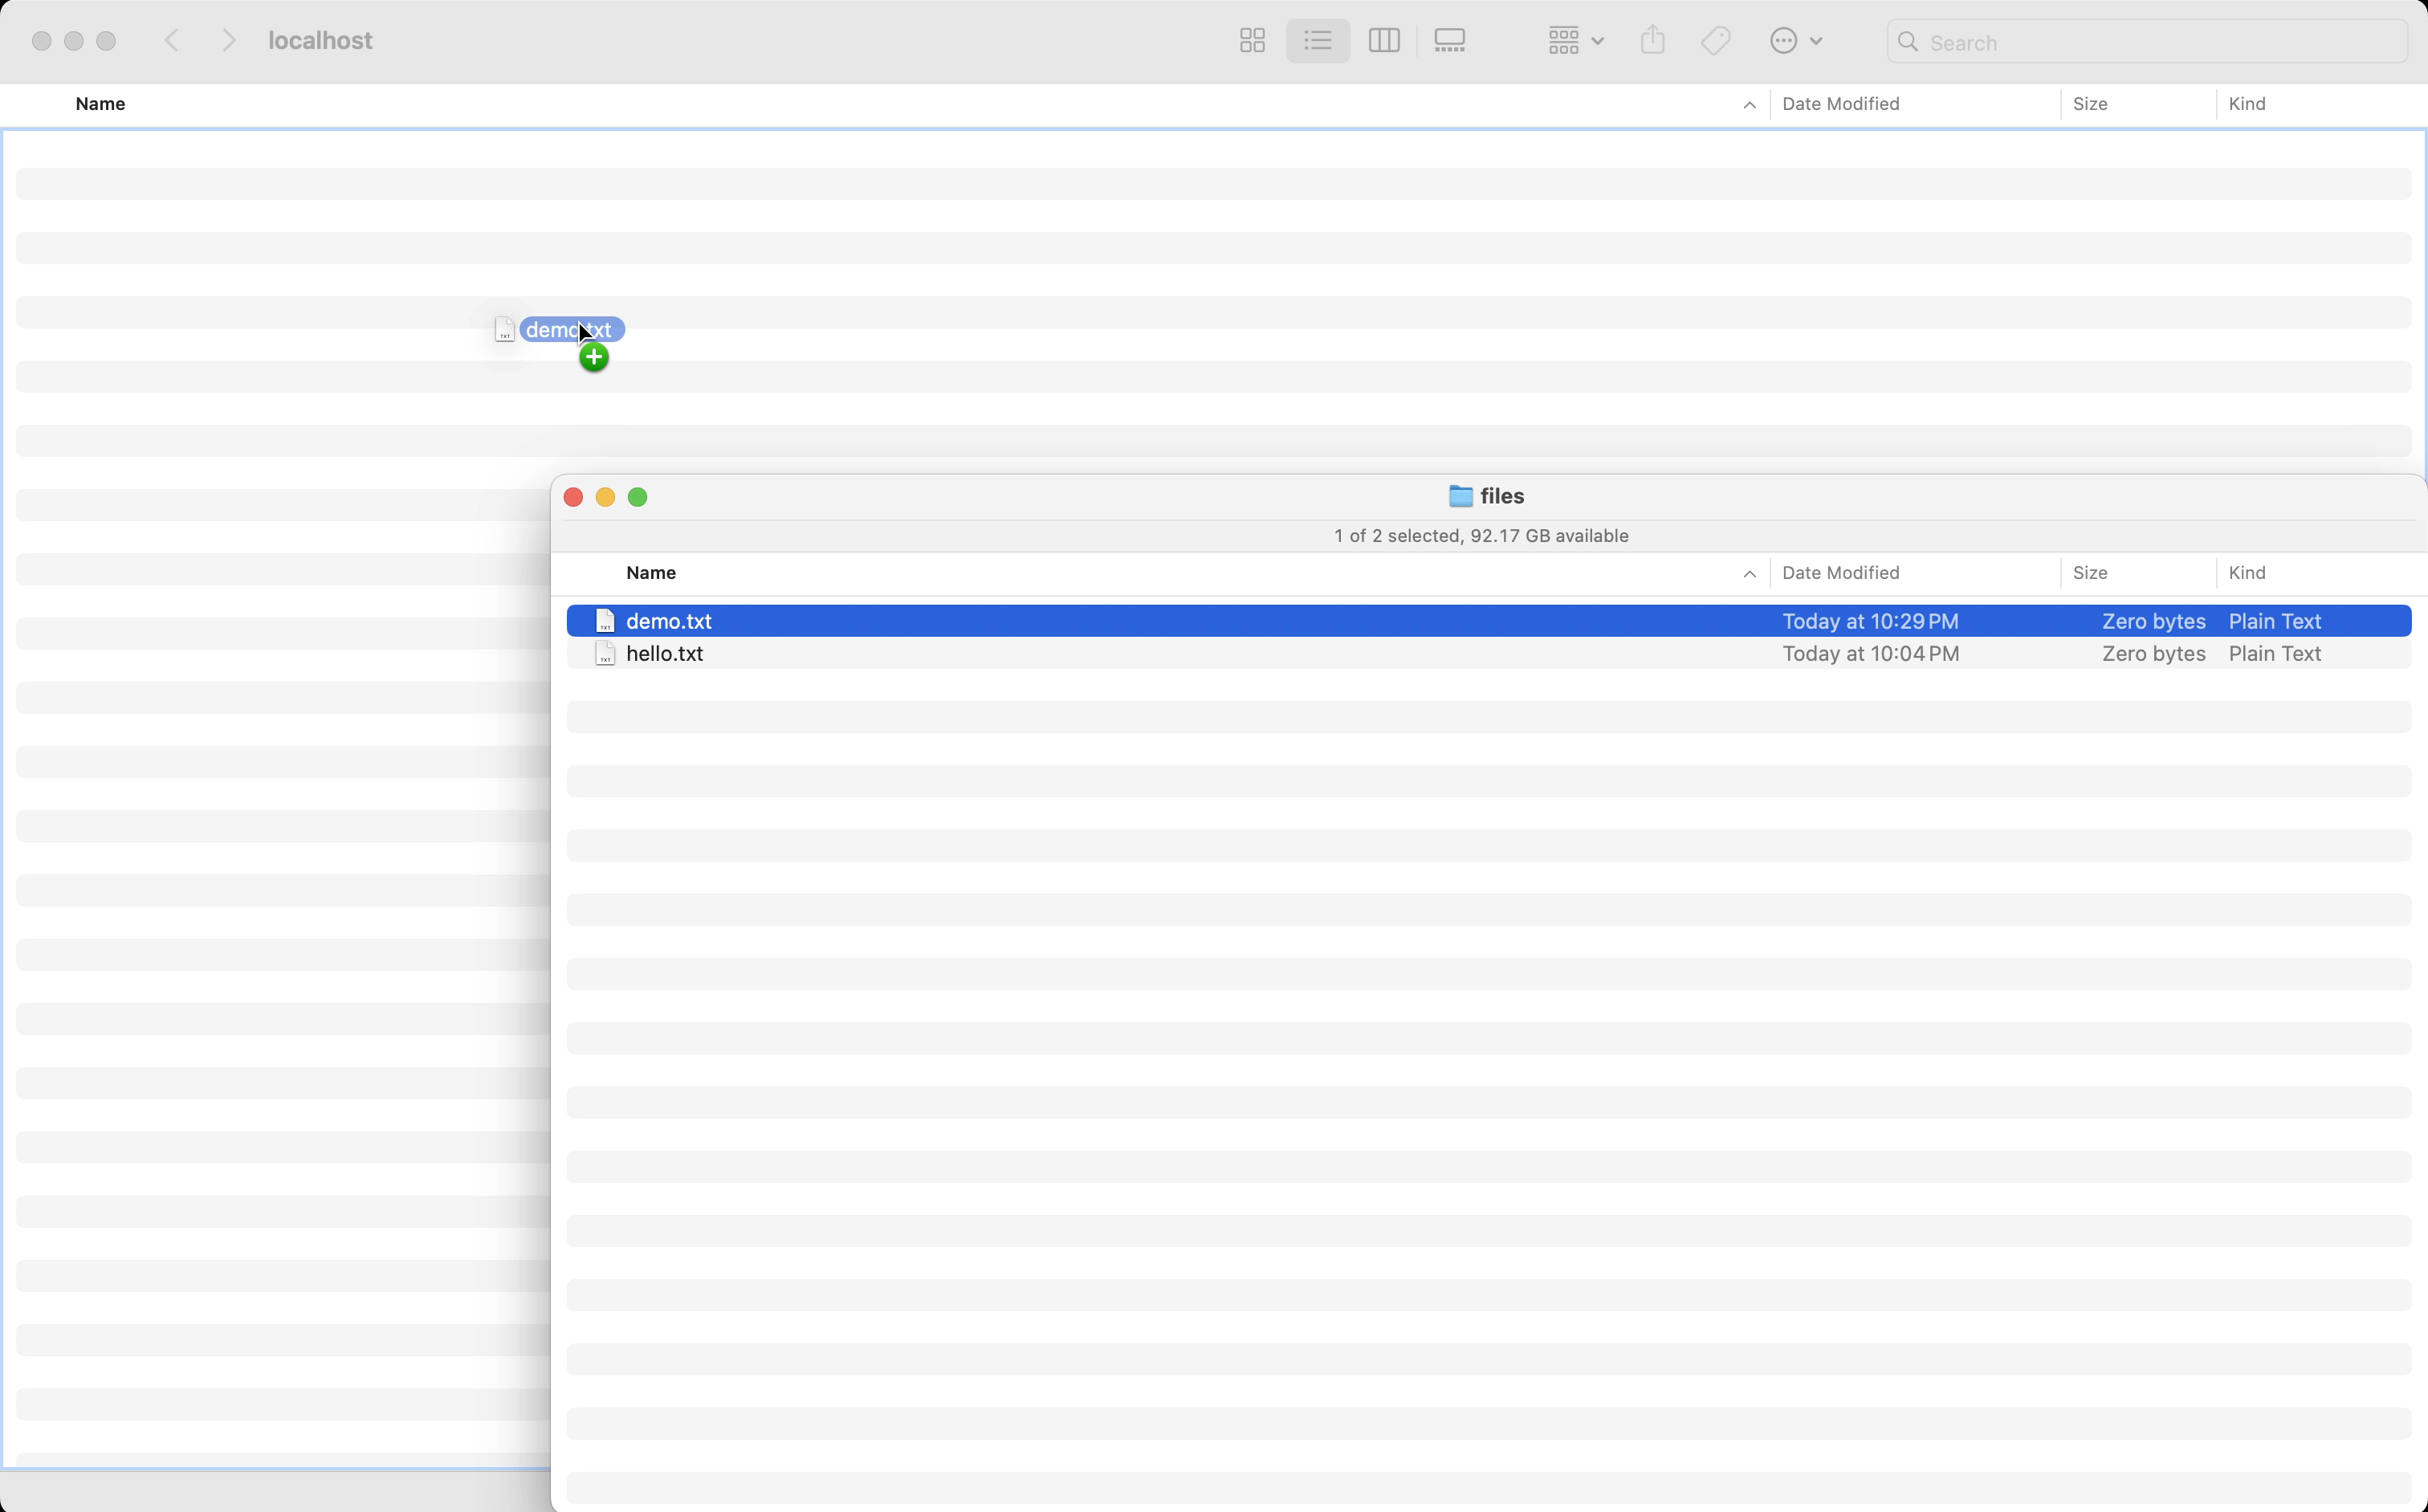
Your Snowflake Stage will now be mounted just like any other filesystem! You can drag files from other folders, delete, or rename files just like you would any other files on your system. The changes will be reflected in your Snowflake Stage immediately.
Using the API (curl)
Next steps
With a few steps we've been able to mount our Snowflake Stage as a filesystem on our local workstate. Rather than connecting via a public interface, our client has connected over a private route using a mutually authenticated and end-to-end encrypted conenction. No ports have been exposed to the internet, no firewall ingress have been changed to allow access in, and yet we have two private systems now able to securely share files with each other.
To explore other capabilities that are possible with Ockam I'd suggest:
- Connecting Snowflake to any system, in any network
- Creating private point-to-point connections with any database
- Adding security as a feature in your SaaS product
Previous Article
Secure & private connections to enterprise LLMs
Next Article
Call a private API from Snowflake